> ## Documentation Index
> Fetch the complete documentation index at: https://magicads.mintlify.site/llms.txt
> Use this file to discover all available pages before exploring further.
# Google Analytics Integration
> Enhance your Magic Ads platform with Google Analytics to track user behavior and gain valuable insights. This guide walks you through setting up Google Analytics for your Magic Ads website.
## Introduction
Magic Ads's Google Analytics integration allows you to track and analyze user behavior on your platform. By adding Google Analytics, you can gain valuable insights into how users interact with your Magic Ads website, helping you make data-driven decisions to improve user experience and engagement.
Magic Ads supports GA for frontend and separate one for the Admin Dashboard, both have different setup mechanisms, below are configuration steps for both
## Frontend - Google Analytics Configuration
Follow these steps to connect Google Analytics with your Magic Ads platform's frontend page:
If you don’t have a Google Analytics account, [sign up here](https://analytics.google.com/).
Once logged in, click on the **Admin** button on the bottom right corner.
 Create a new **Property** for your Magic Ads website
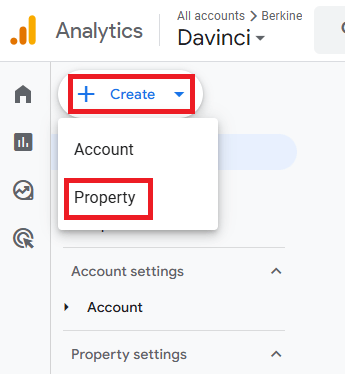 Fill in the property details and rest of the information as needed.
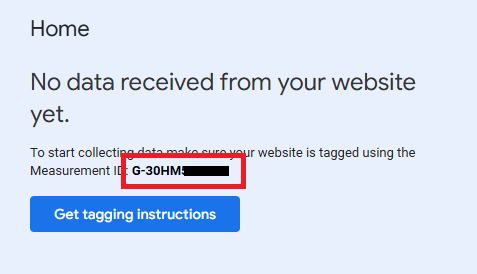
 Go to the home page and copy your **Measurement ID**.
If you’re new to Google Analytics, consider watching their introductory videos or reading their setup guide for beginners.
Go to the home page and copy your **Measurement ID**.
If you’re new to Google Analytics, consider watching their introductory videos or reading their setup guide for beginners.
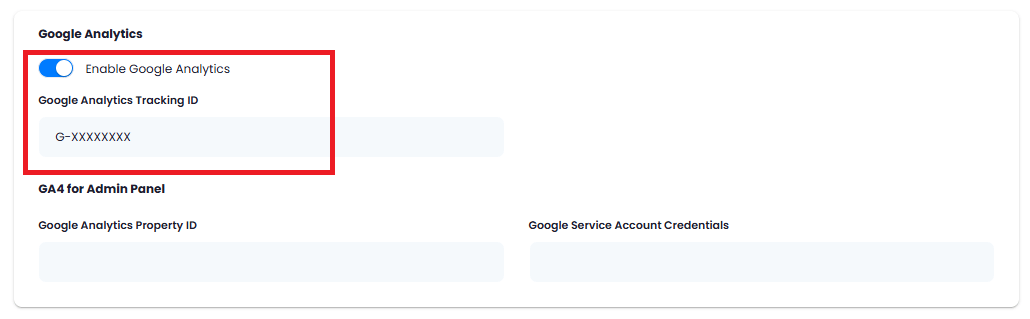
 Login to the Magic Ads as Admin. Go to the **Admin Panel** -> **Backend Settings** -> **Global Settings** and scroll to **Google Analytics** section.
Inlude your **Google Analytics Tracking ID** that you copied in the previous step, turn on the **Enable Google Analytics** checkbox and click on **Save** button.
 You now have completed the Google Analytics configuration for frontend.
## Admin Dashboard - Google Analytics 4 Configuration
Magic Ads has integrated Google Analytics metrics view in the Admin Dashboard page, so you could directly see all your metrics from your Google Analytics account in your Admin Panel.
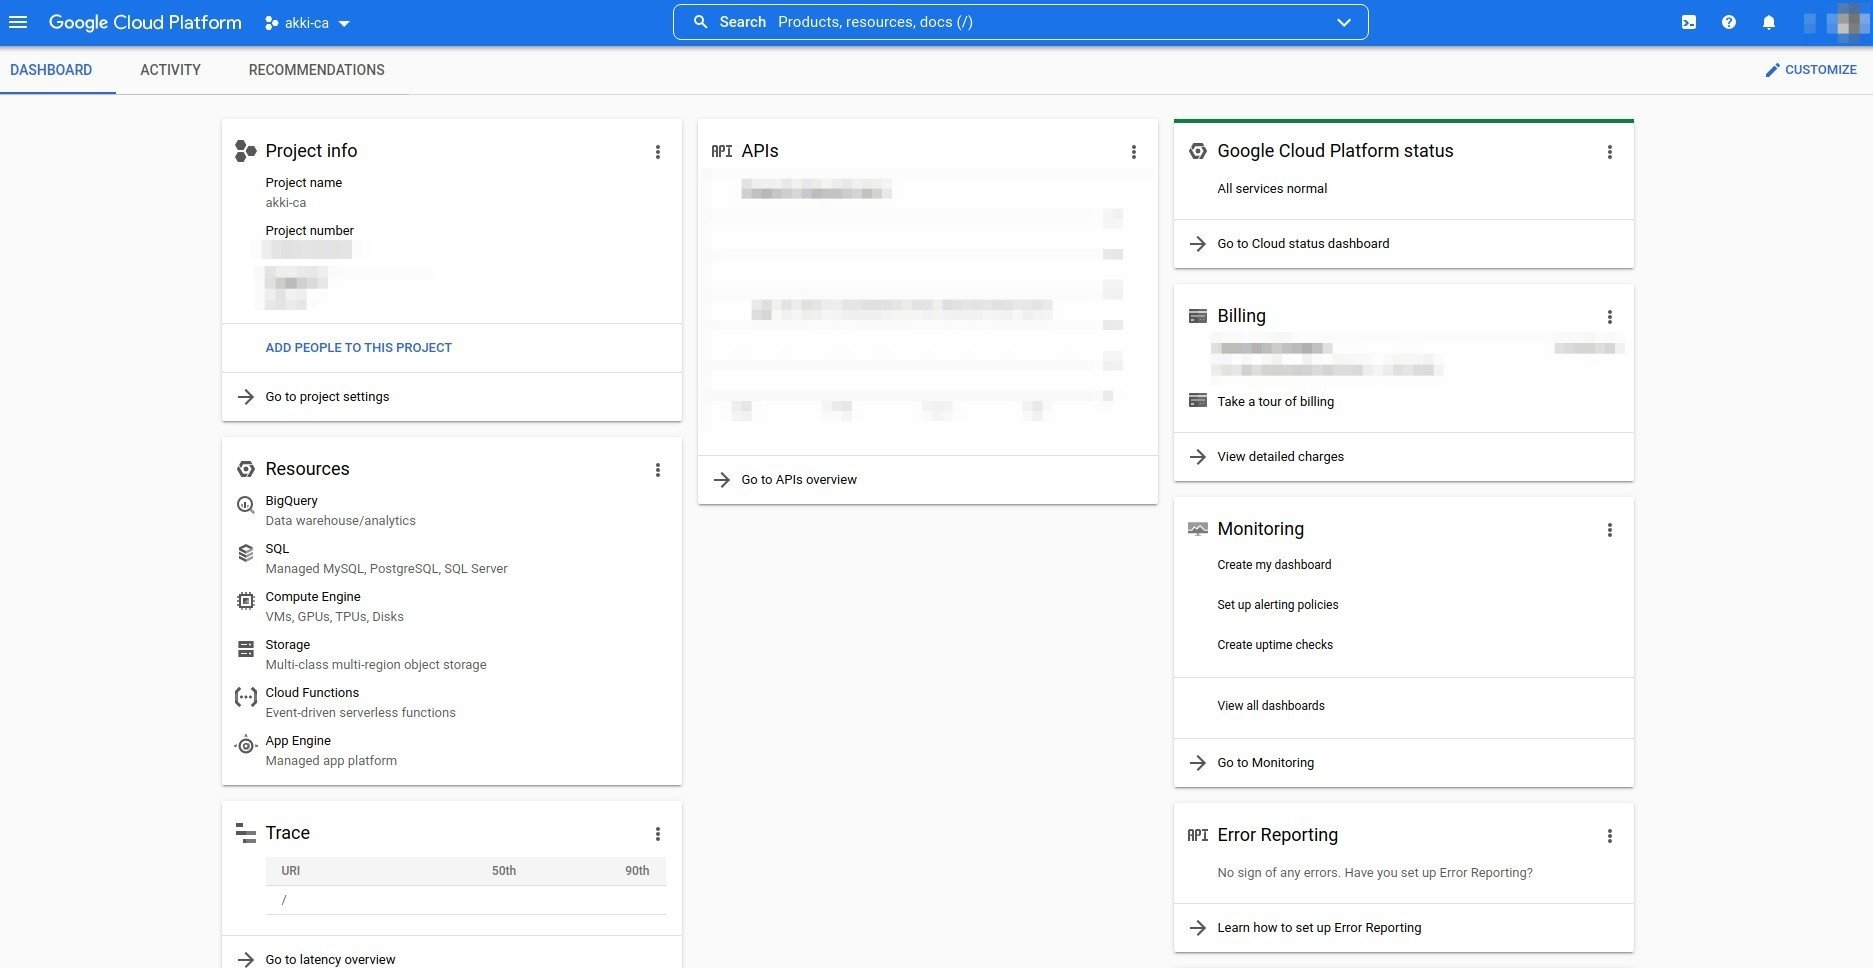
Login into your [Google Cloud Console](https://console.cloud.google.com/) account.
Once logged in, select your **project** that you want to use.
You now have completed the Google Analytics configuration for frontend.
## Admin Dashboard - Google Analytics 4 Configuration
Magic Ads has integrated Google Analytics metrics view in the Admin Dashboard page, so you could directly see all your metrics from your Google Analytics account in your Admin Panel.
Login into your [Google Cloud Console](https://console.cloud.google.com/) account.
Once logged in, select your **project** that you want to use.
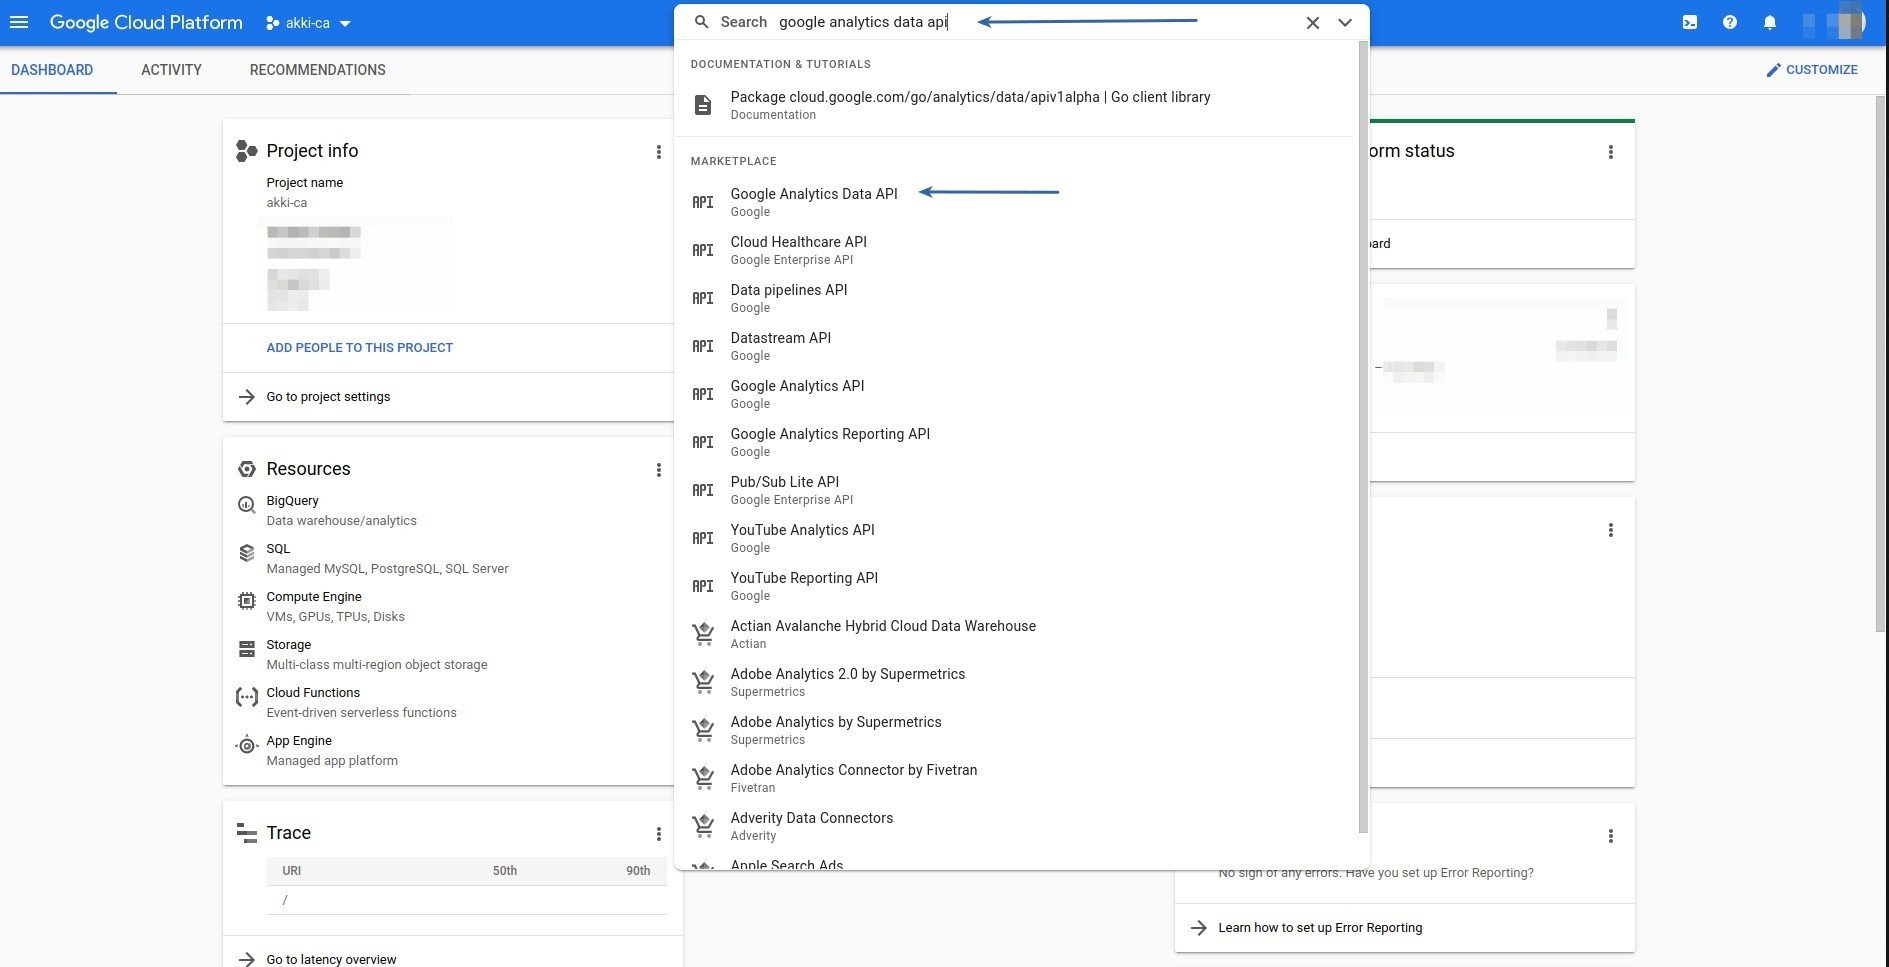
 Search for **google analytics data api** and select it among the search results as shown below.
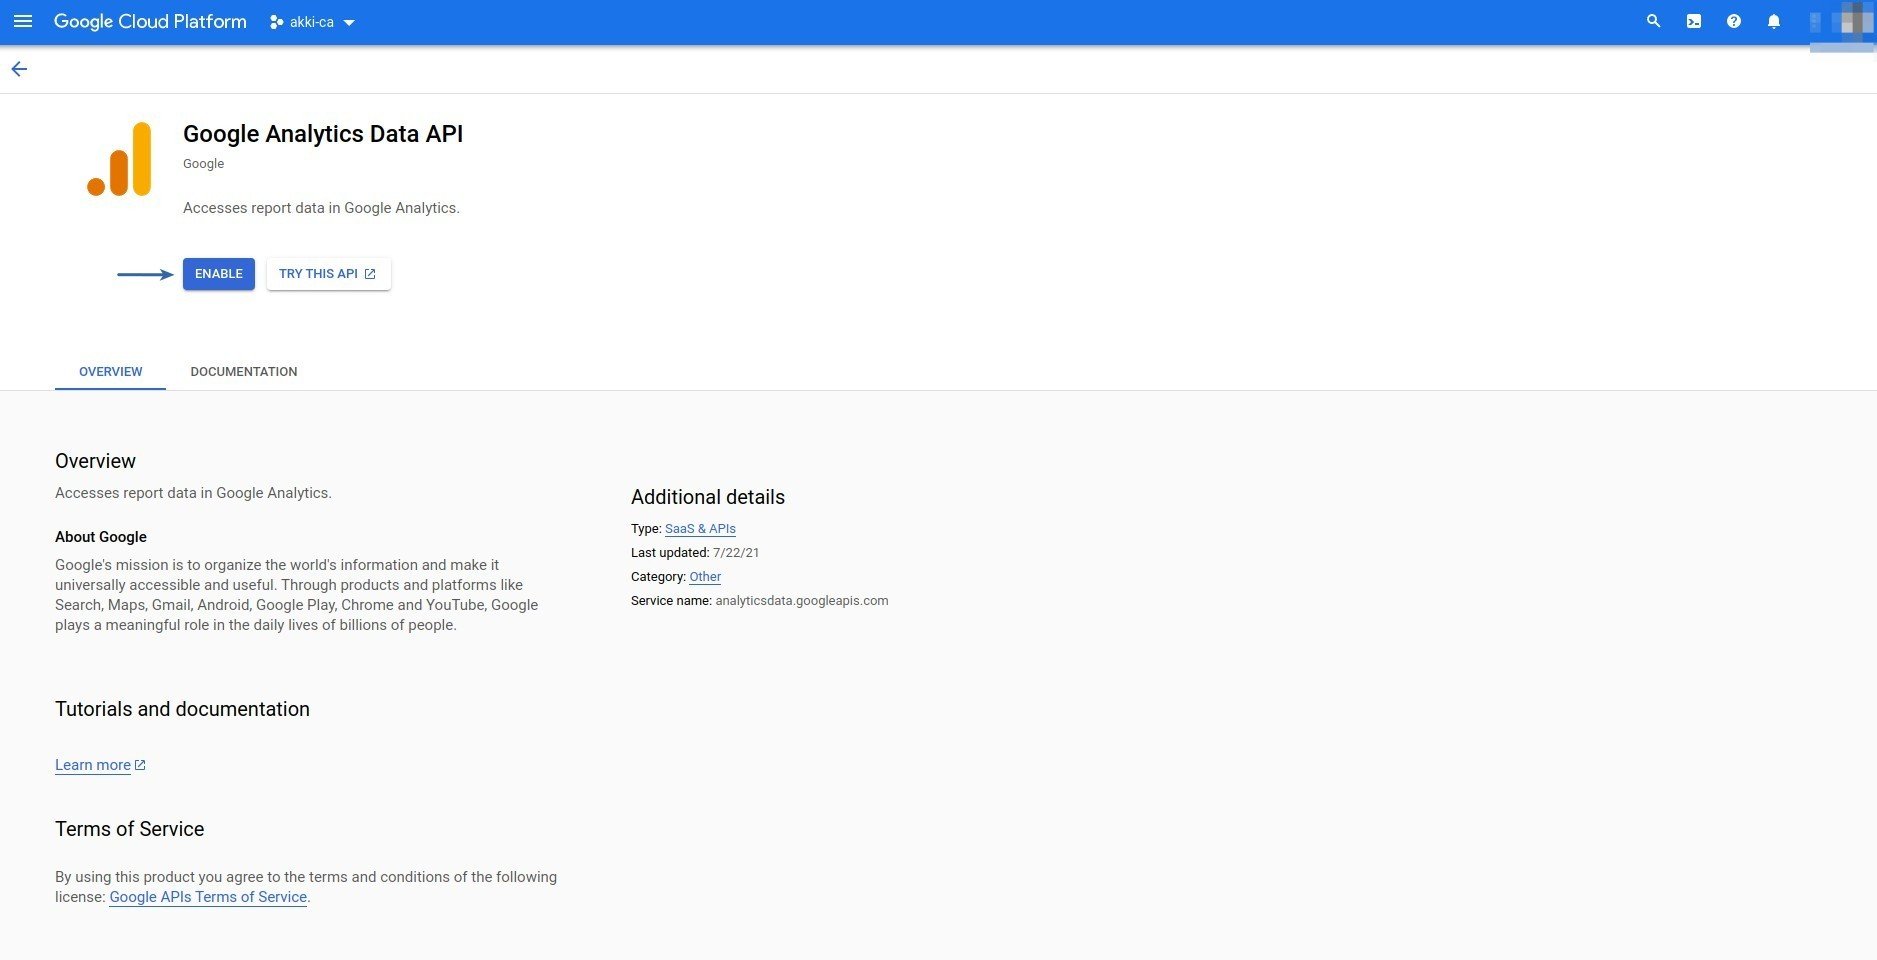
 After selecting it make sure to **Enable** it.
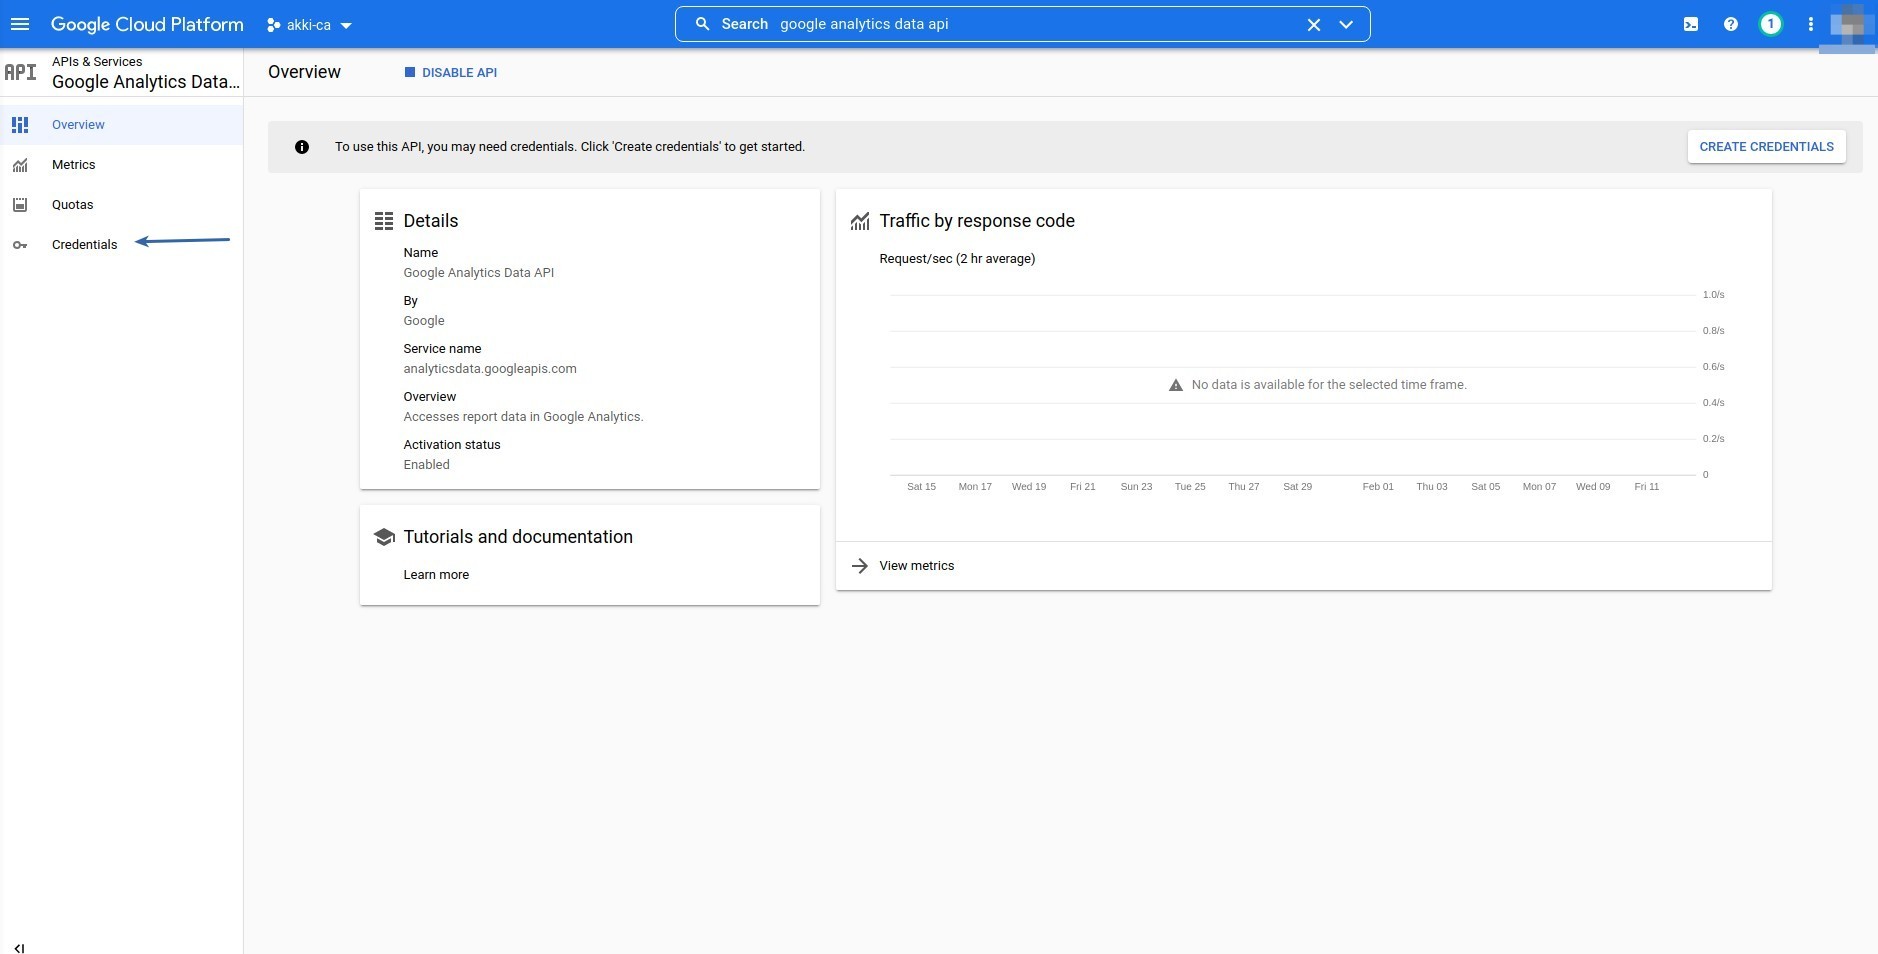
 Next, select **Credentials** tab from side menu.
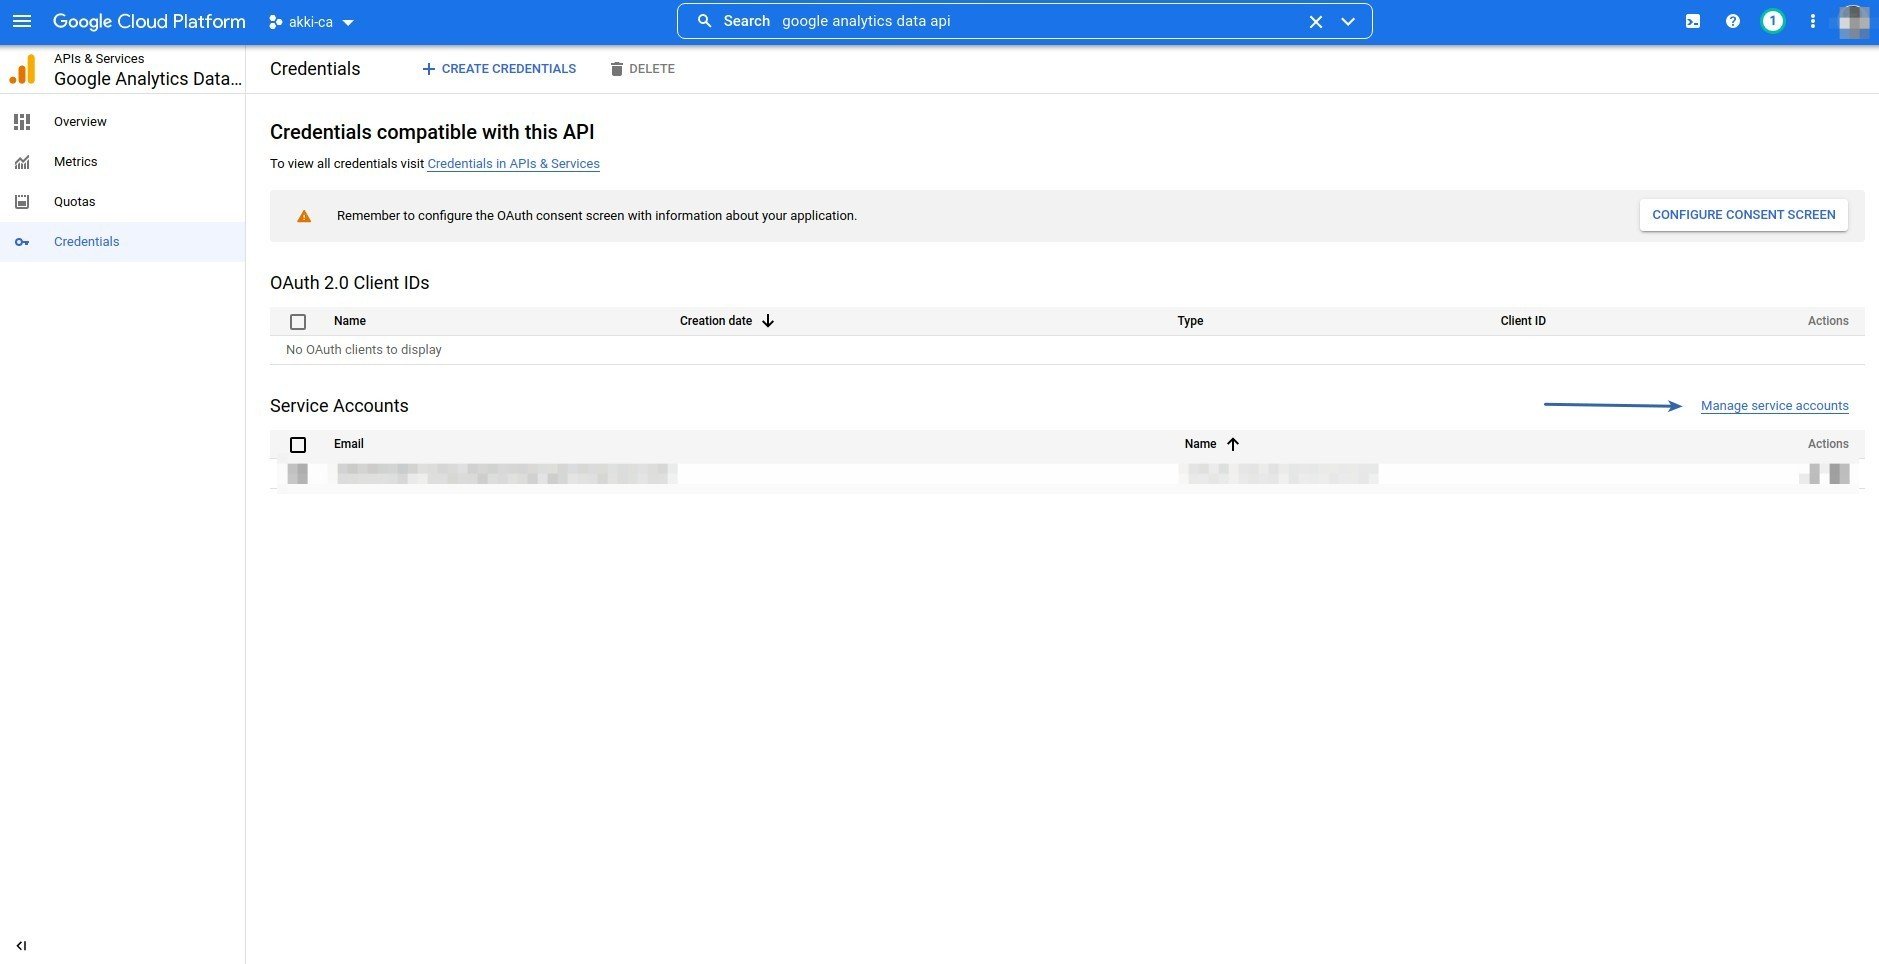
 While you are on the Credentials page, select **Manage Service Accounts**.
 Next click on **Create Service Account**.
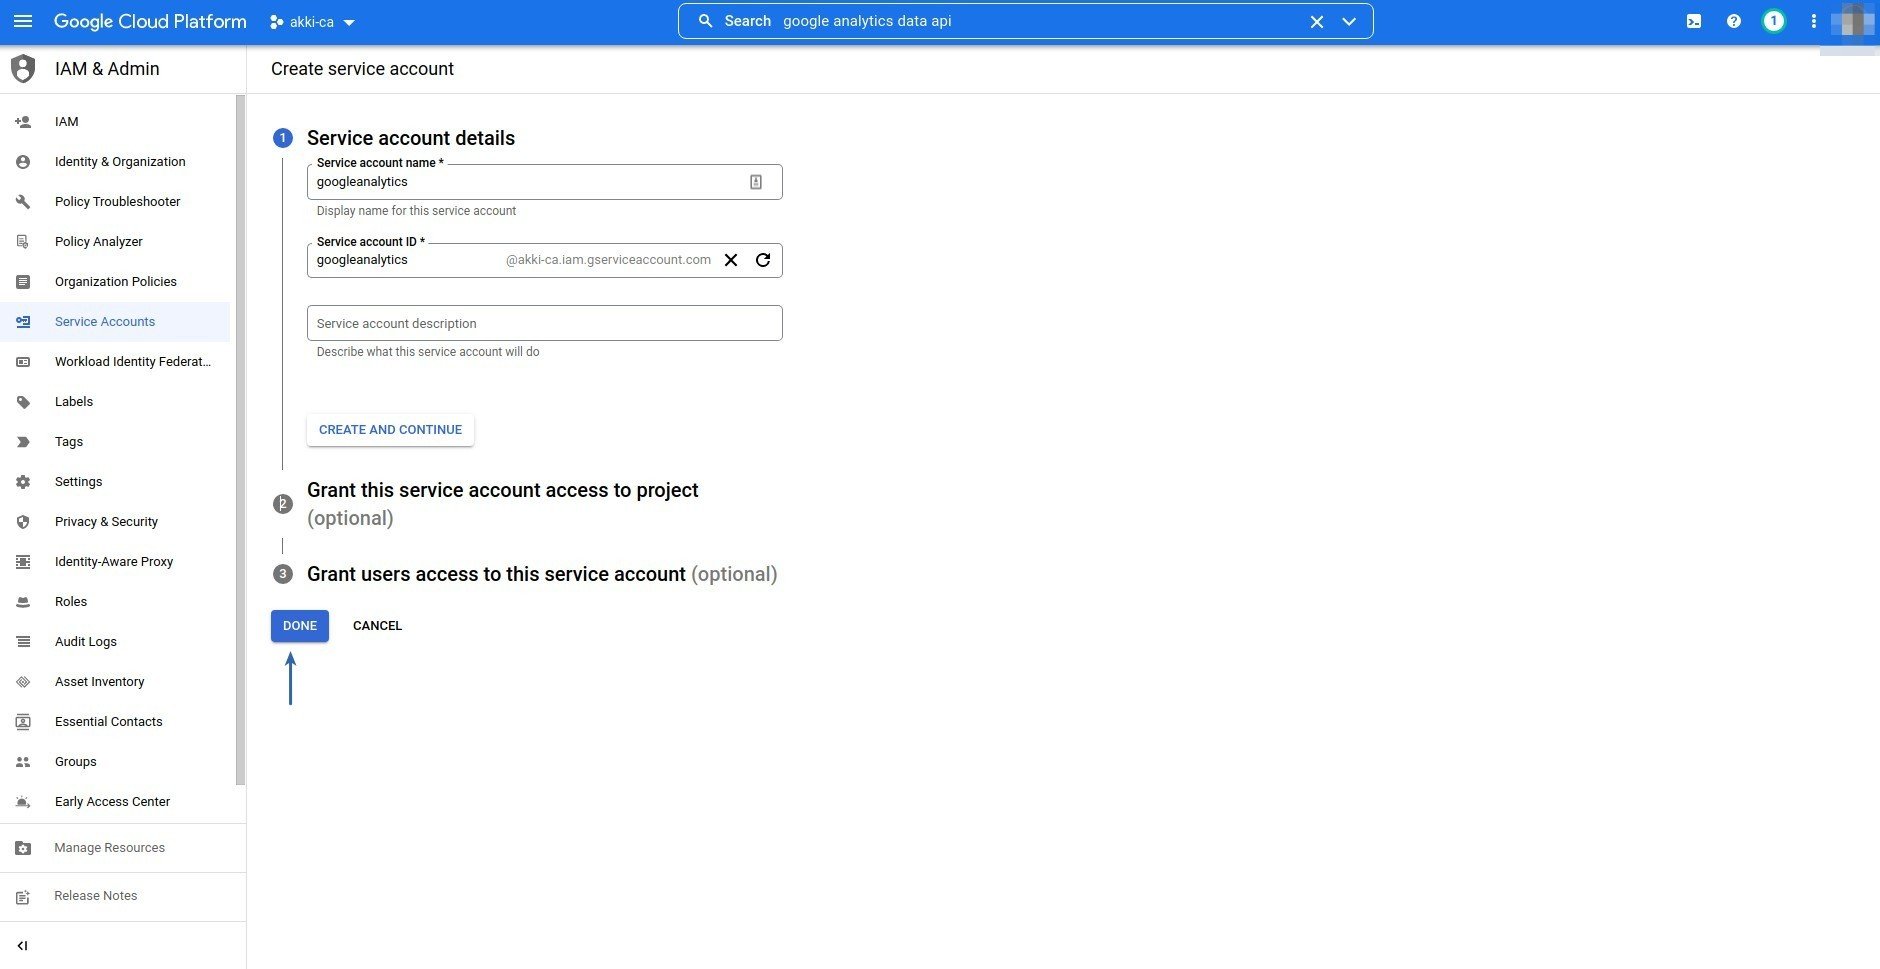 Provide require information as you prefer and click **Done**.
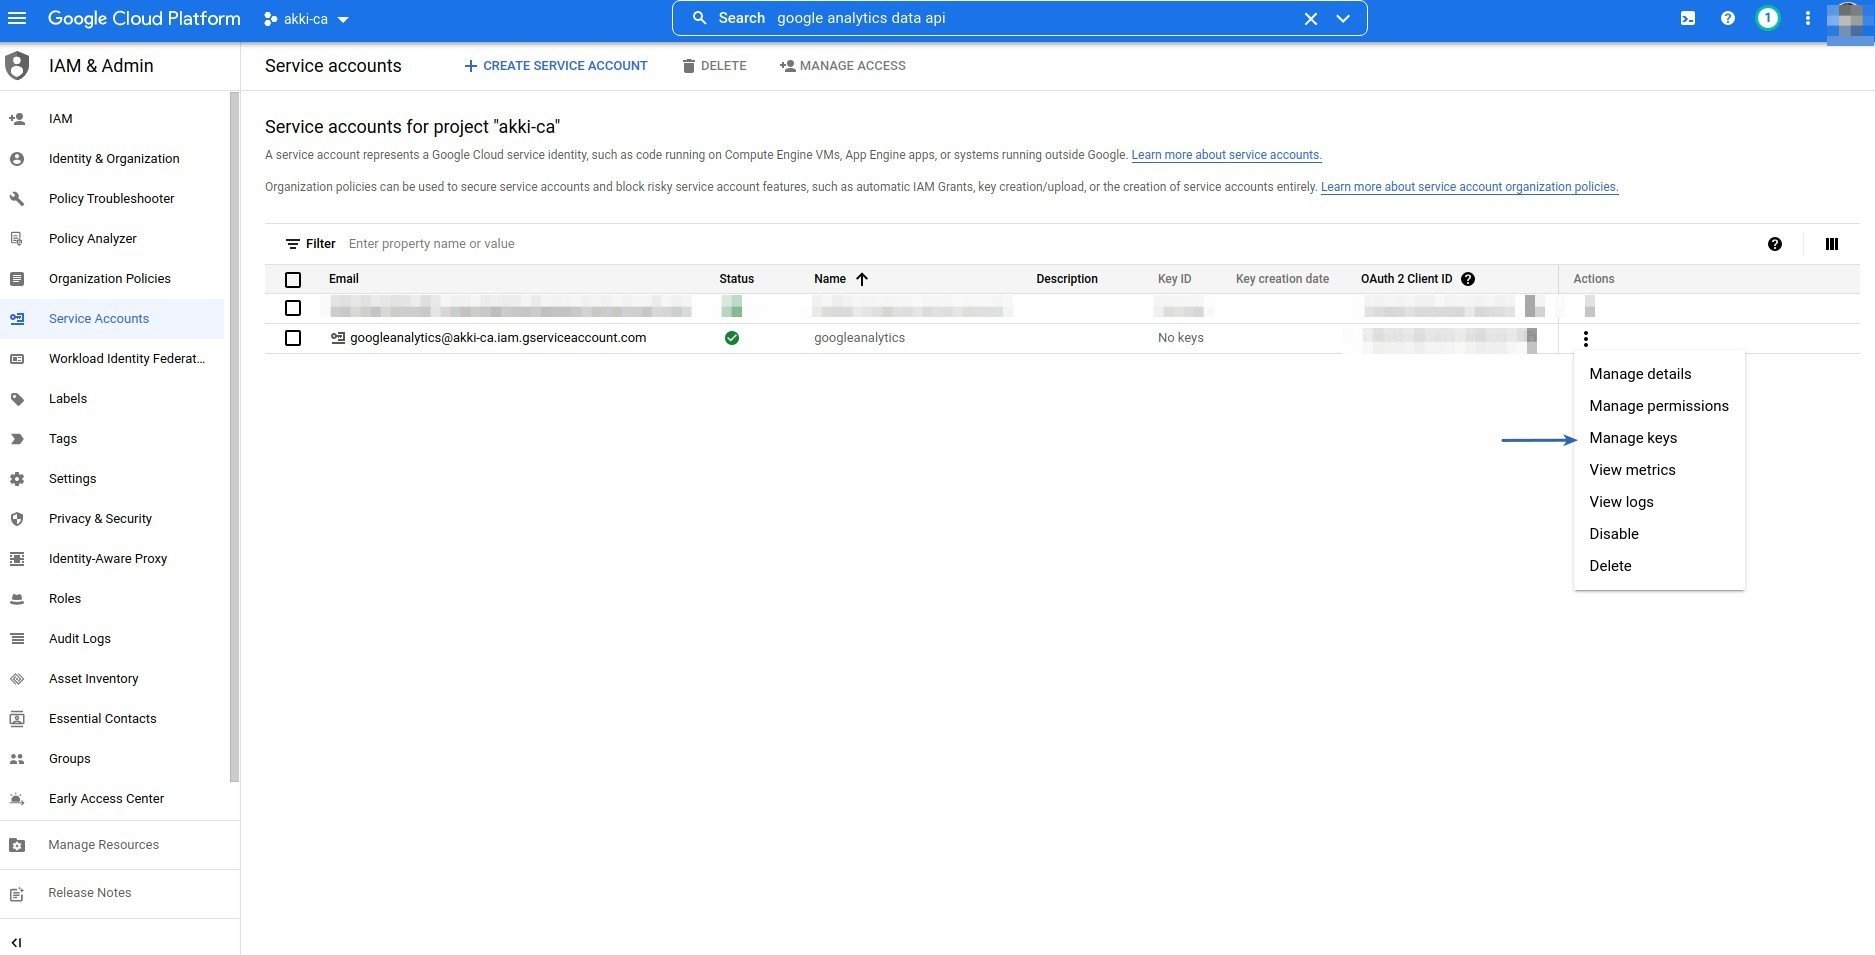
 Next select your newly created service account and under Actions column, select **Manage Keys**.
 Next select **Create New Key**.
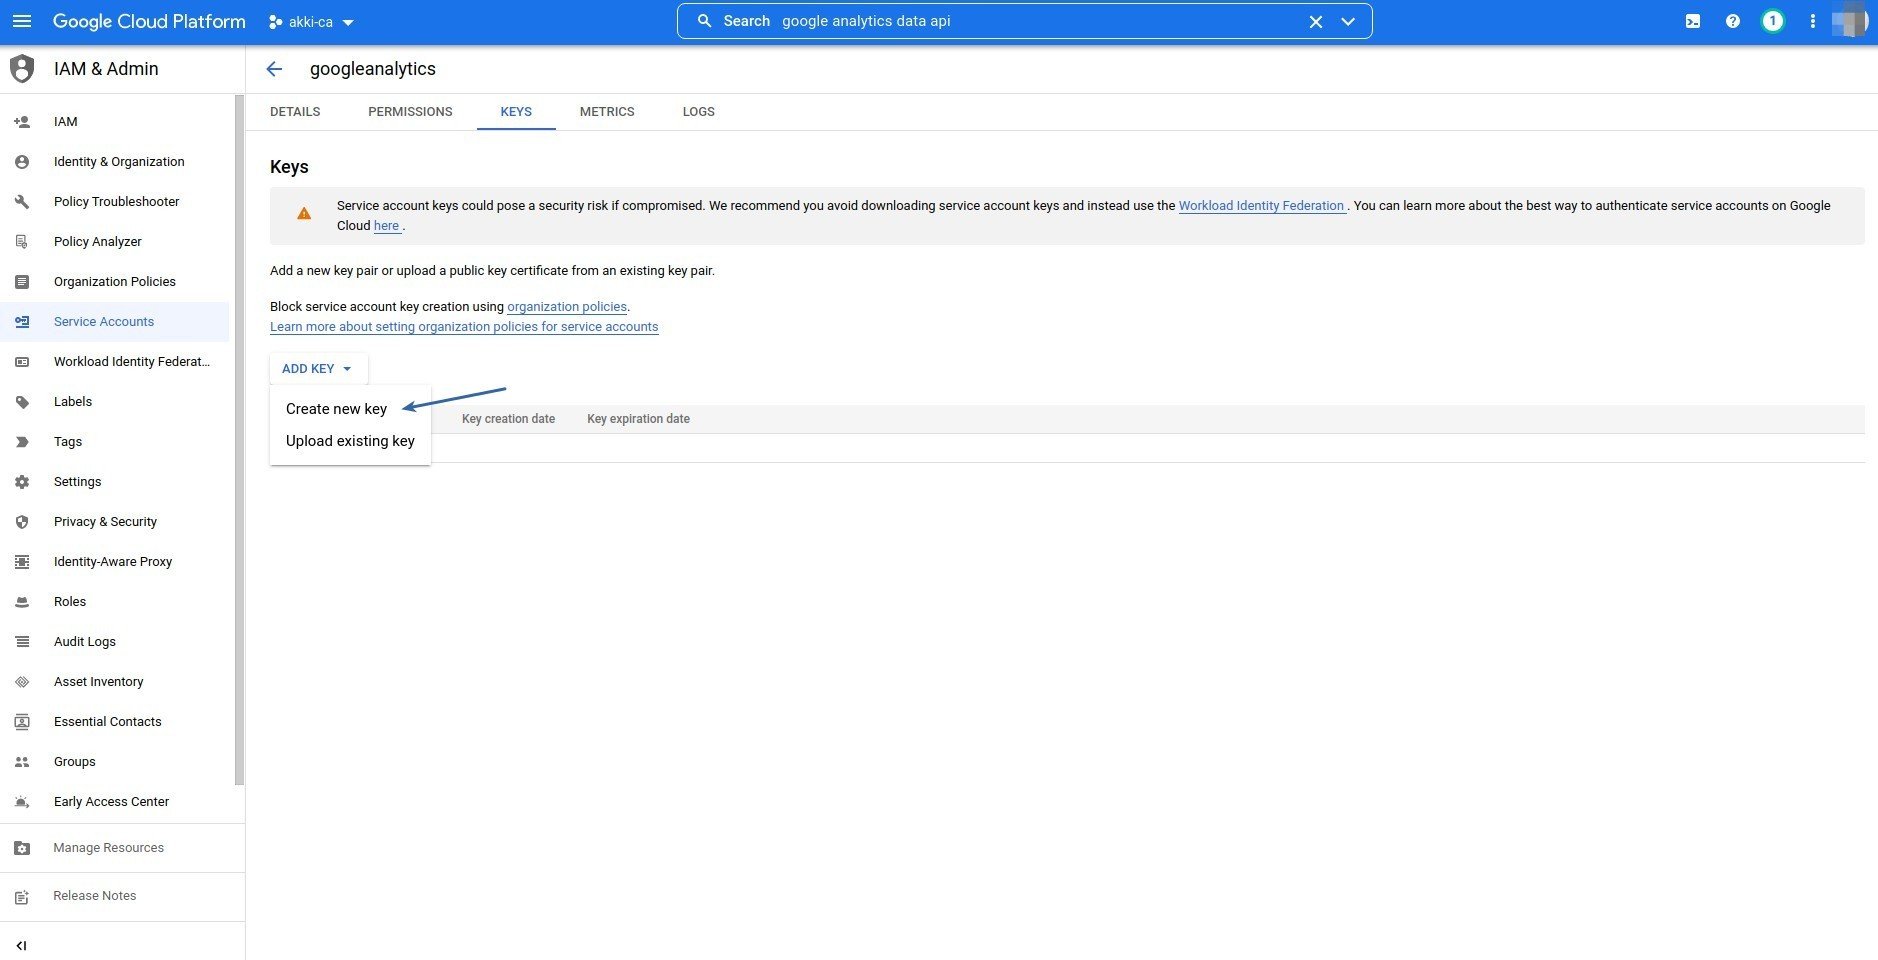 Next select Select key type to be **JSON** and save the file somewhere, you will need it soon..
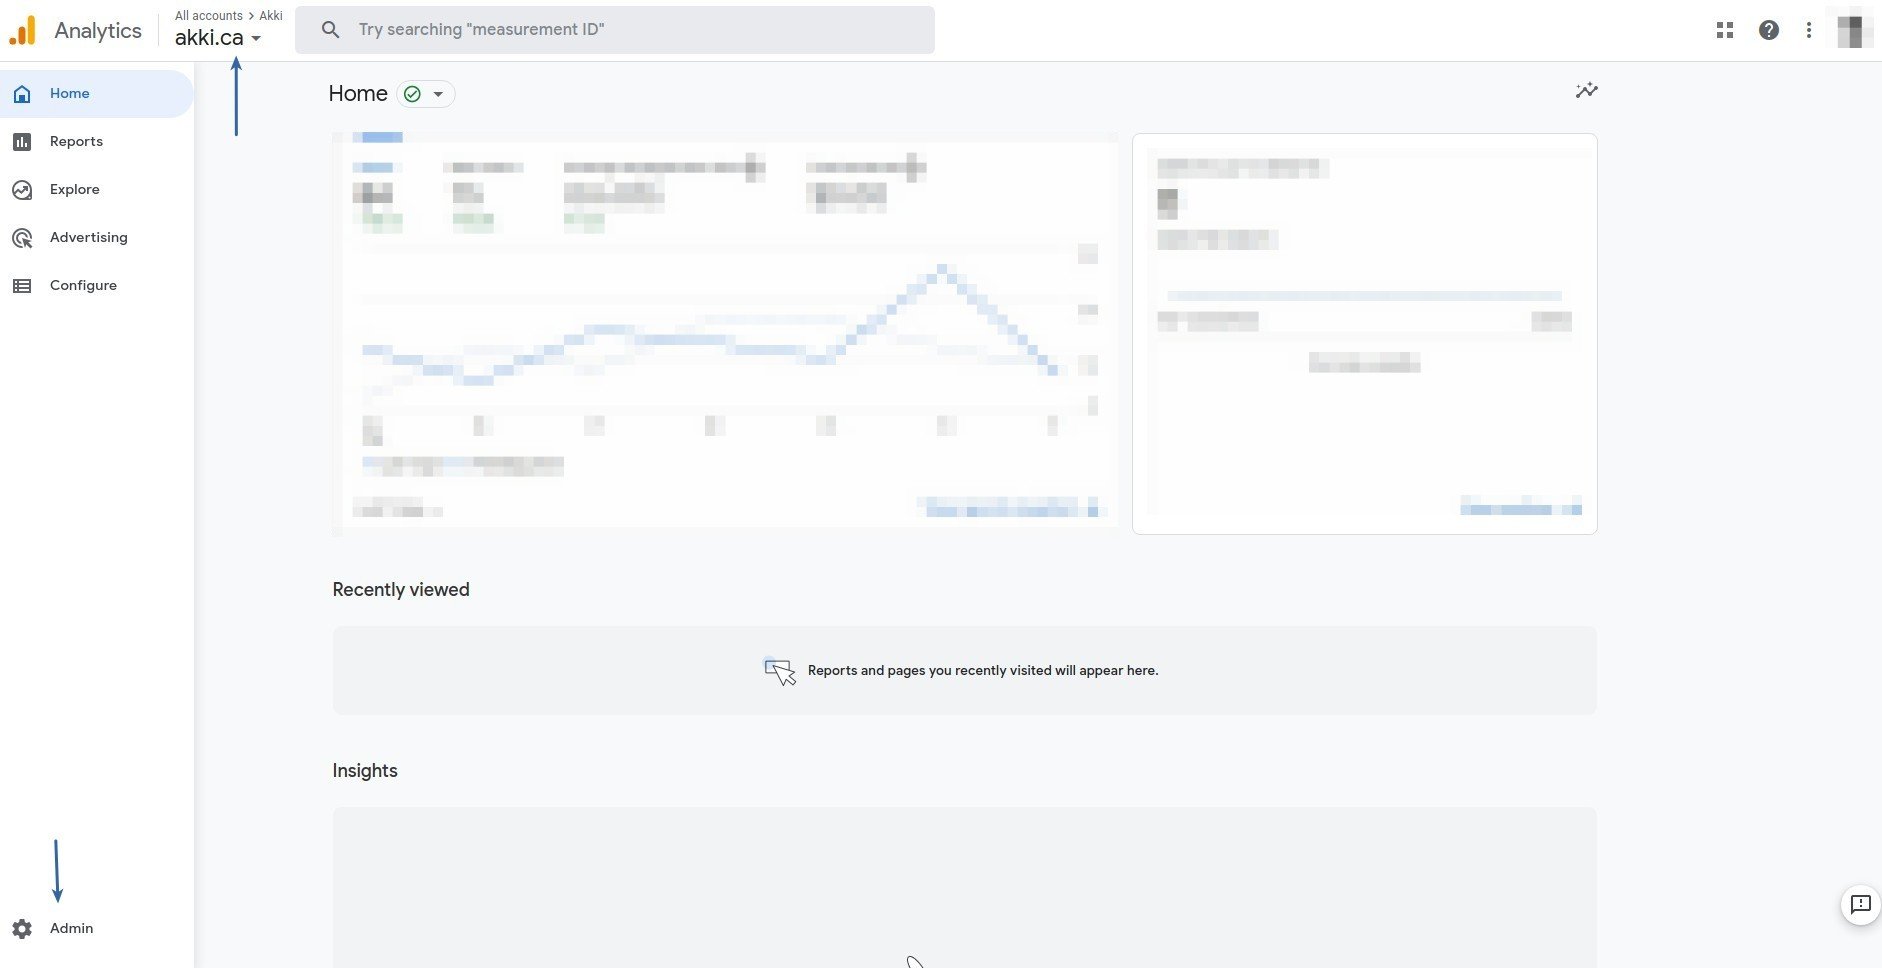
Now let's setup your Google Analytics account. Loging to your Google Analytics account (by default it is not GA4 only) and select your target account and click on **Admin** button at the bottom
Next select Select key type to be **JSON** and save the file somewhere, you will need it soon..
Now let's setup your Google Analytics account. Loging to your Google Analytics account (by default it is not GA4 only) and select your target account and click on **Admin** button at the bottom
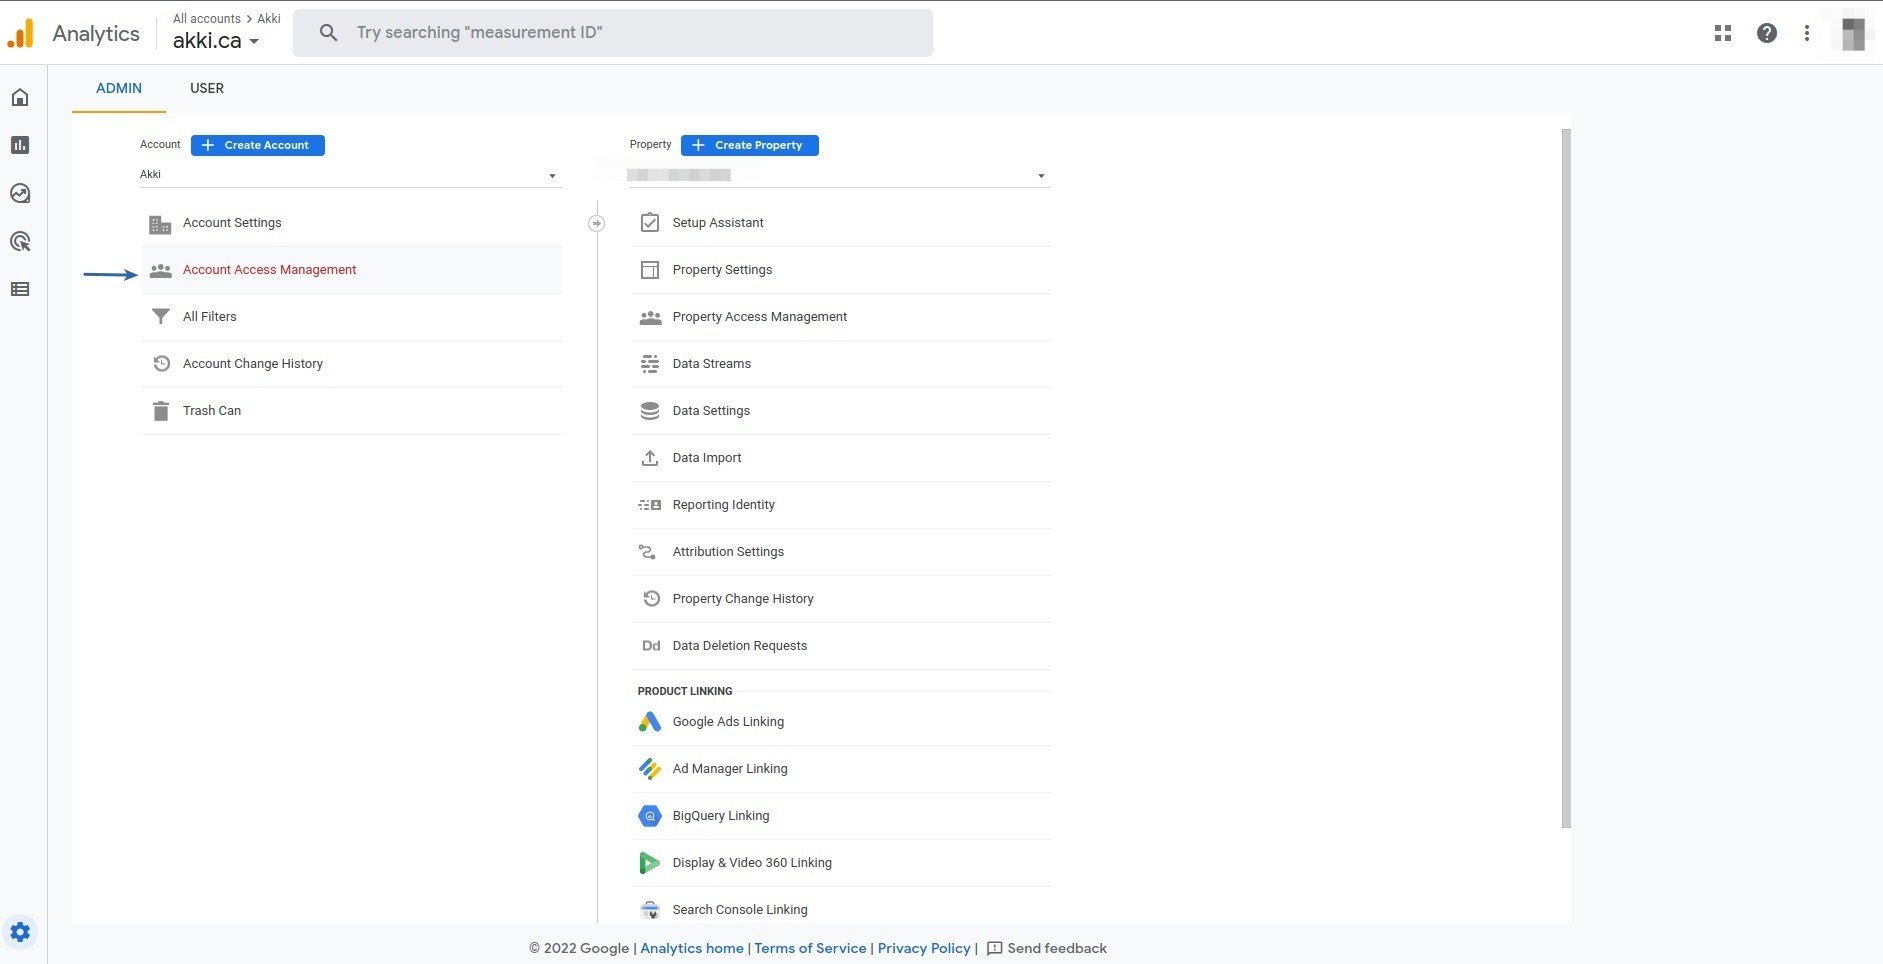
 Next select **Account Access Management**.
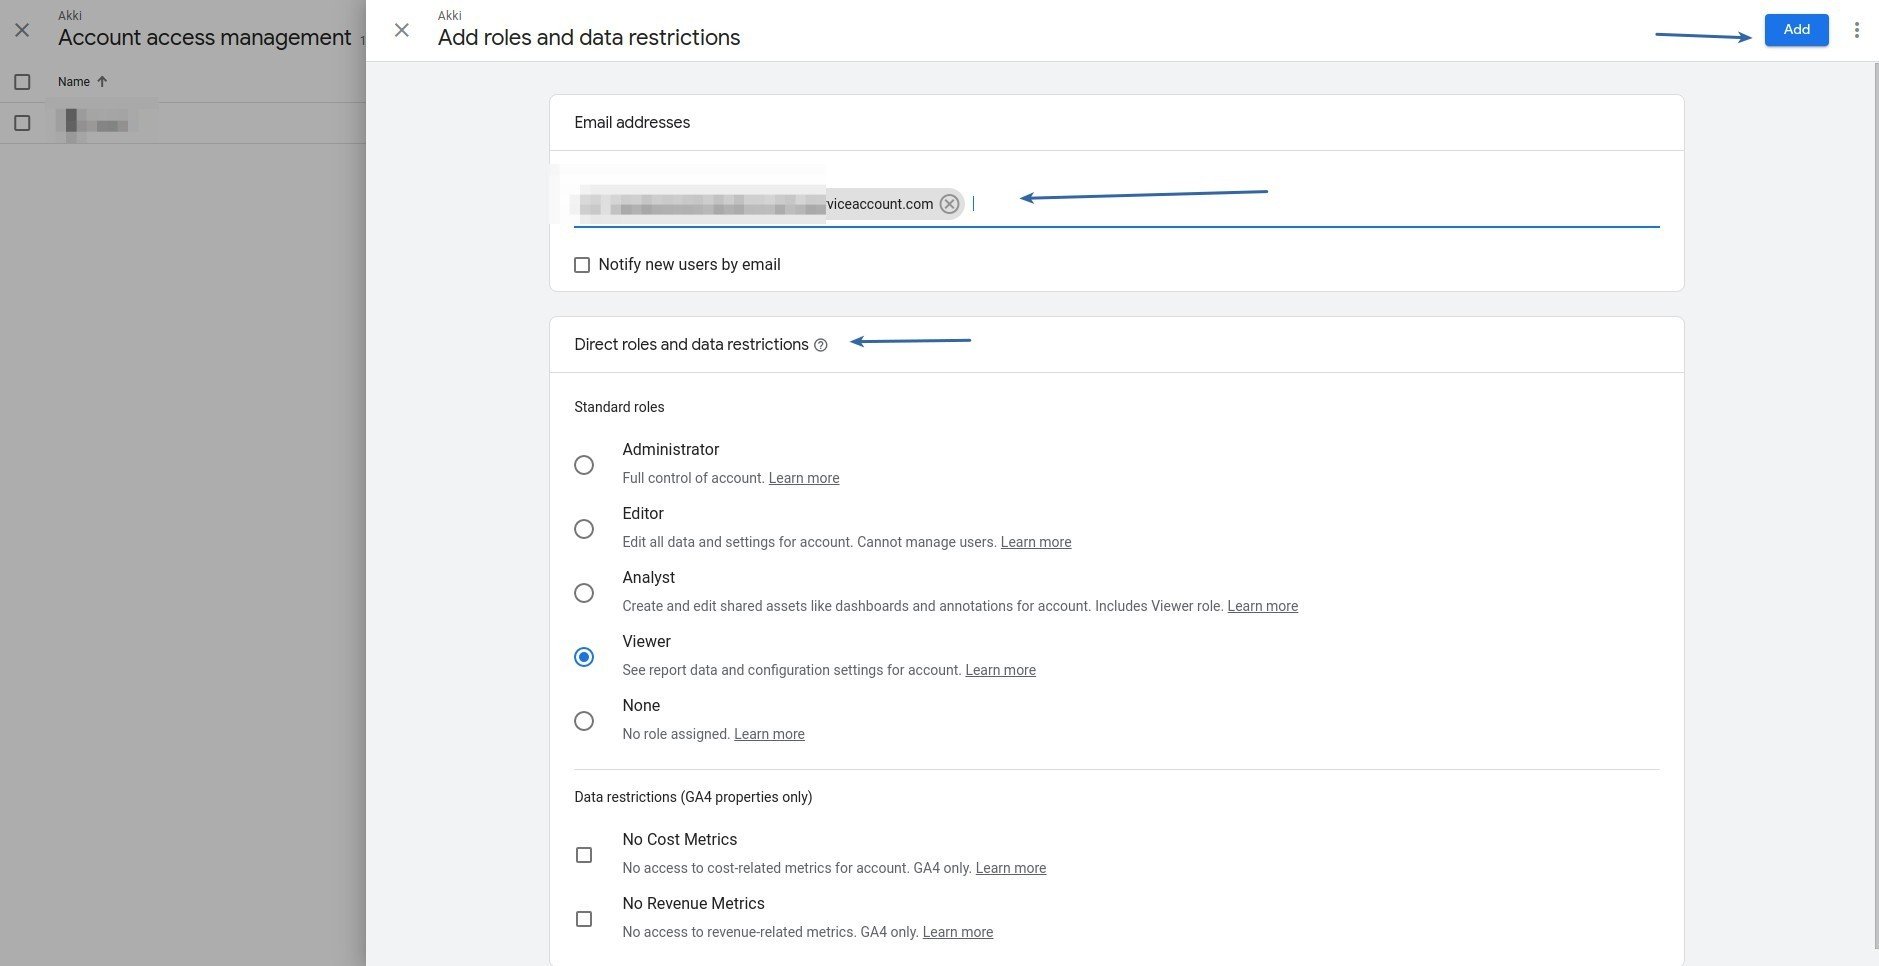
 Next click on the **Add Users** button.
 Enter the email same as the **client\_email** from the json file that you generated at step 11.
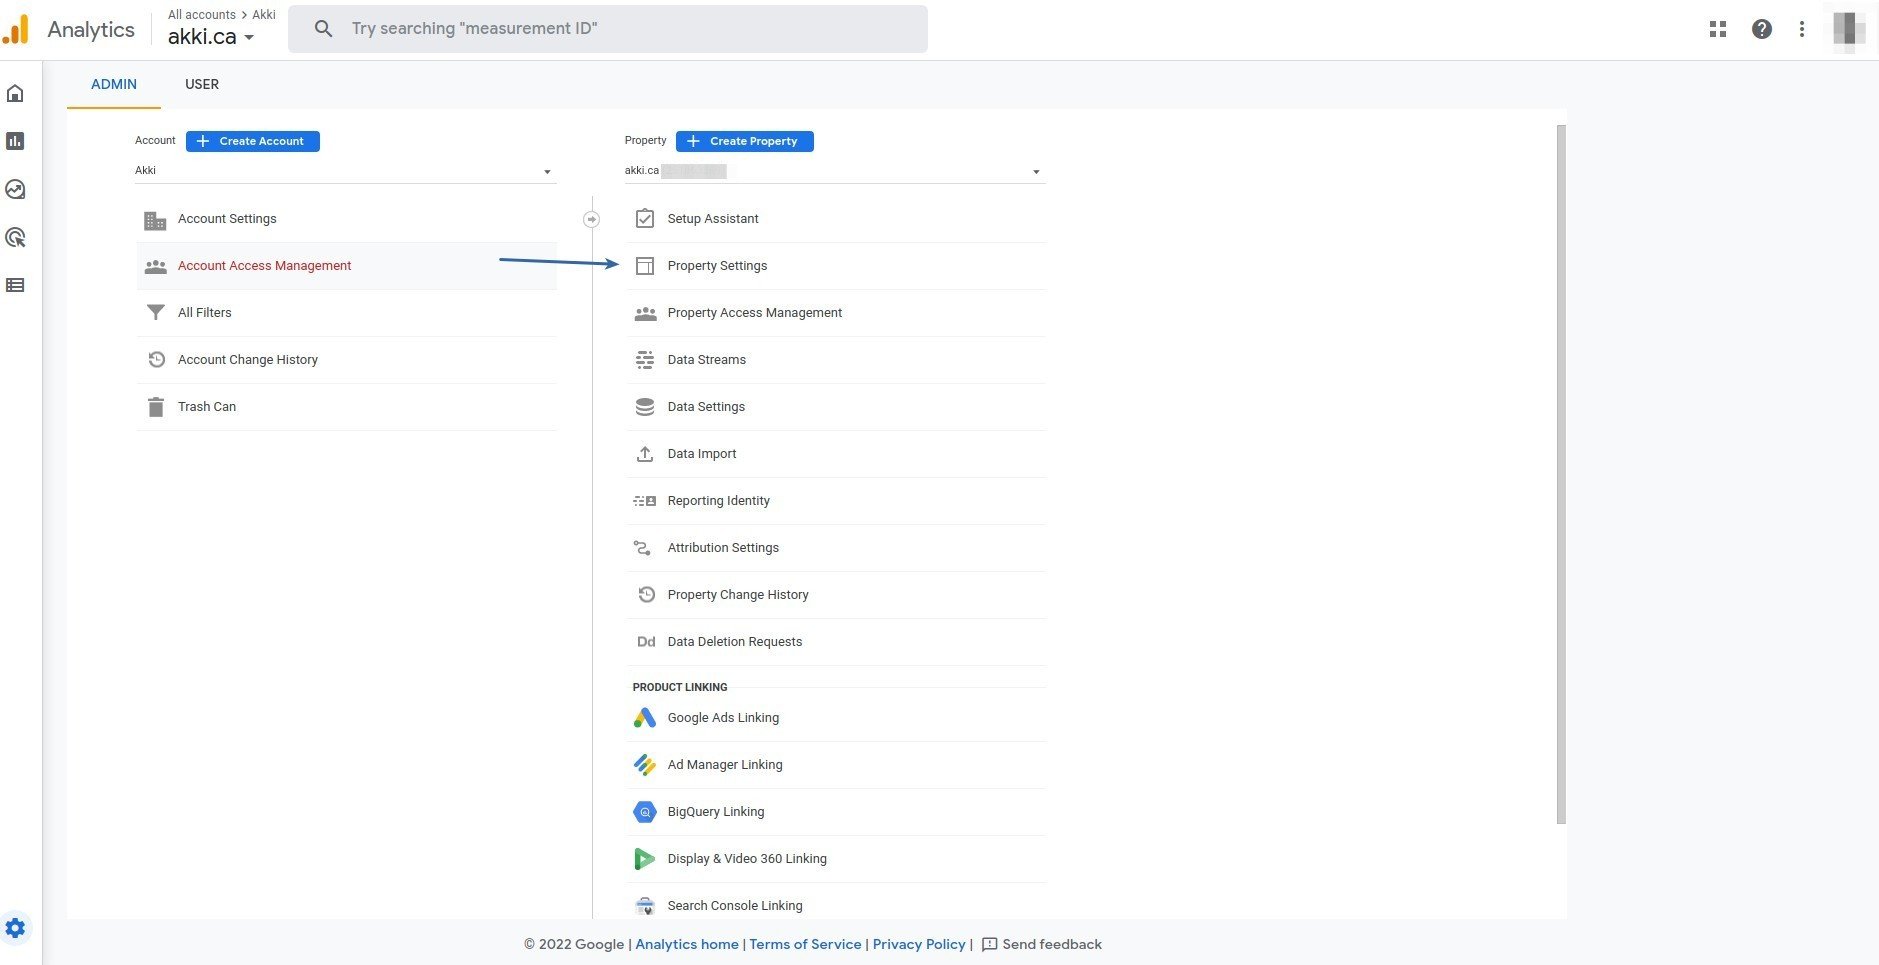
 Next select **Property** Settings.
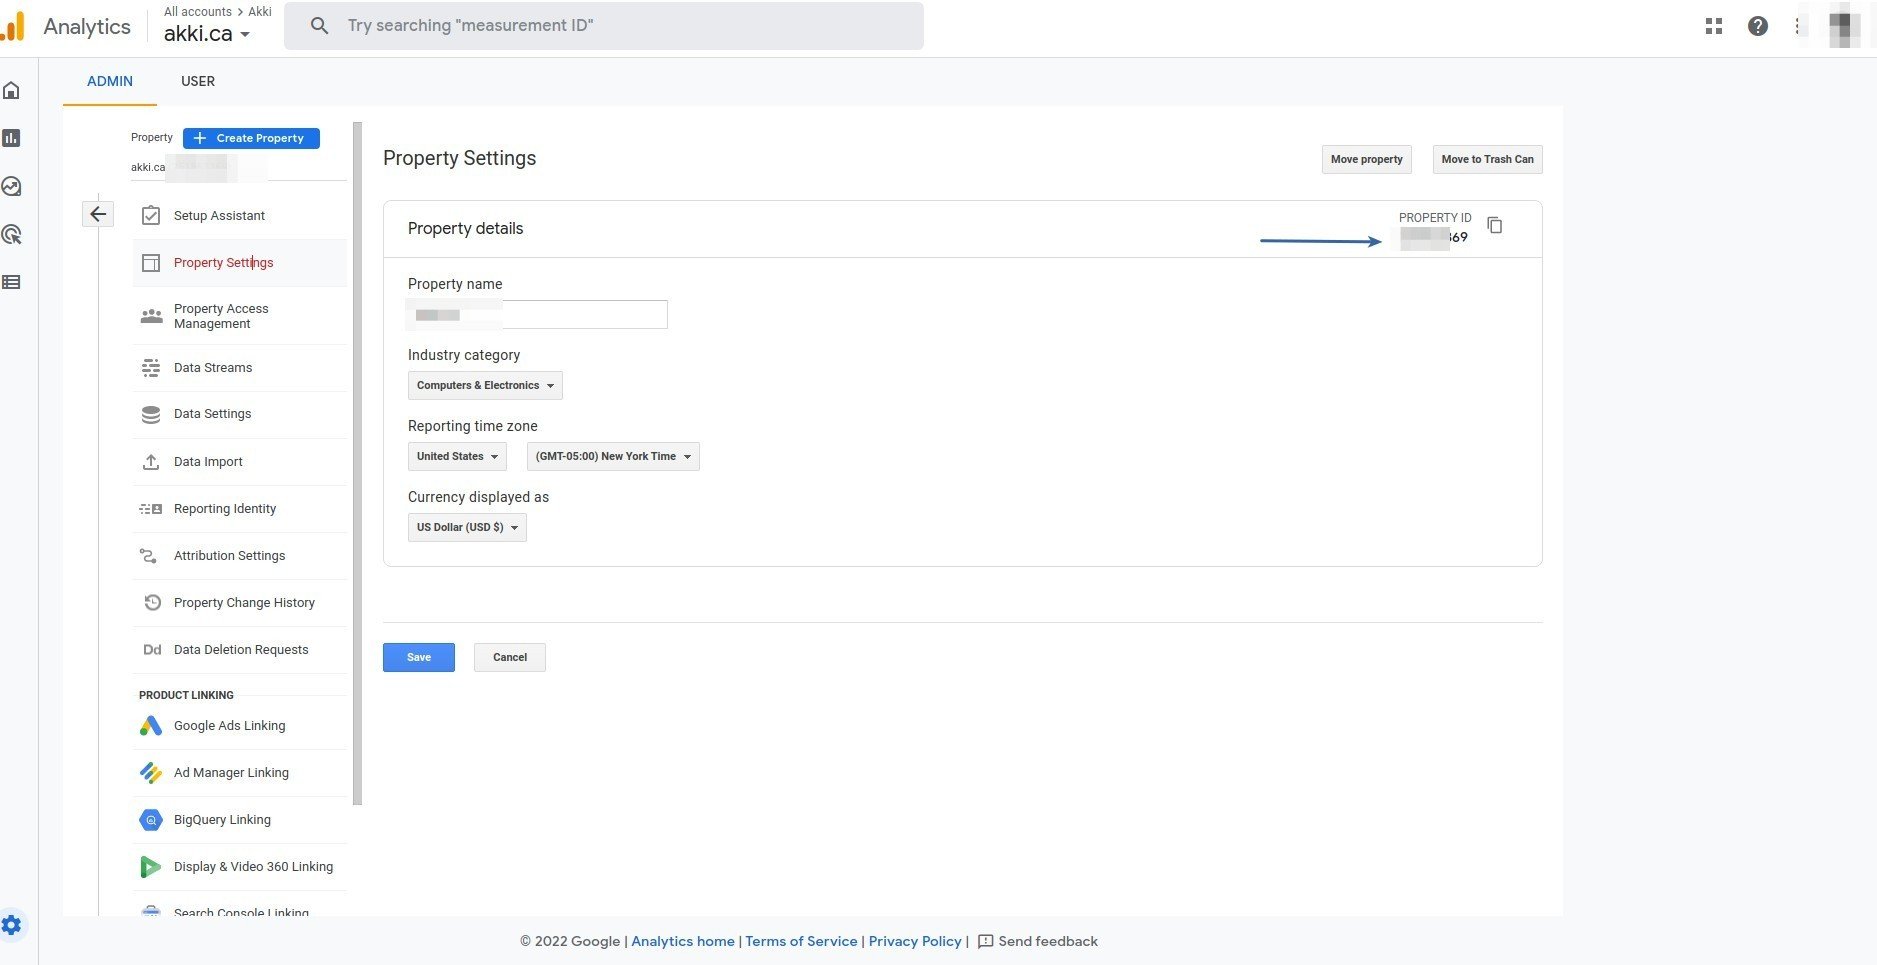
 Save the **Property ID** value.
 Login to the Magic Ads as Admin. Go to the **Admin Panel** -> **Backend Settings** -> **Global Settings** and scroll to **Google Analytics** section.
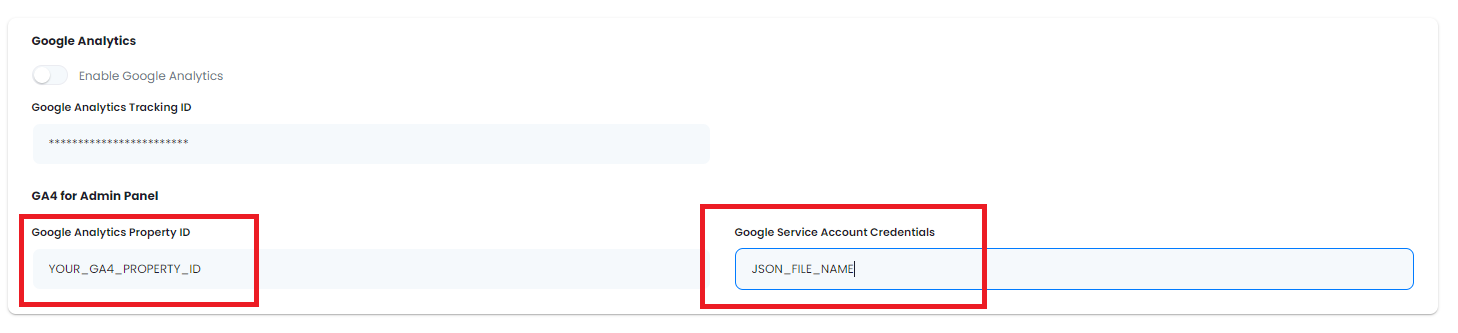
Enter your \***Google Analytics Property ID** and **Google Service Account Credentials JSON** File Name and click save.
 Last important step would be to upload your json file to your hosting and store it under **storage/app/analytics/**
You now have completed the Google Analytics 4 configuration for admin dashboard.
Last important step would be to upload your json file to your hosting and store it under **storage/app/analytics/**
You now have completed the Google Analytics 4 configuration for admin dashboard.