> ## Documentation Index
> Fetch the complete documentation index at: https://magicads.mintlify.site/llms.txt
> Use this file to discover all available pages before exploring further.
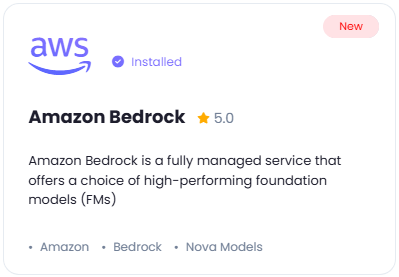
# Amazon Bedrock
> Amazon Bedrock extension provides a unified API that gives you access to many different AI models through a single endpoint
This is a `free` extension available for anyone
* Amazon | Nova Pro
* Amazon | Nova Lite
* Amazon | Nova Micro
* More will be added soon...
Please note that at the moment we have added support for main Amazon Nova models in AI Writer and AI Chat feature, other models will be supported soon with Amazon Bedrock.
## Introduction
Amazon Bedrock provices access to state of the art models via single API endpoint, it one of the most secure and rapidly growing services at AWS.
## Extension Configuration
To be able to use Amazon Bedrock feature, follow these steps to setup Amazon Bedrock Extension.
Go to the **Marketplace** in **Admin Panel** and install **Amazon Bedrock** extension.
 After installation is completed, go to **AI Settings** page in Admin Panel and click on **Extensions** tab there. Click on **Amazon Bedrock** there.
 You will need to include following required AWS credentials:
* **AWS Access Key**
* **AWS Secret Access Key**
* **AWS Region**
You will need to include following required AWS credentials:
* **AWS Access Key**
* **AWS Secret Access Key**
* **AWS Region**
To create IAM user with **Access Key** and **Secret Access Key** refer to the **AWS IAM User Creation** intructions below and then continue from this current step.
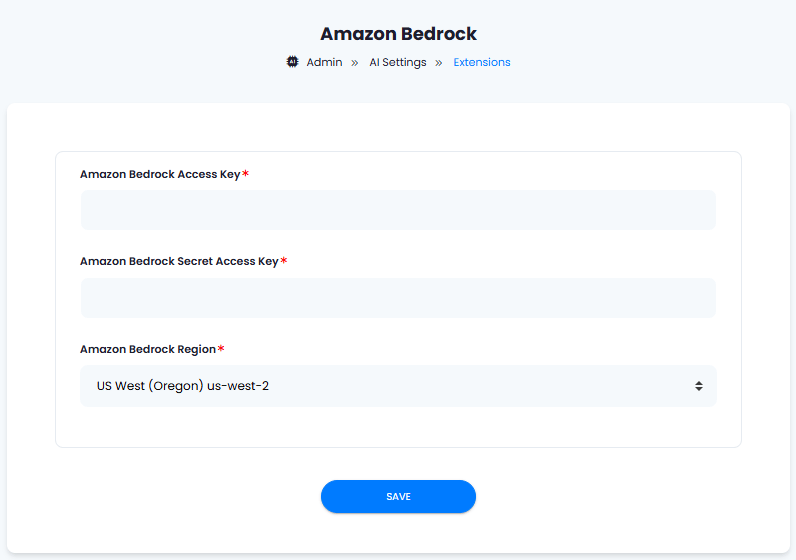 After you are done with the configuration, click on the **Save** button.
Congratulations! You have successfully completed the Amazon Bedrock extension configuration. Proceed to the section below on how to use it.
## AWS IAM User Creation
By default all access to IAM users are denied, except for the root user. Make sure to keep your root user credentials in a secure place, you don't need them for Davinci AI.
Sign in to the [AWS Management Console](https://console.aws.amazon.com/console/) and open the [IAM](https://console.aws.amazon.com/iam/) console.
Or simply search for IAM service once you are logged in
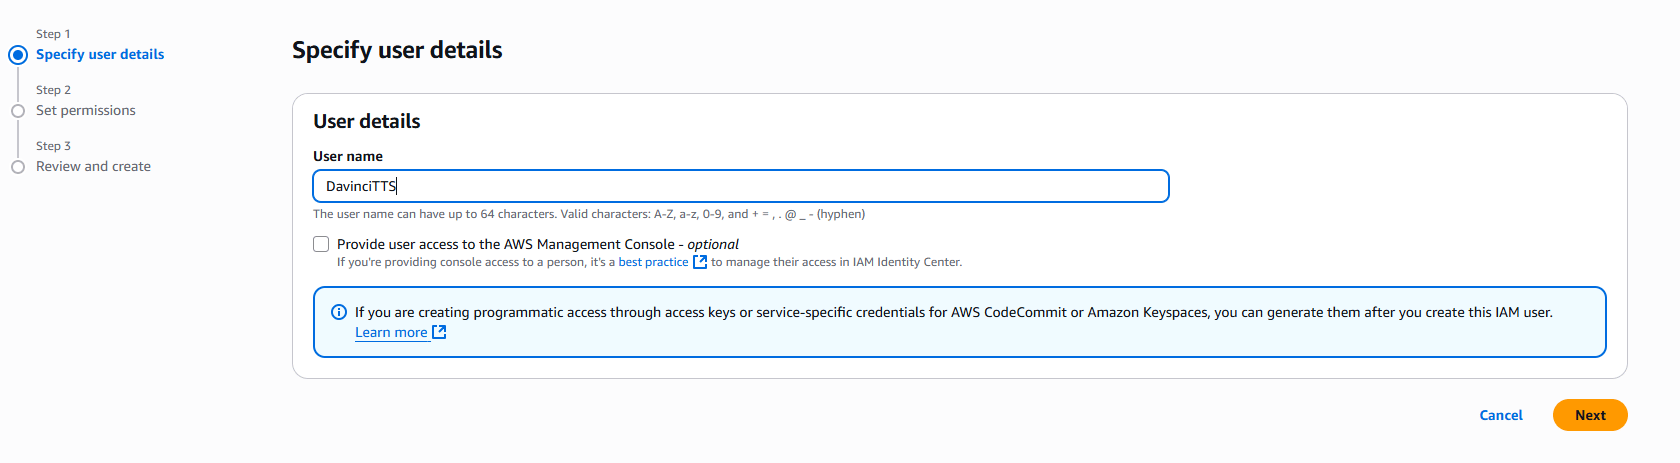
Once you are at the IAM service page, in the left navigation pane, choose **Access management** -> **Users** and then click on **Create User** button.
1. Provide **User name** as needed, and click on **Next** button
After you are done with the configuration, click on the **Save** button.
Congratulations! You have successfully completed the Amazon Bedrock extension configuration. Proceed to the section below on how to use it.
## AWS IAM User Creation
By default all access to IAM users are denied, except for the root user. Make sure to keep your root user credentials in a secure place, you don't need them for Davinci AI.
Sign in to the [AWS Management Console](https://console.aws.amazon.com/console/) and open the [IAM](https://console.aws.amazon.com/iam/) console.
Or simply search for IAM service once you are logged in
Once you are at the IAM service page, in the left navigation pane, choose **Access management** -> **Users** and then click on **Create User** button.
1. Provide **User name** as needed, and click on **Next** button
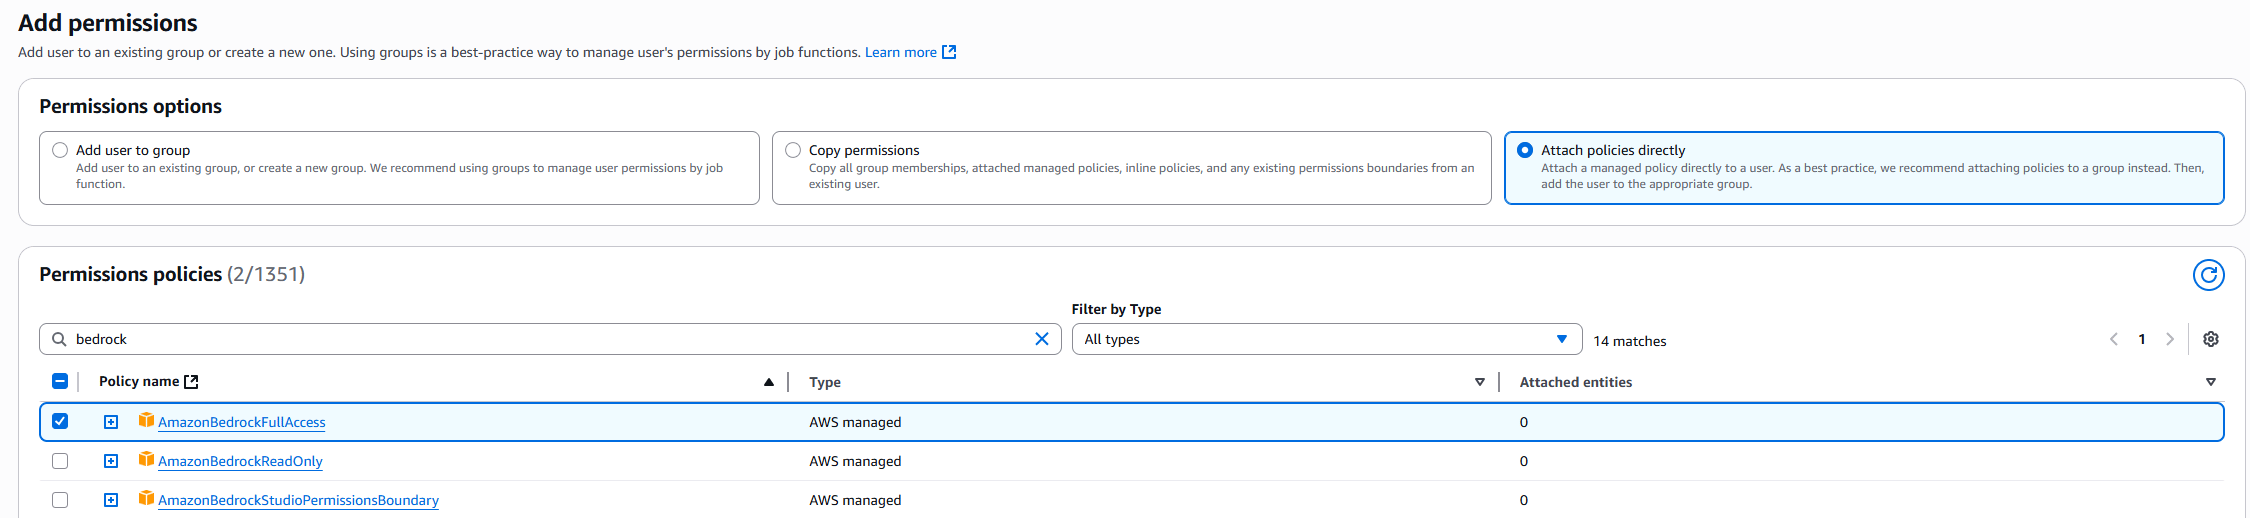
 2. On the **Set permissions** page, specify how you want to assign permissions to this set of new users. Choose **Attach policies directly option**. It will show you all the availalbe policies.
Select and add following 2 policies:
* **AmazonBedrockFullAccess**
Click on **Next** button afterwards
3. On the **Review and create** step, you should see following policies being added.
Click on **Create User** button.
 Once you have created a new IAM user, he will be available at the **Users** list. Click on your newly created user. You will be shown full details of that newly created user. Next:
1. Select the **Security credentials** tab
2. And click on **Create access key** button
Once you have created a new IAM user, he will be available at the **Users** list. Click on your newly created user. You will be shown full details of that newly created user. Next:
1. Select the **Security credentials** tab
2. And click on **Create access key** button
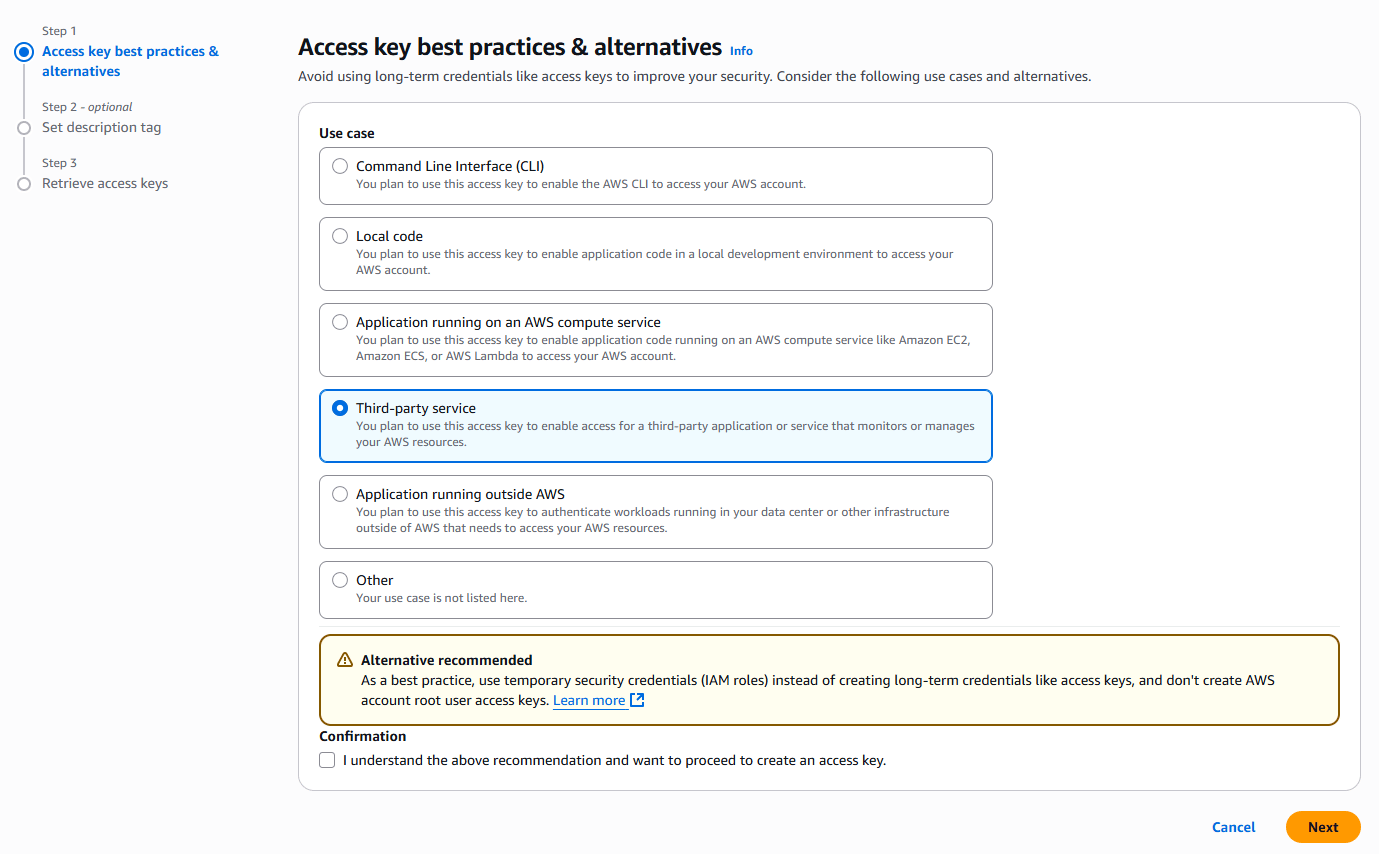
 3. Select **Third-party service** from the list and click on **Next** button.
 4. Copy your **Access Key** and **Secret Access key** and store them in a secure place.
Next, you need to enable target models in **Amazon Bedrock** service itself in your **AWS account**.
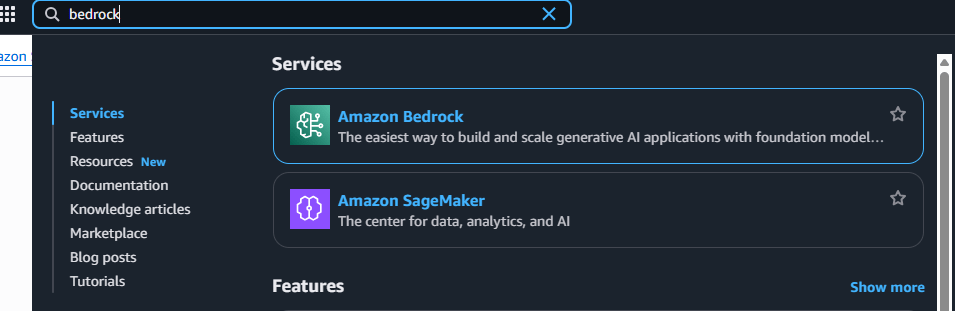
In the homepage of your **AWS Management Console** search for **Amazon Bedrock** and click on it.
4. Copy your **Access Key** and **Secret Access key** and store them in a secure place.
Next, you need to enable target models in **Amazon Bedrock** service itself in your **AWS account**.
In the homepage of your **AWS Management Console** search for **Amazon Bedrock** and click on it.
 And in your Amazon Bedrock page, on the right menu panel, at the bottom of the menu list under **Bedrock configurations** list, click on **Model Access**. tab. It will show all the models that are available to you in your target reion.
Request access to following models:
* Nova Premier
* Nova Pro
* Nova Lite
* Nova Micro
Please pay close attention to your `AWS Region` on the top right corner, all enabled models are region specific.
And in your Amazon Bedrock page, on the right menu panel, at the bottom of the menu list under **Bedrock configurations** list, click on **Model Access**. tab. It will show all the models that are available to you in your target reion.
Request access to following models:
* Nova Premier
* Nova Pro
* Nova Lite
* Nova Micro
Please pay close attention to your `AWS Region` on the top right corner, all enabled models are region specific.
 This concludes your Amazon Bedrock setup, you now have Nova models accessible in your selected **AWS Region**.
Next, go back to **Step 3** of **Extension Configuration** section above and continue.
You have completed the AWS IAM creation process.
## How to Use
Using Amazon Bedrock is an easy task. We have created a detailed intructions on how to use AI Models [here](/core/models), make sure that all steps above are completed first with Amazon Bedrock setup.
This concludes your Amazon Bedrock setup, you now have Nova models accessible in your selected **AWS Region**.
Next, go back to **Step 3** of **Extension Configuration** section above and continue.
You have completed the AWS IAM creation process.
## How to Use
Using Amazon Bedrock is an easy task. We have created a detailed intructions on how to use AI Models [here](/core/models), make sure that all steps above are completed first with Amazon Bedrock setup.