> ## Documentation Index
> Fetch the complete documentation index at: https://magicads.mintlify.site/llms.txt
> Use this file to discover all available pages before exploring further.
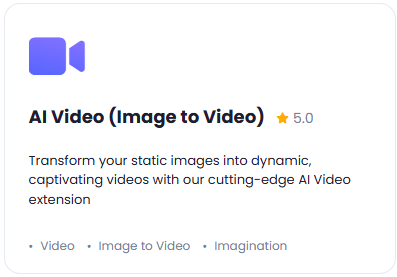
# AI Image to Video
> Transform your static images into dynamic, captivating videos with our cutting-edge AI Image to Video extension
This is a **Paid** extension that you need to first purchase via **Marketplace**
* Stable Diffusion - powered by **stability.ai**
* Kling 2.1 Master - powered by **fal.ai**
* Kling 2.1 Pro - powered by **fal.ai**
* Kling 2.1 Standard - powered by **fal.ai**
* Kling 1.6 Pro - powered by **fal.ai**
* Haiper 2.0 Video - powered by **fal.ai**
* Luma Dream Machine - powered by **fal.ai**
* Google Veo2 - powered by **fal.ai**
## Extension Configuration
To be able to use AI Video (Image to Video) feature, follow these steps to setup this extension.
Go to the **Marketplace** in **Admin Panel** and install **AI Video (Image to Video)** extension after your successful purchase of the extension.
 After installation is completed, go to **AI Settings** page in Admin Panel and click on **Extensions** tab there. Click on **AI Video (Image to Video)** there.
 Pleas note that that AI Image to Video extension uses 2 AI vendors to power image to video models: **Stability.ai** and **Fal.ai**. If you want to have access to all image to video models then we recommend including API keys of both vendors.
1. To setup **Fal.ai** - Go to Fal AI website, sign up with them and get your **Fal AI API Key** on your profile page after you successfully complete the registration process on their website.
Make sure to fill up your balance on your Fal AI account as they do not offer any free credits upon registration.
2. To setup **Stability.ai** - Go to Stability AI website, sign up with them and get your **Stability AI API Key** on your profile page after you successfully complete the registration process on their website.
Store your API key securely and never share it publicly. The API key provides direct access to your account.
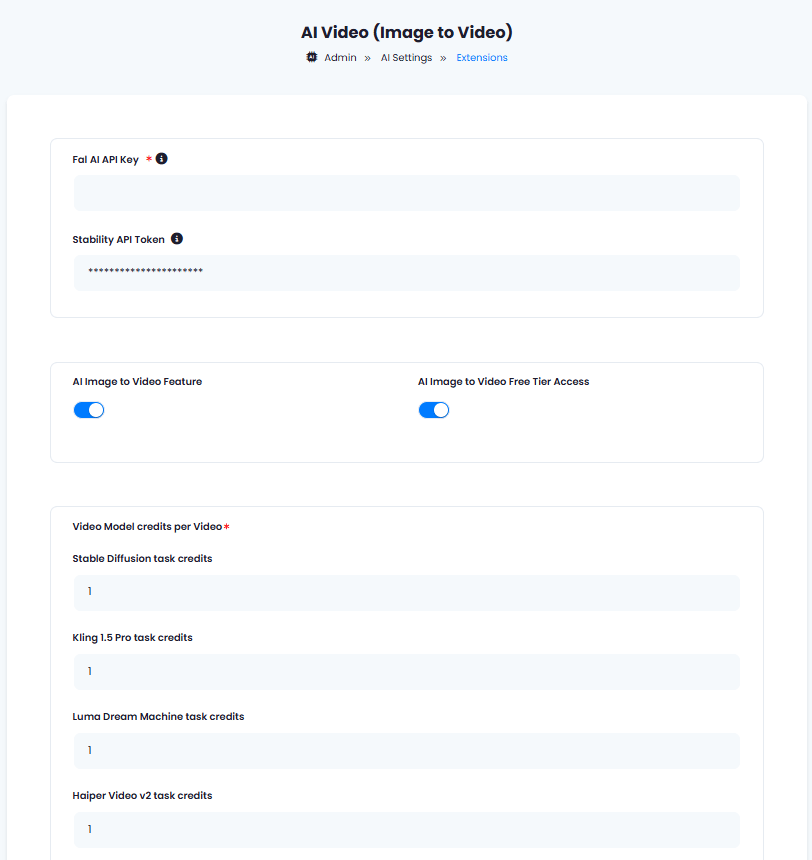
To control the settings of **AI Image to Video** exension, return to **AI Settings** page in Admin Panel and click on the **Extensions** tab, and select **AI Video (Image to Video)** extension.
1. Enter your **Fal AI API Key** in the input field if you want to use fal.ai image to video models.
2. Enter your **Stability API Key** in the input field if you want to use stability.ai image to video model.
3. Turn on the checkboxes for **AI Image to Video Feature** and **AI Image to Video Free Tier Access**
If you don't turn on AI Image to Video Free Tier Access, then users who did not subscribe to any subscription plan where you have AI Image to Video feature enabled, will not have any access to this feature
4. **Video Model credits per Video** section allows you set how many media credits each Image to Video model task will use for each video generation. Davinci AI give you full control on credit assignment per each media task.
5. After you are done with configuration, click the **Save** button.
Pleas note that that AI Image to Video extension uses 2 AI vendors to power image to video models: **Stability.ai** and **Fal.ai**. If you want to have access to all image to video models then we recommend including API keys of both vendors.
1. To setup **Fal.ai** - Go to Fal AI website, sign up with them and get your **Fal AI API Key** on your profile page after you successfully complete the registration process on their website.
Make sure to fill up your balance on your Fal AI account as they do not offer any free credits upon registration.
2. To setup **Stability.ai** - Go to Stability AI website, sign up with them and get your **Stability AI API Key** on your profile page after you successfully complete the registration process on their website.
Store your API key securely and never share it publicly. The API key provides direct access to your account.
To control the settings of **AI Image to Video** exension, return to **AI Settings** page in Admin Panel and click on the **Extensions** tab, and select **AI Video (Image to Video)** extension.
1. Enter your **Fal AI API Key** in the input field if you want to use fal.ai image to video models.
2. Enter your **Stability API Key** in the input field if you want to use stability.ai image to video model.
3. Turn on the checkboxes for **AI Image to Video Feature** and **AI Image to Video Free Tier Access**
If you don't turn on AI Image to Video Free Tier Access, then users who did not subscribe to any subscription plan where you have AI Image to Video feature enabled, will not have any access to this feature
4. **Video Model credits per Video** section allows you set how many media credits each Image to Video model task will use for each video generation. Davinci AI give you full control on credit assignment per each media task.
5. After you are done with configuration, click the **Save** button.
 You know have completed the AI Video (Text to Video) extension configuration. Proceed to the section below on how to use it.
You have successfully comleted the setup process of this extension.
## How to Use
To get a full details of each and every technical featuer of the Image to Video model, you can refer to the Fal AI Image to Video API Page and Stability AI Image to Video API Page
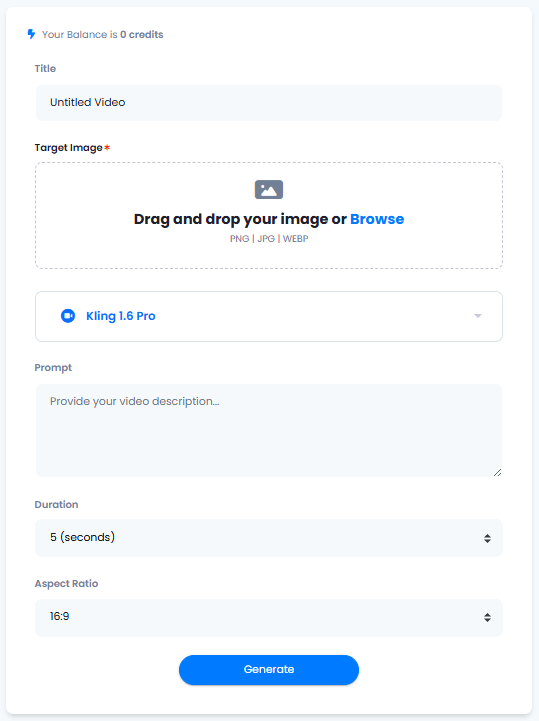
### Create Image to Video task
1. Go to AI Image to Video tab in the User panel
2. (Optional) Provide video title name as needed.
3. Upload your target image file, that will be converted to video. Supported image formats are: **PNG | JPG | WEBP**
4. Select your Image to Video task LLM, there are 5 different models available
Upon selecting your Text to Video LLM option, settings below will change dynamically and will be fully relevant only for the selected model
5. Depending on the Image to Video task you have selected, provide the information as needed such as:
* **Prompt** - What this video needs to be about
* **Duration** - Length of the final video, length are predefined by the video models, and not applicable to each and every model, which change dynamically based on the selected model
* **Aspect Ratio** - Video aspect ration of the final results, will change dynamically based on video models, and not applicable to each and every model
6. To learn more about each of the features there, please refer to the Fal AI Image to Video API Page and Stability AI Image to Video API Page
You know have completed the AI Video (Text to Video) extension configuration. Proceed to the section below on how to use it.
You have successfully comleted the setup process of this extension.
## How to Use
To get a full details of each and every technical featuer of the Image to Video model, you can refer to the Fal AI Image to Video API Page and Stability AI Image to Video API Page
### Create Image to Video task
1. Go to AI Image to Video tab in the User panel
2. (Optional) Provide video title name as needed.
3. Upload your target image file, that will be converted to video. Supported image formats are: **PNG | JPG | WEBP**
4. Select your Image to Video task LLM, there are 5 different models available
Upon selecting your Text to Video LLM option, settings below will change dynamically and will be fully relevant only for the selected model
5. Depending on the Image to Video task you have selected, provide the information as needed such as:
* **Prompt** - What this video needs to be about
* **Duration** - Length of the final video, length are predefined by the video models, and not applicable to each and every model, which change dynamically based on the selected model
* **Aspect Ratio** - Video aspect ration of the final results, will change dynamically based on video models, and not applicable to each and every model
6. To learn more about each of the features there, please refer to the Fal AI Image to Video API Page and Stability AI Image to Video API Page