> ## Documentation Index
> Fetch the complete documentation index at: https://magicads.mintlify.site/llms.txt
> Use this file to discover all available pages before exploring further.
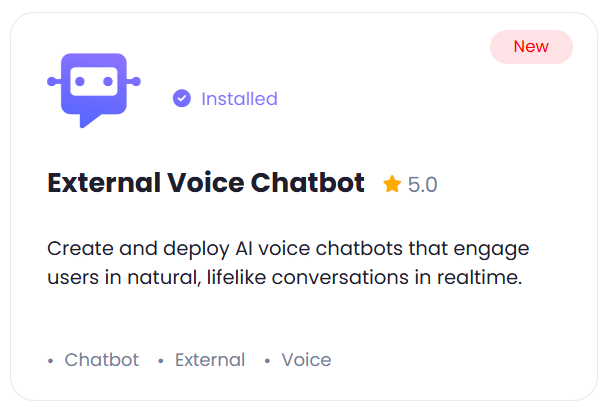
# External Voice Chatbot
> Allow end users to create, train, and embed voice chatbots directly onto their websites using Elevenlabs models with Davinci AI.
This is a **Paid** extension that you need to first purchase via **Marketplace**
## Introduction
Elevate User Engagement with **Customizable Voice Chatbots** Enable your clients to design, personalize, and deploy tailored external Voice Chatbots that align with their unique business needs. These sophisticated chatbots can be effortlessly integrated into websites, delivering a seamless and professional user experience. Fully customizable, these chatbots enhance customer interaction by facilitating real-time engagement, providing instant responses to queries, offering personalized recommendations, and optimizing the visitor journey.
## Key Features and Benefits:
* **Brand Alignment**: Clients can customize chatbot aesthetics, including colors, logos, and avatars, to ensure a consistent brand identity and a polished website presence.
* **Unlimited Creation**: Users can develop multiple chatbots tailored to distinct website sections or specific business goals, with no restrictions on quantity.
* **Adaptive Training**: Chatbots can be continuously trained to evolve with changing user demands, maintaining relevance and effectiveness.
* **Personalized Greetings**: Craft unique welcome messages to create an engaging and inviting experience for website visitors.
* **Insightful**: Access detailed chat histories to analyze user interactions, and refine customer engagement strategies.
- Set Voice Chatbot Name
- Set Chatbot Title
- Set Chatbot Instructions
- Custom Fallback Message
- Custom Greetings Message
- Custom Trigger Bubble Message
- Select Custom AI Avatars
- Set Widget Position
- Customize Header BG Color
- Customize Header Text Color
- Customize AI Box BG Color
- Customize AI Box Text Color
- Customize User Box BG Color
- Customize User Box Text Color
- Single Page URL training
- PDF files training
- Excel/CSV files training
- Text input training
- Q\&A input training
- More will be added soon...
* Elevenlabs
## Extension Configuration
Go to the **Marketplace** in **Admin Panel** and install **External Voice Chatbot** extension after successfully purchasing it first.
 After installation is completed, go to **AI Settings** page in Admin Panel and click on **Extensions** tab there. Click on **AI Voice Chatbot** there.
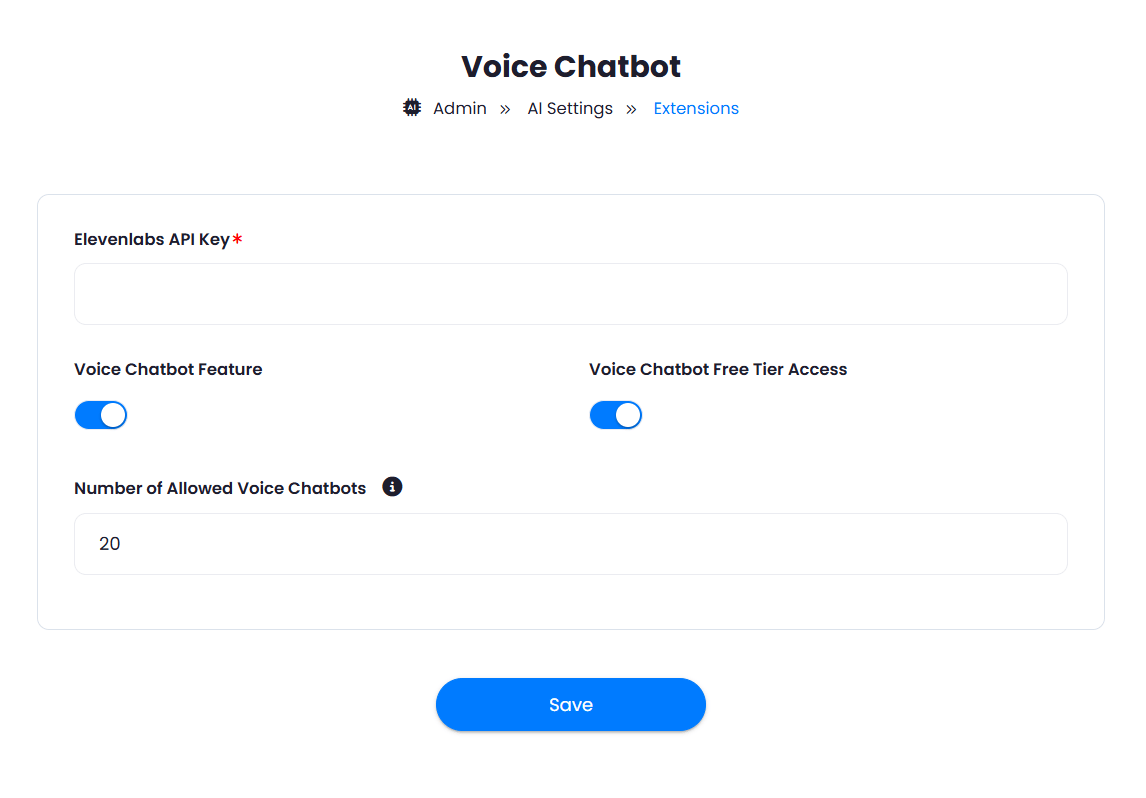
 To control the settings of **AI Voice Chatbot** exension, return to **AI Settings** page in Admin Panel and click on the **Extensions** tab, and select **AI Voice Chatbot** extension.
1. Turn on the checkboxes for **AI Voice Chatbot Feature** and **AI Voice Chatbot Free Tier Access**
If you don't turn on AI Voice Chatbot Free Tier Access, then users who did not subscribe to any subscription plan where you have External Chatbot feature enabled, will not have any access to this feature
2. Set **Number of Allowed Voice Chatbots** that users can create.
3. Include your **Elevenlabs API key**.
4. After you are done with configuration, click on the **Save** button.
To control the settings of **AI Voice Chatbot** exension, return to **AI Settings** page in Admin Panel and click on the **Extensions** tab, and select **AI Voice Chatbot** extension.
1. Turn on the checkboxes for **AI Voice Chatbot Feature** and **AI Voice Chatbot Free Tier Access**
If you don't turn on AI Voice Chatbot Free Tier Access, then users who did not subscribe to any subscription plan where you have External Chatbot feature enabled, will not have any access to this feature
2. Set **Number of Allowed Voice Chatbots** that users can create.
3. Include your **Elevenlabs API key**.
4. After you are done with configuration, click on the **Save** button.
 Congratulations! You now have completed the Voice Chatbot extension configuration. Proceed to the section below on how to use it.
## How to Use
Using External AI Voice Chatbot extension is very easy and straightforward. It gives you full flexibility on customizing your external chatbot to match the styles of the taget website where it will be running.
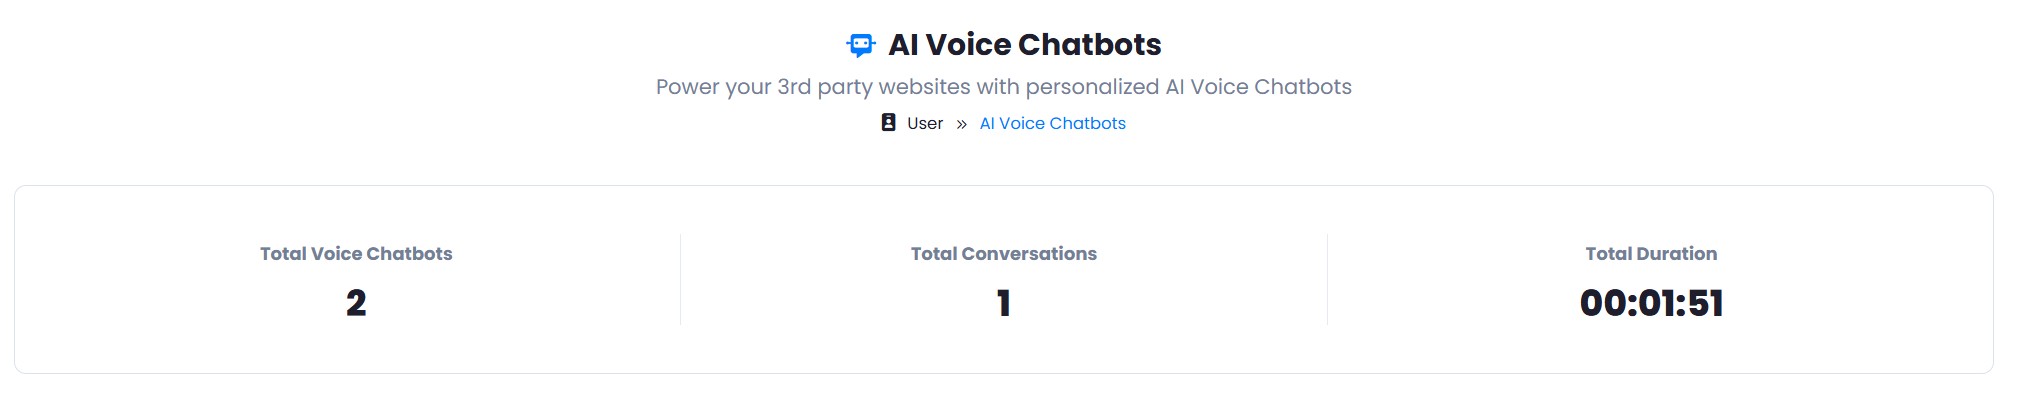
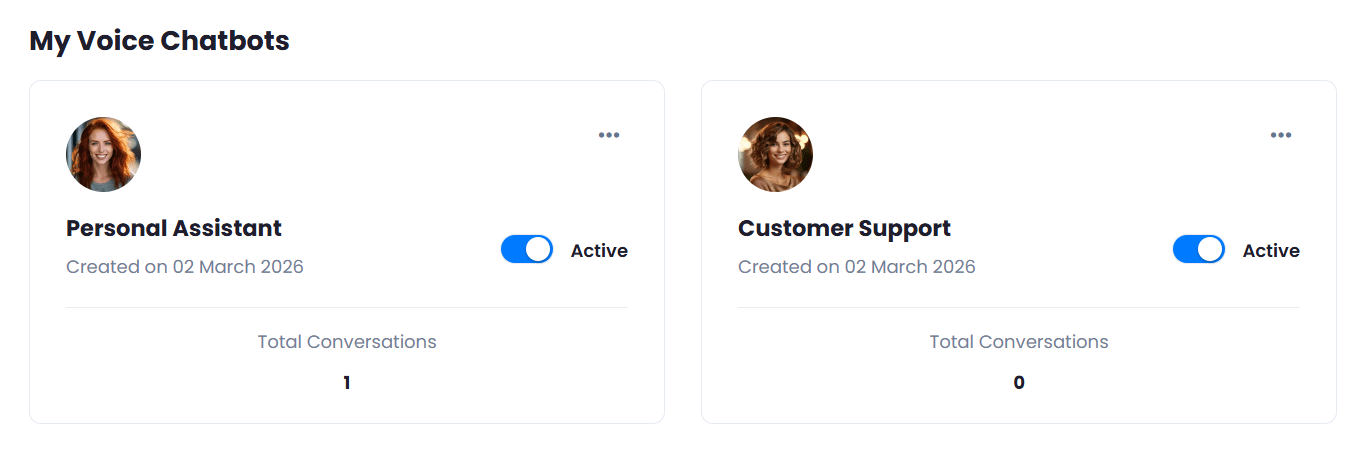
1. Go to **AI Voice Chatbots** in User panel.
2. First thing you will see there is the **General Statistics** information.
Congratulations! You now have completed the Voice Chatbot extension configuration. Proceed to the section below on how to use it.
## How to Use
Using External AI Voice Chatbot extension is very easy and straightforward. It gives you full flexibility on customizing your external chatbot to match the styles of the taget website where it will be running.
1. Go to **AI Voice Chatbots** in User panel.
2. First thing you will see there is the **General Statistics** information.
 3. Down below you will see **Create New Voice Chatbot** and **View Conversation History** buttons.
 4. And finally you will see all the chatbots that you have created. You can create up to the allowed amount, but you can always delete older ones to create new or subscribe to a plan with higher number of allowed external chatbots.
 ## Create Chatbot
To create your chatbot click on the **Create New Voice Chatbot** button.
### Step 1. Configure Chatbot
Under the first configure step, you can configure everything related to the text, instructions, and other settings. Below is the explanation of all feature. You also have live preview for each step on the right side.
## Create Chatbot
To create your chatbot click on the **Create New Voice Chatbot** button.
### Step 1. Configure Chatbot
Under the first configure step, you can configure everything related to the text, instructions, and other settings. Below is the explanation of all feature. You also have live preview for each step on the right side.
 ### Step 2. Customize Chatbot
Under the second step, you can fully customize the styling of the chatbot and adjust it as needed.
### Step 2. Customize Chatbot
Under the second step, you can fully customize the styling of the chatbot and adjust it as needed.
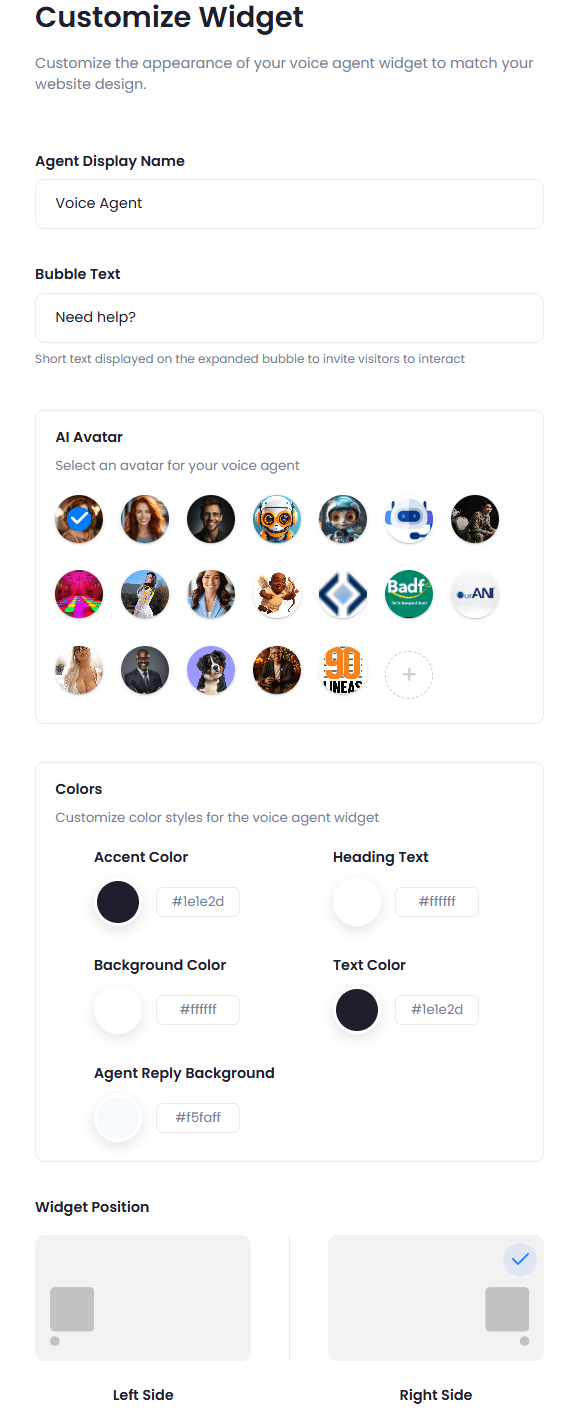 Once you are done with customizing the styles, click on **Next** button.
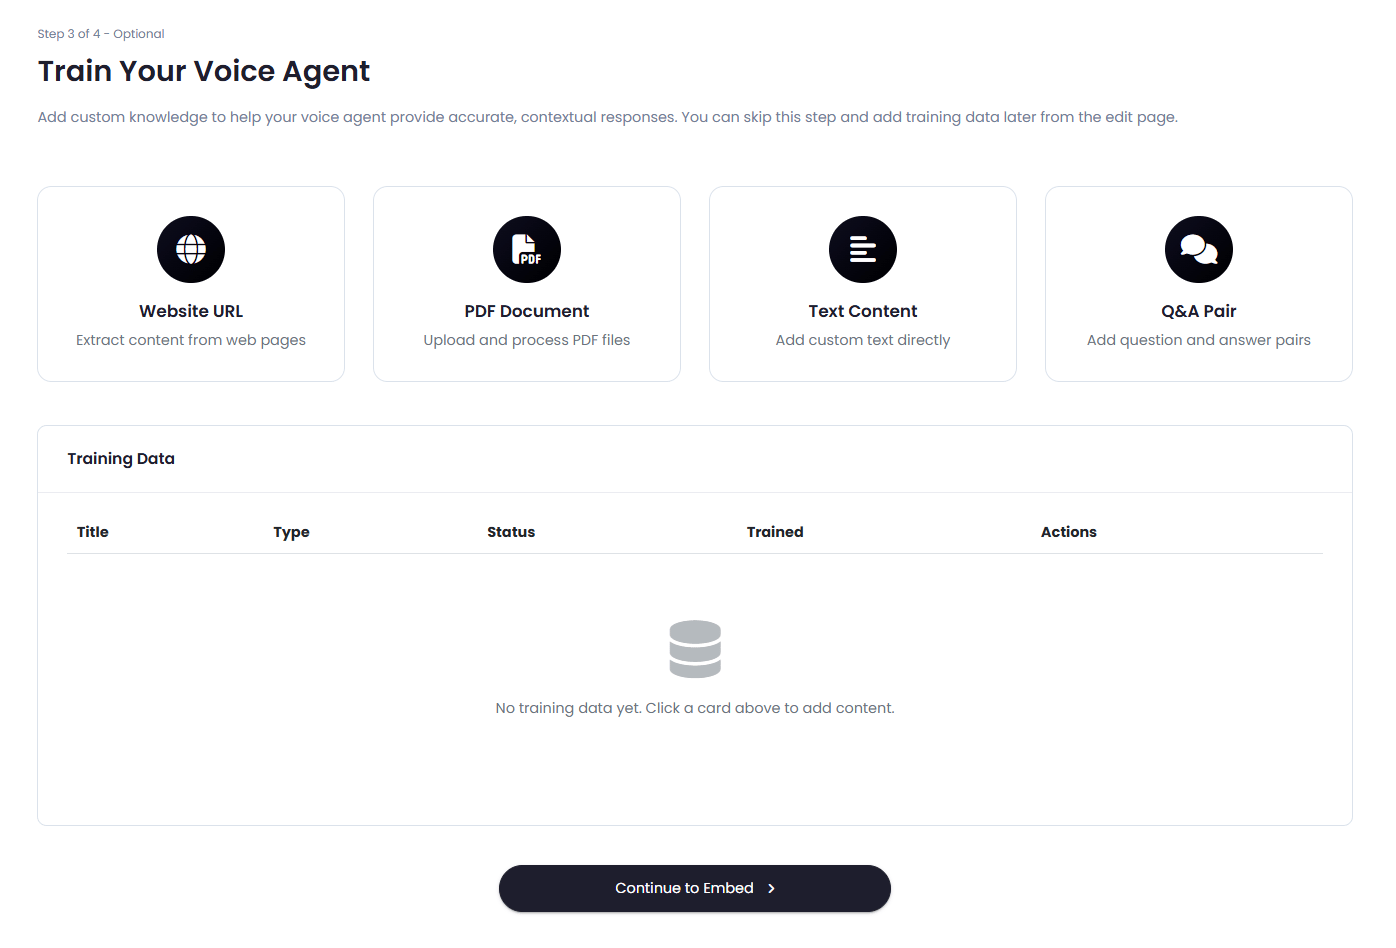
It is after Customization step, the chatbot is actually created. You can skip the Training section if no training is planned.
### Step 3. Training - Add a knowledge Base
You have 4 options to train the chatbot:
* URL
* PDF files
* Text inputs
* Q\&A inputs
Once you are done with customizing the styles, click on **Next** button.
It is after Customization step, the chatbot is actually created. You can skip the Training section if no training is planned.
### Step 3. Training - Add a knowledge Base
You have 4 options to train the chatbot:
* URL
* PDF files
* Text inputs
* Q\&A inputs
 ### Step 4. Embed and integrate
After you are done with creating and training your chatbot, to embed the chatbot into your website, you can use the provided code snippet.
### Step 4. Embed and integrate
After you are done with creating and training your chatbot, to embed the chatbot into your website, you can use the provided code snippet.
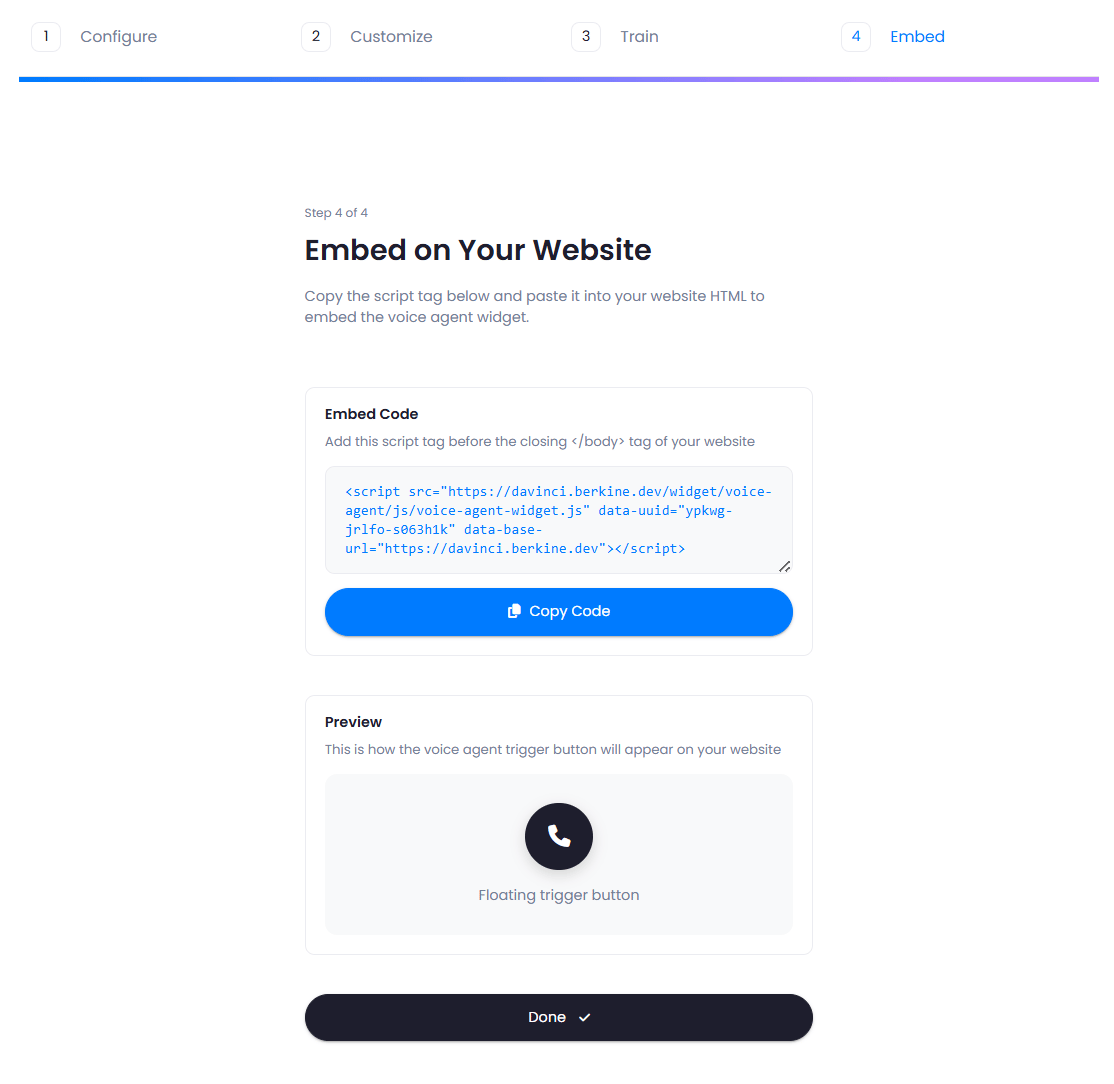 Include it in right before the `` in your target website and you will automatically see the chatbot available on your website.
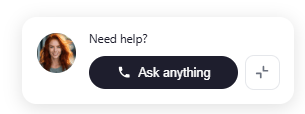
## Voice Chatbot Look
Once you have embedded your newly created Voice Chatbot, it will appear in the side of the scrip that you selected during chatbot creation.
Include it in right before the `` in your target website and you will automatically see the chatbot available on your website.
## Voice Chatbot Look
Once you have embedded your newly created Voice Chatbot, it will appear in the side of the scrip that you selected during chatbot creation.
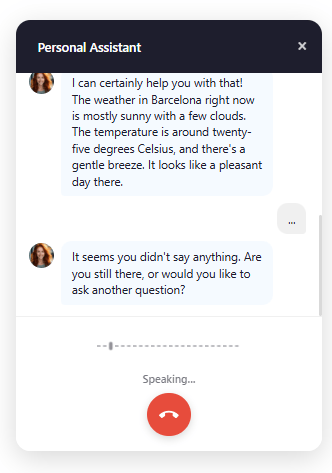
 And after clicking on the call button, it will start the window and you can speak with the Voice Chatbot agent directly.
 Congratulations! You have completed the chatbot creation and training.