> ## Documentation Index
> Fetch the complete documentation index at: https://magicads.mintlify.site/llms.txt
> Use this file to discover all available pages before exploring further.
# WordPress Integration
> Take advantage of Davinci AI Powerful AI tools to generate posts for your Wordpress websites.
This is a **Paid** extension that you need to first purchase via **Marketplace**
## Introduction
Davinci AI's WordPress Extension allows you to gerenate varios posts with the help of AI and post them instantly on any of your connected WordPress accounts, or schedule them to be posted at a later time.
### WordPress Account Setup
To configure you WordPress account, follow these steps listed below:
As Wordpress integration is a user based feature, that is each user needs to connect their WP accounts to leverage this extension.
Log in to your WordPress website's **admin dashboard** using your credentials.
**Disable 2FA** in case if you have turned it on in your settigs.
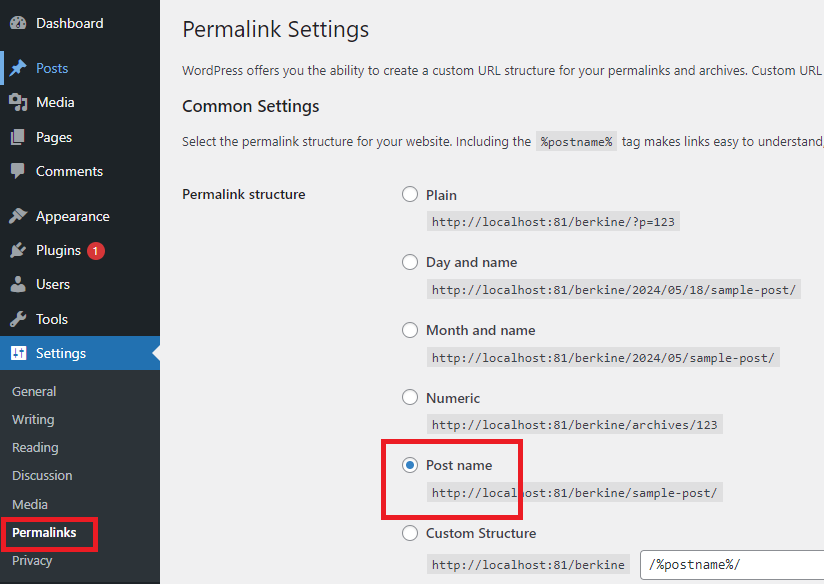
In your WordPress dashboard, go to **Settings** -> **Permalinks** page and select postname.
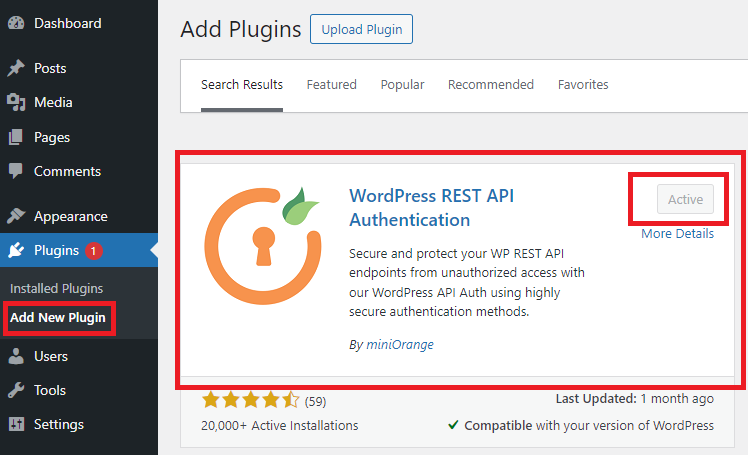
 Next, go to **Plugins** -> **Add New Plugin** and install **WordPress REST API Authentication**, make sure that after installation it is **activated**.
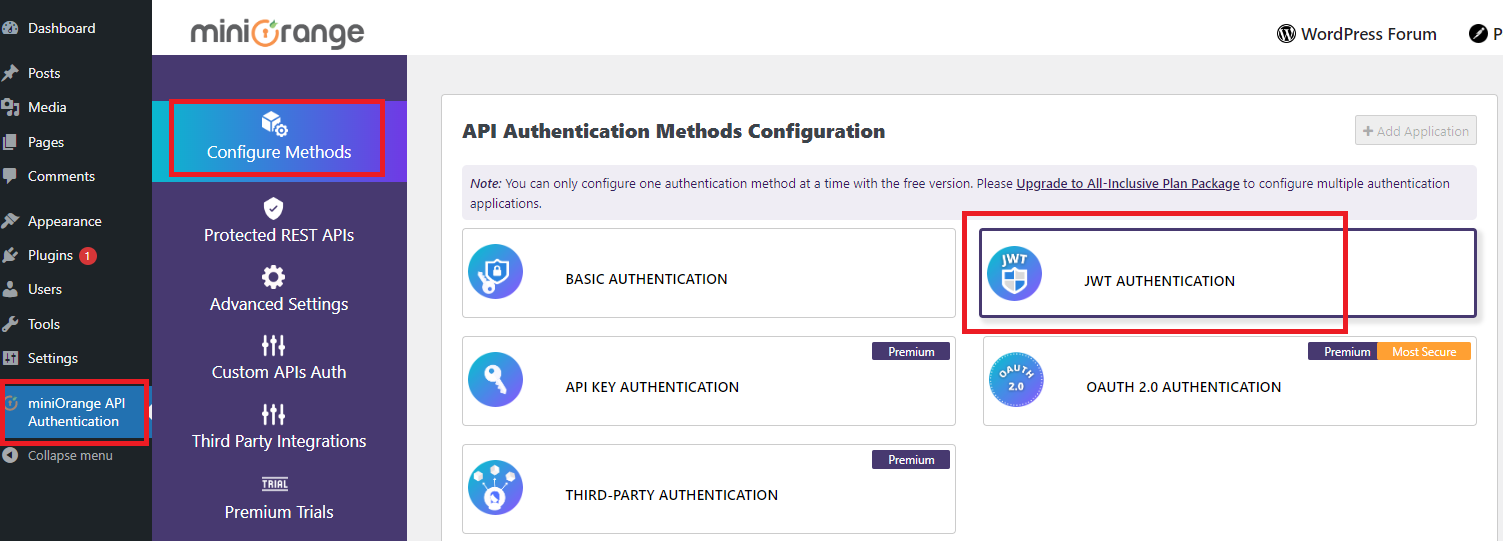
 Once the installation is complete click on **miniOrange API Authentication** and click on **JWT Authentication** as shown in the image
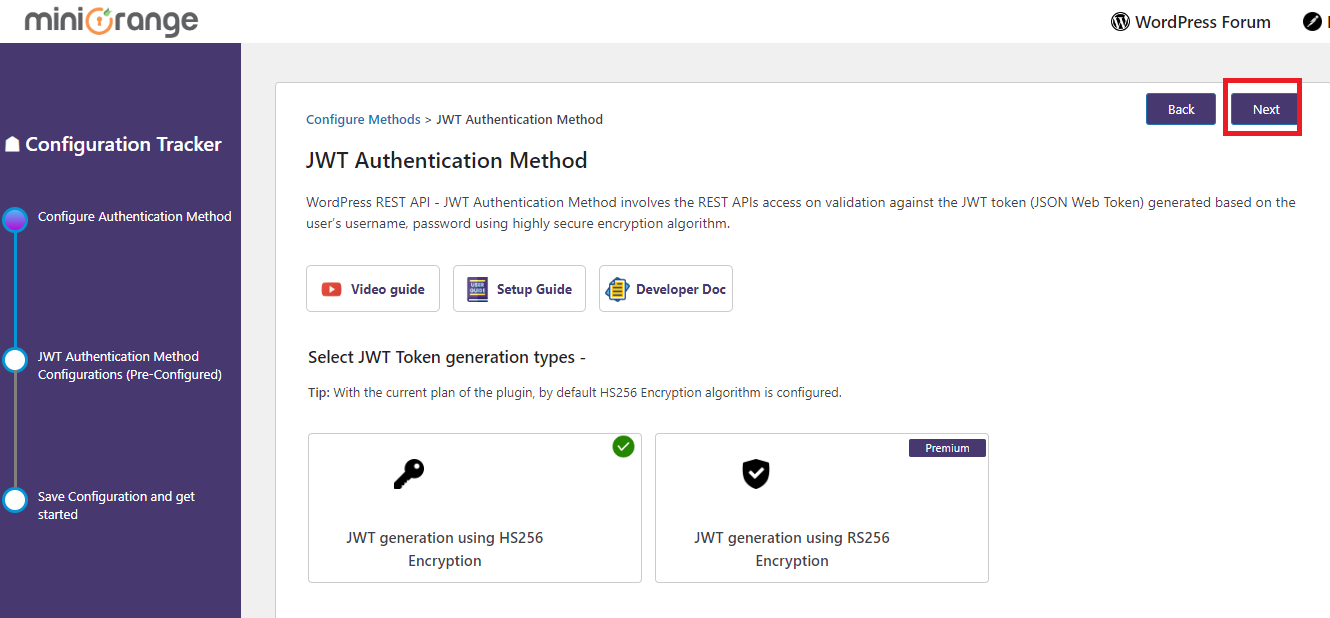
 Click on **Next** button as shown in the image.
 Click on **Finish** button as shown in the image.
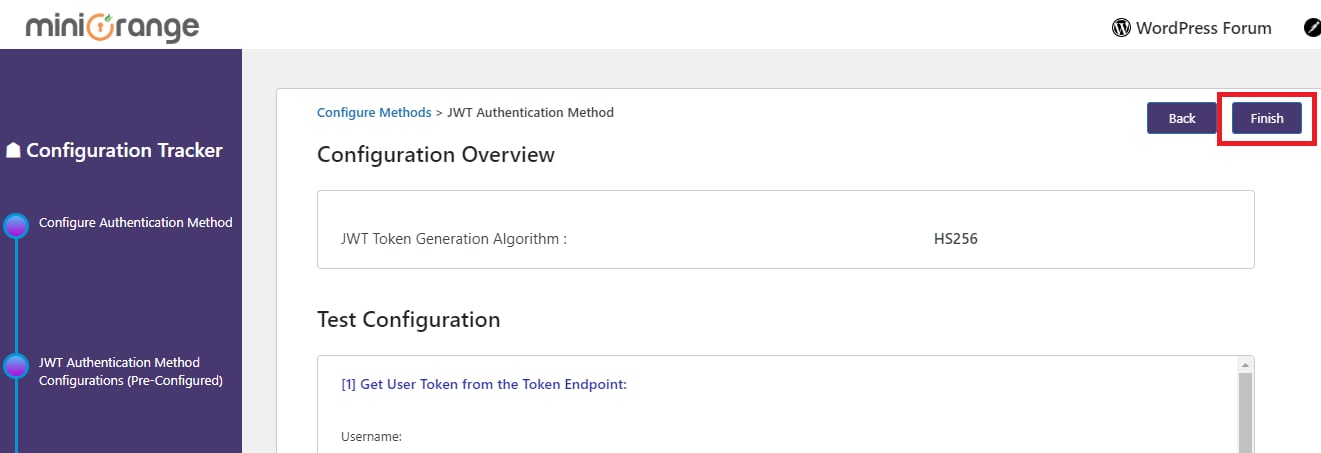 You have completed WordPress Account setup
### WordPress Extension Configuration
To configure your WordPress Extension, follow these steps listed below:
Go to the **Marketplace** in **Admin Panel** and install **WordPress Integration** extension.
You have completed WordPress Account setup
### WordPress Extension Configuration
To configure your WordPress Extension, follow these steps listed below:
Go to the **Marketplace** in **Admin Panel** and install **WordPress Integration** extension.
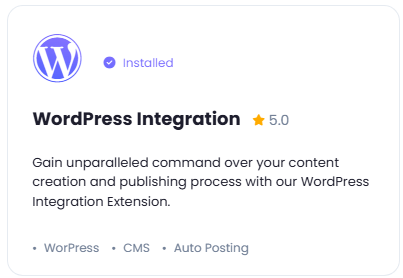 After installation is completed, go to **AI Settings** page in Admin Panel and click on **Extensions** tab there. Click on **Wordpress Integration** there.
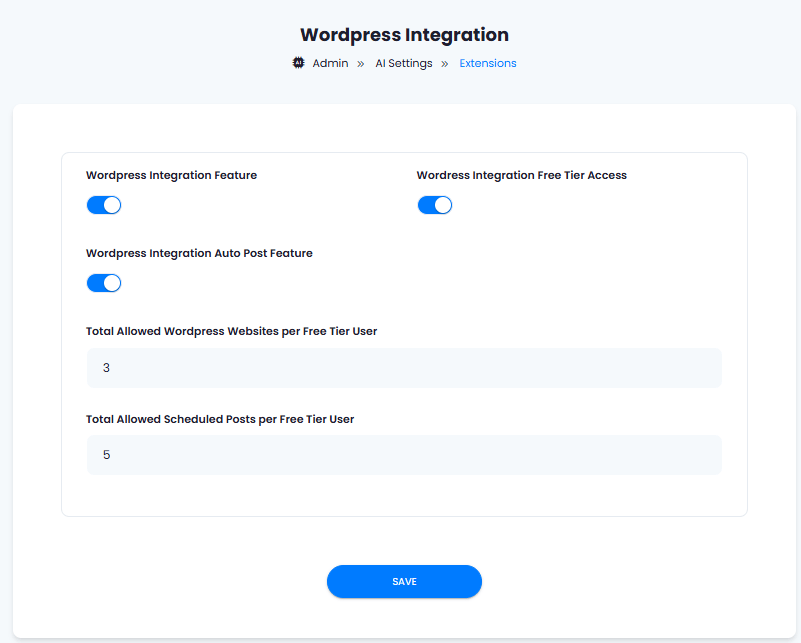
 1. Turn on the checkboxes for **Wodpress Integration Feature** and **Wodpress Integration Free Tier Access**
If you don't turn on Wordpress Integration Free Tier Access, then users who did not subscribe to any subscription plan where you have Wordpress Integration feature enabled, will not have any access to this feature
2. If you want all your users to be able to schedule posts, then turn on **Wodpress Integration Auto Post Feature** checkbox.
3. Under **Total Allowed Wordpress Websites per Free Tier User** and **Total Allowed Scheduled Posts per Free Tier User** input fields, you can control how many Wordpress websites your free tiers users can connect and how many posts they can schedule in total.
4. After you are done with setup click on **Save** button.
1. Turn on the checkboxes for **Wodpress Integration Feature** and **Wodpress Integration Free Tier Access**
If you don't turn on Wordpress Integration Free Tier Access, then users who did not subscribe to any subscription plan where you have Wordpress Integration feature enabled, will not have any access to this feature
2. If you want all your users to be able to schedule posts, then turn on **Wodpress Integration Auto Post Feature** checkbox.
3. Under **Total Allowed Wordpress Websites per Free Tier User** and **Total Allowed Scheduled Posts per Free Tier User** input fields, you can control how many Wordpress websites your free tiers users can connect and how many posts they can schedule in total.
4. After you are done with setup click on **Save** button.
 As the Wordpress Integation is part of the main **Integration** feature of Davinci AI, you need to enable this main **Integration** featue as well.
For that, go to **AI Settings** page in **Admin Panel**
1. To make sure that **Integration** feature is enabled for all users, under **General AI Settings** tab -> **AI Features Control (For All Groups)** section, turn on the **Integration Feature (For All Groups)** checkbox and click on **Save** button.
2. As Davinc AI provides detailed granular control of features between subscribers and free tier users, you can separately control settings for free tiers users. To make sure that the Free Tier users also can use the **Integration** feature, under **Free Trial Features** tab -> **AI Features Control (For Non-Subscribers)** section, turn on the **Integration Feature Access (For Non-Subscribers)** checkbox and click on the **Save** button.
You have completed WordPress Extension configuration
### How to Add Wordpress Website
After you are done with previous configurations, it is time to add your wordpress websites in the Integration feature, follow the steps listed below:
In the **User Panel** in the sidepanel menu section, click on the **Integration** feature.
As the Wordpress Integation is part of the main **Integration** feature of Davinci AI, you need to enable this main **Integration** featue as well.
For that, go to **AI Settings** page in **Admin Panel**
1. To make sure that **Integration** feature is enabled for all users, under **General AI Settings** tab -> **AI Features Control (For All Groups)** section, turn on the **Integration Feature (For All Groups)** checkbox and click on **Save** button.
2. As Davinc AI provides detailed granular control of features between subscribers and free tier users, you can separately control settings for free tiers users. To make sure that the Free Tier users also can use the **Integration** feature, under **Free Trial Features** tab -> **AI Features Control (For Non-Subscribers)** section, turn on the **Integration Feature Access (For Non-Subscribers)** checkbox and click on the **Save** button.
You have completed WordPress Extension configuration
### How to Add Wordpress Website
After you are done with previous configurations, it is time to add your wordpress websites in the Integration feature, follow the steps listed below:
In the **User Panel** in the sidepanel menu section, click on the **Integration** feature.
 Click on the **Manage** button on the **Wordpress** integration there.
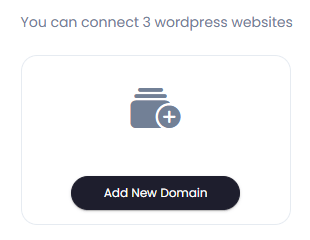
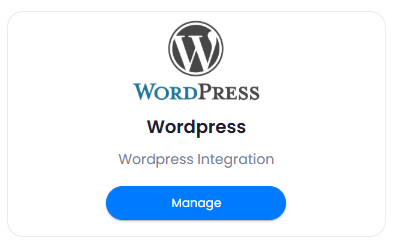 Now you can start adding your Wordpress domain. Note that you can add domains up to the value specified there. Click on the **Add New Domain** button.
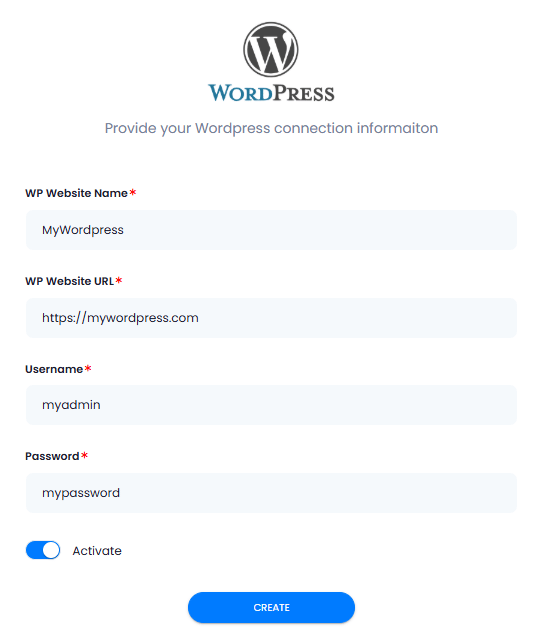
 Provide your Wordpress connection information, make sure that this Wordpress domain was properly configured as was shown above.
* Provide **WP Website Name**, this will allow you to easily identify it among others later
* Provide **WP Website URL**, make sure that it does not end with '**/**' sign at the end
* Provide your Wordpress **Admin Username**
* Provide your Wordpress **Admin Password**
* Turn on the **Activate** checkbox
After you have provided all information, click on the **Create** button, it will process the connection and if all your settings are correct, it will genreate a secure **connection token** behind the scenes and will store it with your WP credentials that you provided.
Provide your Wordpress connection information, make sure that this Wordpress domain was properly configured as was shown above.
* Provide **WP Website Name**, this will allow you to easily identify it among others later
* Provide **WP Website URL**, make sure that it does not end with '**/**' sign at the end
* Provide your Wordpress **Admin Username**
* Provide your Wordpress **Admin Password**
* Turn on the **Activate** checkbox
After you have provided all information, click on the **Create** button, it will process the connection and if all your settings are correct, it will genreate a secure **connection token** behind the scenes and will store it with your WP credentials that you provided.
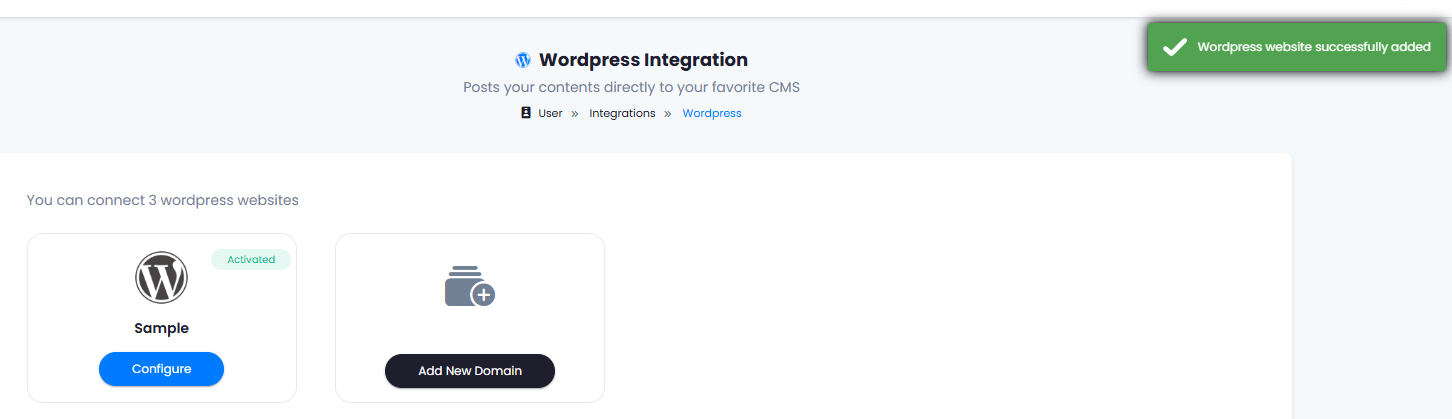
 When a Wordpress domain is successfully connected, you will see a success message, and your new domain appears in the list as well.
 You have completed adding Wordpress domain
### How to Use
After you have configured everything, it is now time to start posting your AI generated content to your Wordpress domain.
* AI Writer
* Documents Result
Follow these steps to post or schedule a post to your Wordpress domain:
Go to **AI Writer** feature in the **User Panel**, select any template as you prefer.
On the right side above the tools, you will see a new **Publish** button appear, click on it and select **Publish to Wordpress** option.
Make sure to first generate a content before publishing anything to Wordress
You have completed adding Wordpress domain
### How to Use
After you have configured everything, it is now time to start posting your AI generated content to your Wordpress domain.
* AI Writer
* Documents Result
Follow these steps to post or schedule a post to your Wordpress domain:
Go to **AI Writer** feature in the **User Panel**, select any template as you prefer.
On the right side above the tools, you will see a new **Publish** button appear, click on it and select **Publish to Wordpress** option.
Make sure to first generate a content before publishing anything to Wordress
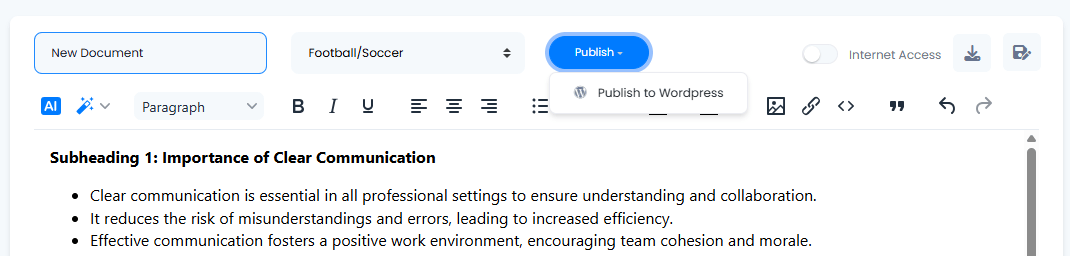 This will redirect you to a seperate **Publish to Wordpress** page along with the generated content.
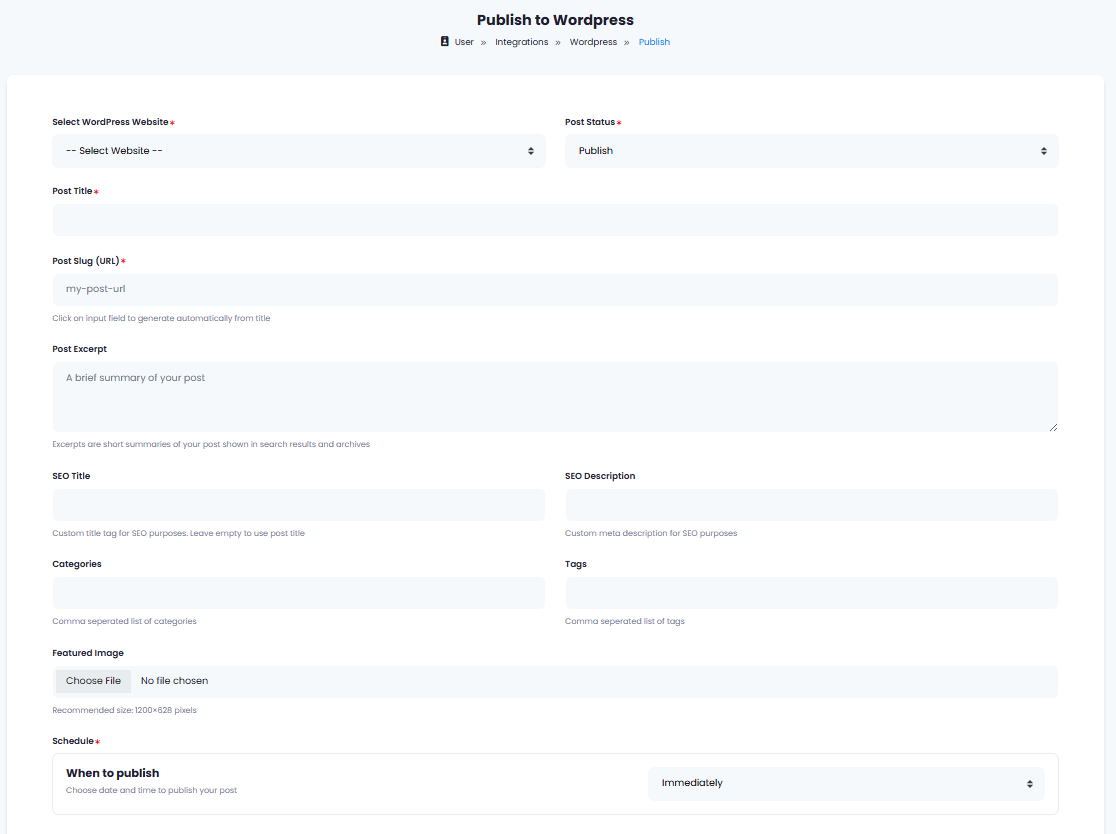 Fill in the fields as needed, the fields marked with red `*` symbol are **required** fields
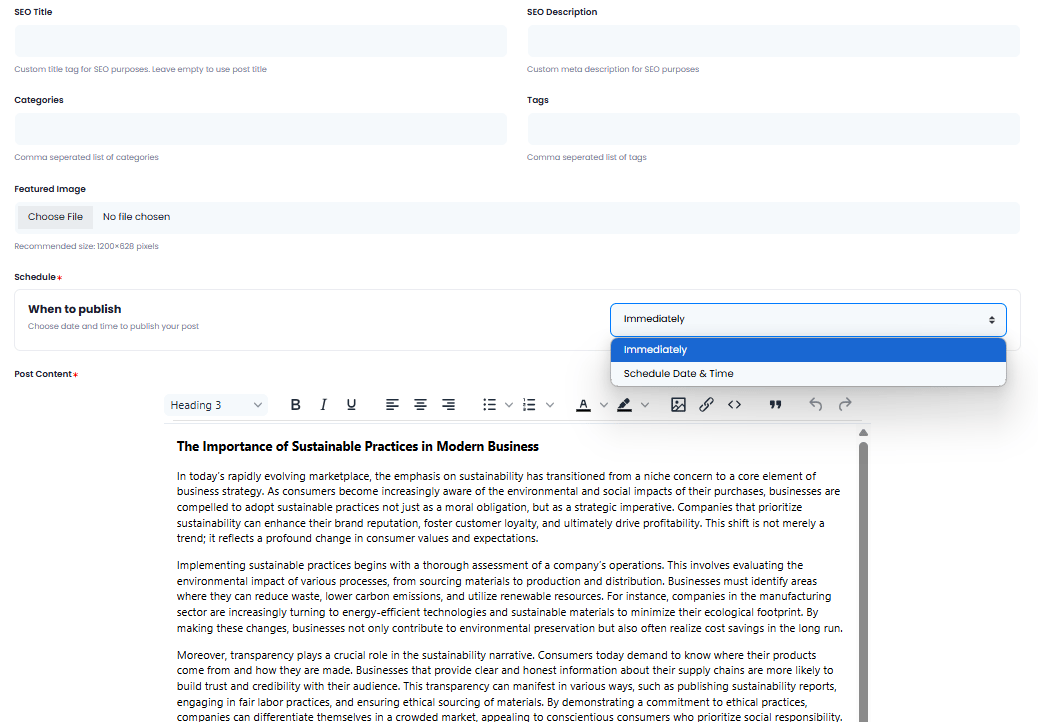
For posting your content to your Wordpress website, you can either select **Immediately**, or **Schedule Date & Time** to post it at a specific day and time.
Fill in the fields as needed, the fields marked with red `*` symbol are **required** fields
For posting your content to your Wordpress website, you can either select **Immediately**, or **Schedule Date & Time** to post it at a specific day and time.
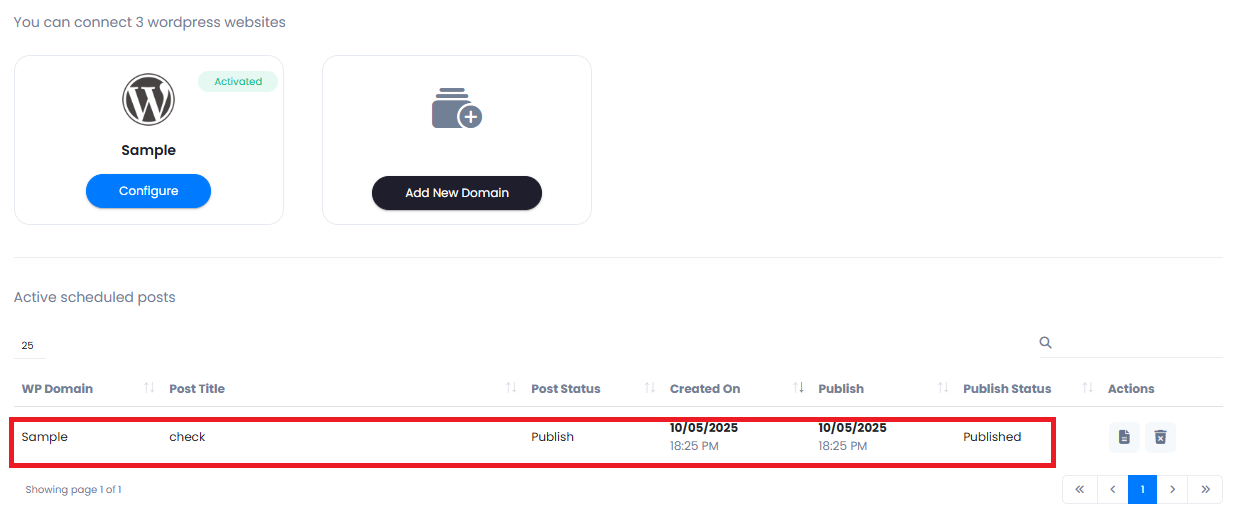
 All posted and scheduled posts are listed in your main Wordpress page under Integration feature.
 And you can see them in your Wordpress account as successfully published posts.
 You have completed publishing a post with Wordpress Extension