> ## Documentation Index
> Fetch the complete documentation index at: https://magicads.mintlify.site/llms.txt
> Use this file to discover all available pages before exploring further.
# AWS TTS Integration
> Enhance your Davinci AI platform with Amazon Polly Text to Speech capabilities. This guide walks you through setting up and leveraging Amazon Polly text to speech feature.
This tutorial is for AI Voiceover feature where AWS is used to convert Text to Speech
## Introduction
Davinci AI’s AWS TTS integration unlocks advanced text to speech capabilities for your platform. With access to various languages and voices that AWS supports, you can let your users use them at the AI Voiceover service.
## AWS Account Creation
To be able to use your **AWS Text to Speech** with **AI Voiceover** feature, follow these steps to setup your AWS account.
If you don’t have an AWS account, [sign up here](https://aws.amazon.com/)
If you need help during registration with AWS, follow this short [how to create an AWS account](https://aws.amazon.com/resources/create-account/) intructions.
Afterwards, make sure you are logged in either as root admin or with IAM user that has admin privileges.
You have completed the AWS Account creation process, follow to the next intructions listed below.
## AWS IAM User Creation
By default all access to IAM users are denied, except for the root user. Make sure to keep your root user credentials in a secure place, you don't need them for Davinci AI.
Sign in to the [AWS Management Console](https://console.aws.amazon.com/console/) and open the [IAM](https://console.aws.amazon.com/iam/) console.
Or simply search for IAM service once you are logged in
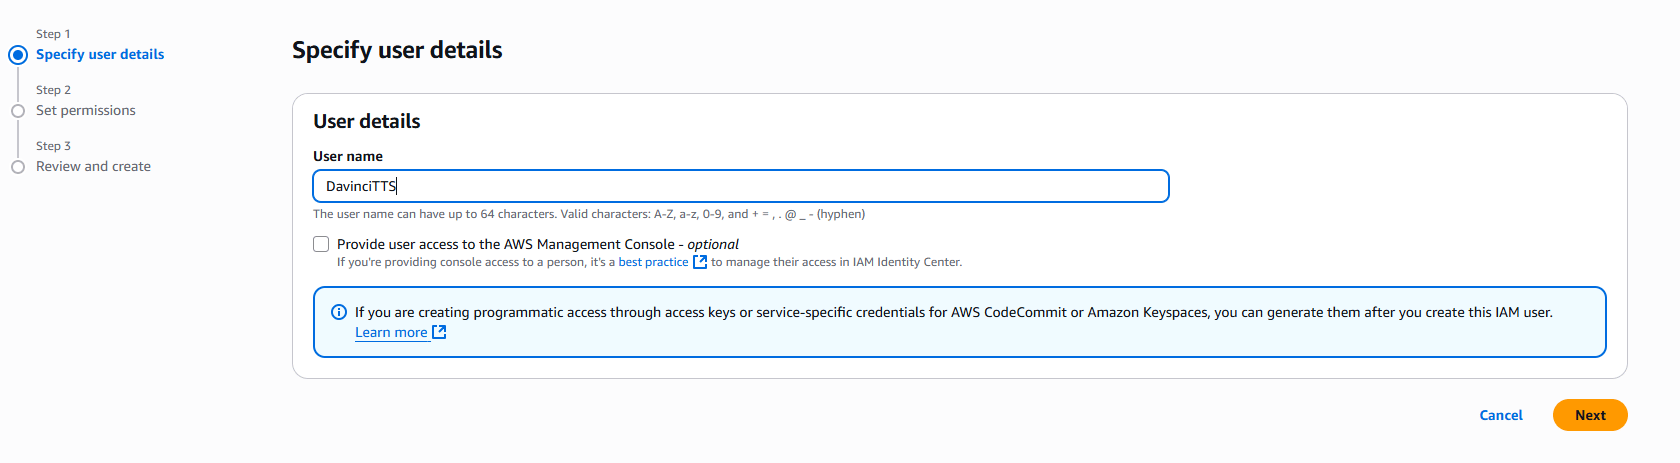
Once you are at the IAM service page, in the left navigation pane, choose **Access management** -> **Users** and then click on **Create User** button.
1. Provide **User name** as needed, and click on **Next** button
 2. On the **Set permissions** page, specify how you want to assign permissions to this set of new users. Choose **Attach policies directly option**. It will show you all the availalbe policies.
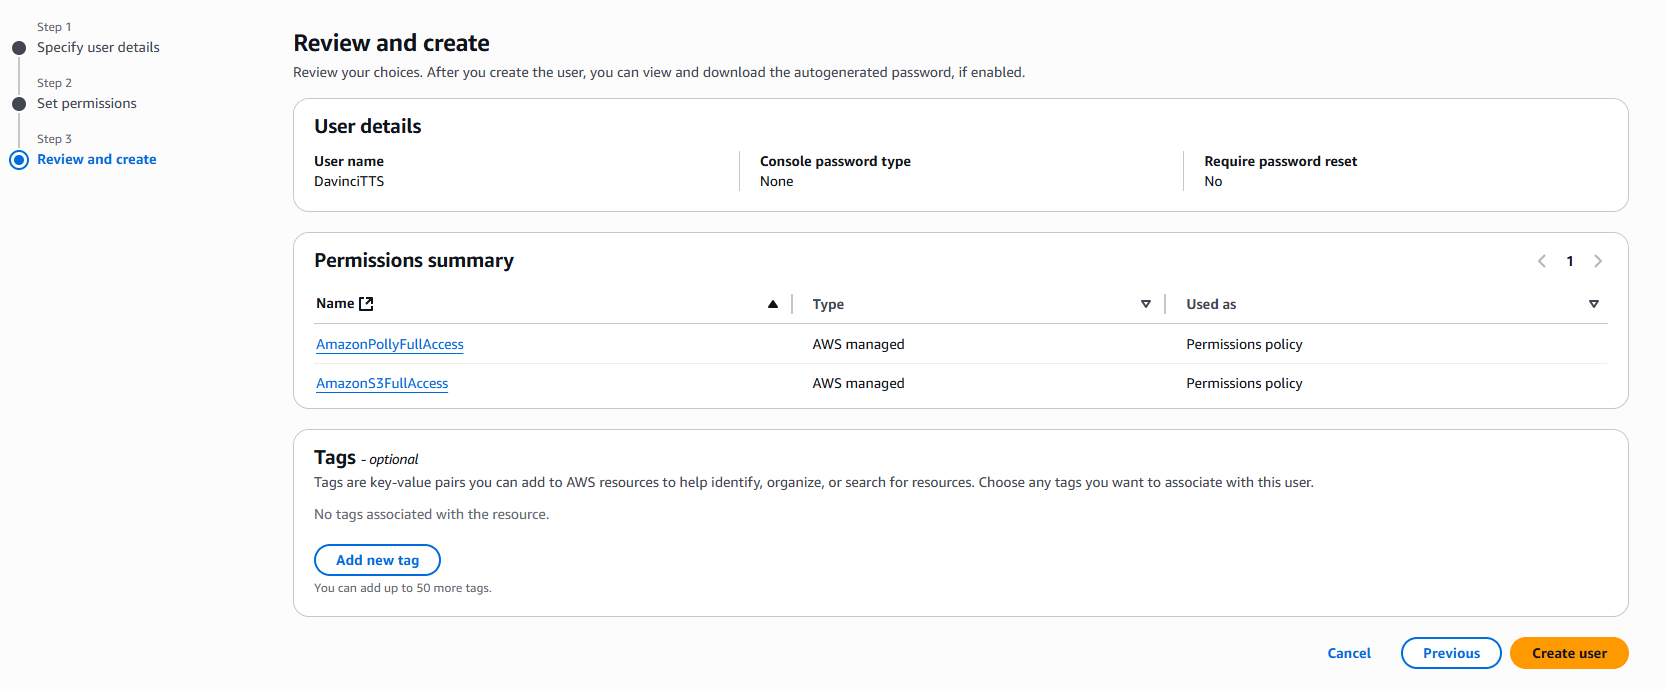
Select and add following 2 policies:
* **AmazonS3FullAccess**
* **AmazonPollyFullAccess**
Click on **Next** button afterwards
3. On the **Review and create** step, you should see following policies being added.
Click on **Create User** button.
 Once you have created a new IAM user, he will be available at the **Users** list. Click on your newly created user. You will be shown full details of that newly created user. Next:
1. Select the **Security credentials** tab
2. And click on **Create access key** button
Once you have created a new IAM user, he will be available at the **Users** list. Click on your newly created user. You will be shown full details of that newly created user. Next:
1. Select the **Security credentials** tab
2. And click on **Create access key** button
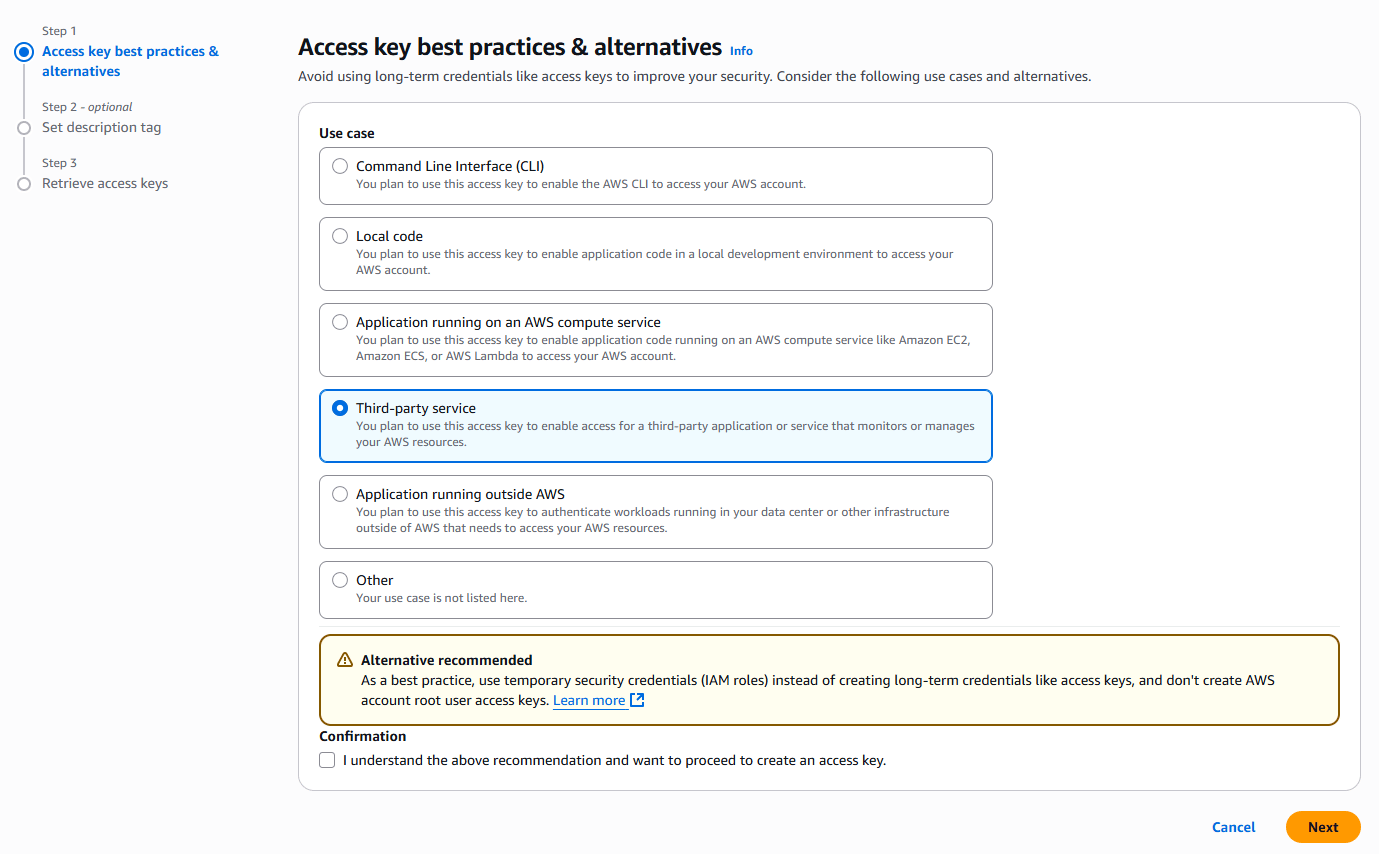
 3. Select **Third-party service** from the list and click on **Next** button.
 4. Copy your **Access Key** and **Secret Access key** and store them in a secure place.
Next, go to the **Admin Panel** -> **AI Settings** -> **AI API Keys** page and select **AWS** from the list
4. Copy your **Access Key** and **Secret Access key** and store them in a secure place.
Next, go to the **Admin Panel** -> **AI Settings** -> **AI API Keys** page and select **AWS** from the list
 Include your **Access Key** and **Secret Access Key** that you copied earlier and select a target **AWS region**.
Make sure to turn on **Activate AWS Standard voices** and **Activate AWS Neural voices** checkboxes.
Note that Amazon Polly is not available in every region, especially their `Neural` voices, double check AWS documentations to make sure that Amazon Polly Neural voices are indeed available in your target region that you want to use.
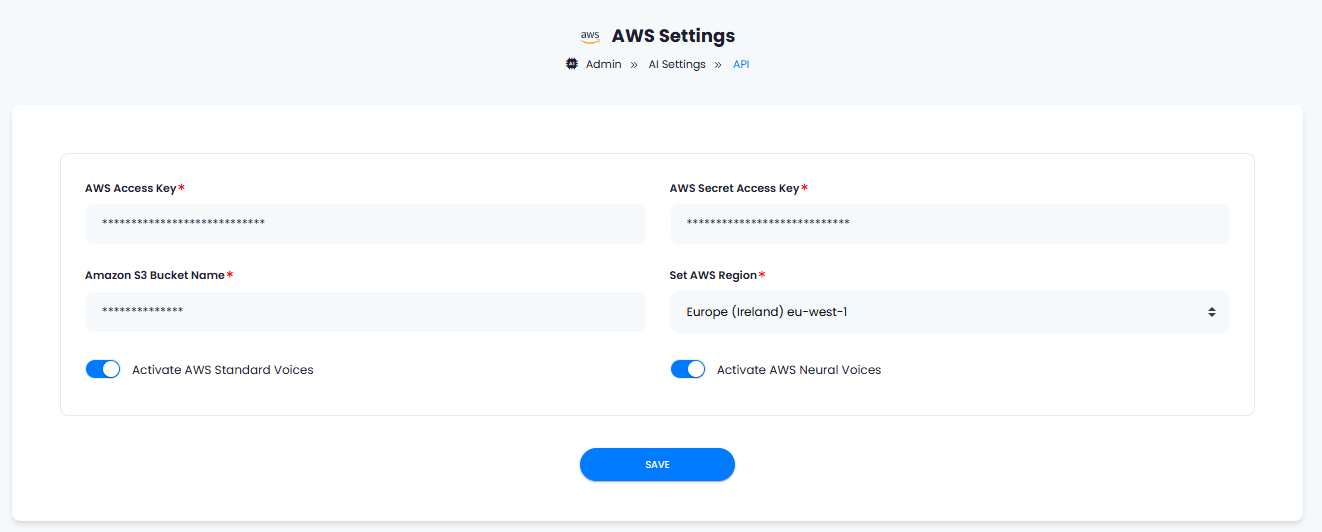 After you are done with configuration, click on the **Save** button.
You have completed the AWS IAM creation process, follow to the next intructions listed below.
You have successfully comleted the setup AWS for AI Voiceover feature.
After you are done with configuration, click on the **Save** button.
You have completed the AWS IAM creation process, follow to the next intructions listed below.
You have successfully comleted the setup AWS for AI Voiceover feature.