> ## Documentation Index
> Fetch the complete documentation index at: https://magicads.mintlify.site/llms.txt
> Use this file to discover all available pages before exploring further.
# Azure Integration
> Enhance your Davinci AI platform with advanced text-to-speech capabilities of Azure. This guide walks you through setting up and leveraging powerful voice generation feature of Microsoft Azure.
## Introduction
Davinci AI’s Azure integration unlocks a world of AI-powered voice capabilities for your platform with hundreds of supported languages and dialects and several hundreds of Neural voices in various combinations.
## Connect Azure Account
To be able to use your Azure API for **AI Voiceover** feature, follow these steps to setup integration.
Go to the [Azure home](https://azure.microsoft.com/en-us/) page.
Create new account and afterwards sigin into your **Azure Portal** under your Profile on the top right corner.
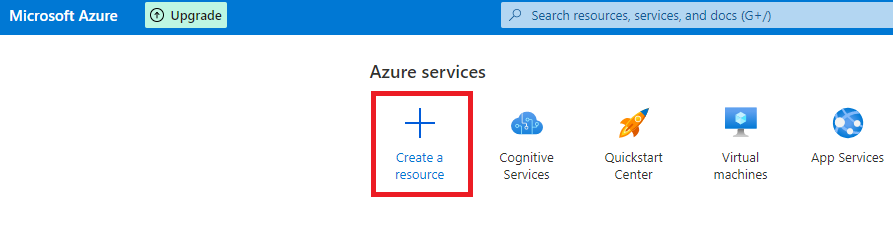
Click on **Create a resource**.
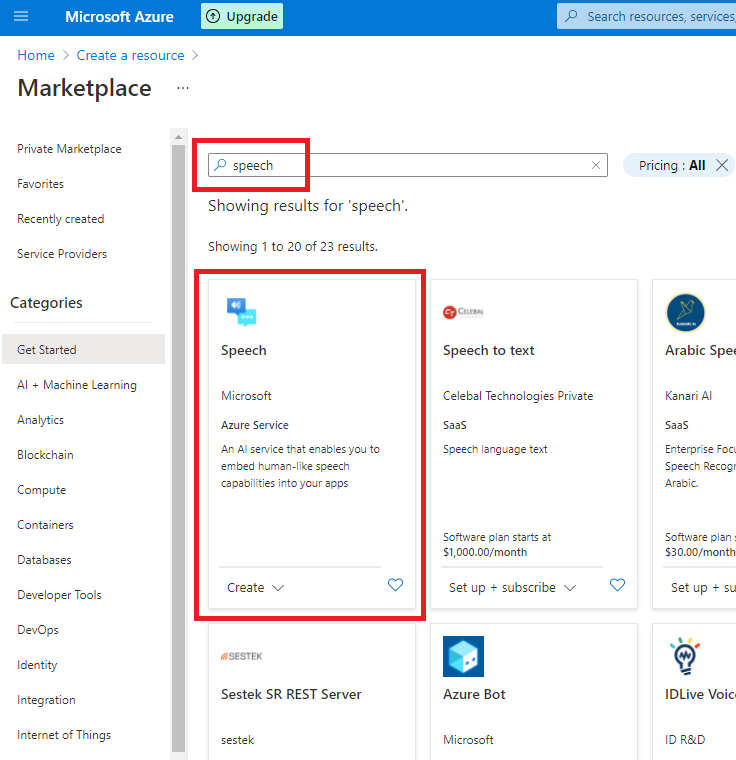
 Next, search for keyword: **speech** and select the first Speech service from Azure.
 Afterwards, click **Create** button.
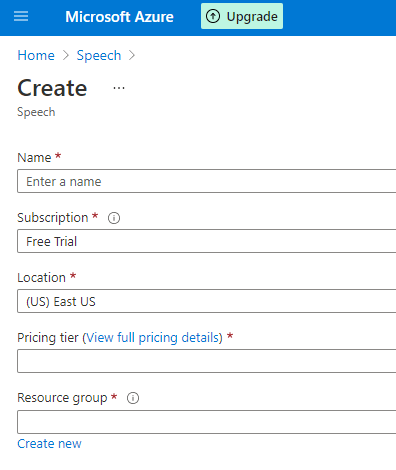
 Next, fill in the required information:
* **Name**: Any string to identify this resource
* **Subscription**: Free Trial (default) (You can change it if you want to)
* **Location**: select Azure region as you prefer. Warning! Not every language/voice is available in all Azure regions, we strongly recommend to consider either US East or West Europe regions.
* **Pricing Tier**: Free F0 is good for starting only, it has limitation in concurrency, refer to Azure Documentations to get exact numbers. Standard S0 will start billing.
* **Resrouce Group**: Any string to group your resources.
Next, fill in the required information:
* **Name**: Any string to identify this resource
* **Subscription**: Free Trial (default) (You can change it if you want to)
* **Location**: select Azure region as you prefer. Warning! Not every language/voice is available in all Azure regions, we strongly recommend to consider either US East or West Europe regions.
* **Pricing Tier**: Free F0 is good for starting only, it has limitation in concurrency, refer to Azure Documentations to get exact numbers. Standard S0 will start billing.
* **Resrouce Group**: Any string to group your resources.
 You are almost there, on this the next page click on Click here to manage keys.
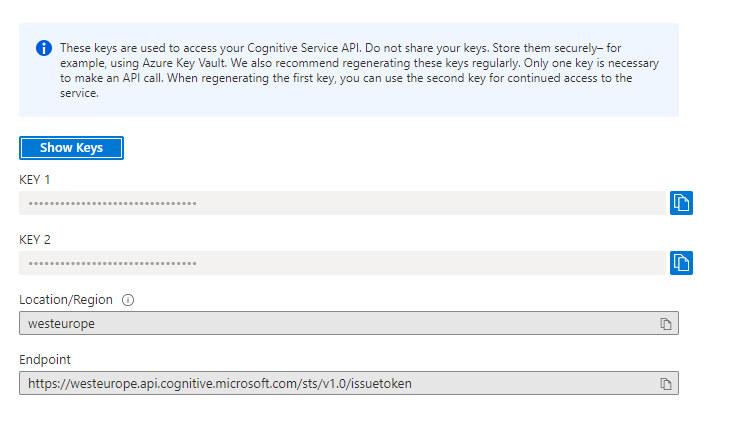
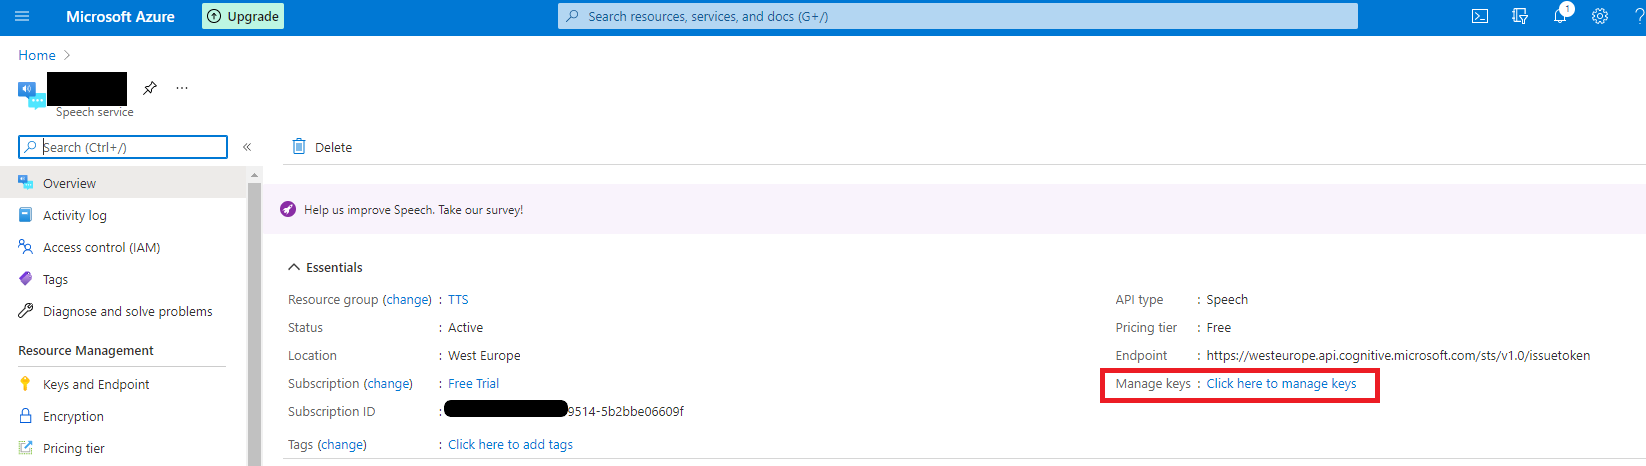 Copy one of the **Keys** as you prefer, also take a not of the **Region** name.
Always keep your API keys in a secure place
Copy one of the **Keys** as you prefer, also take a not of the **Region** name.
Always keep your API keys in a secure place
 Now go back to Davinci AI, login as Admin, and under **Admin Panel**, navigate to **AI Settings** -> **AI API Keys** tab.
Click on **Azure** tab there.
Now go back to Davinci AI, login as Admin, and under **Admin Panel**, navigate to **AI Settings** -> **AI API Keys** tab.
Click on **Azure** tab there.
 Include your **Azure Key** and select your **Azure Region**, make sure to turn on **Activate Azure Voices** checkbox.
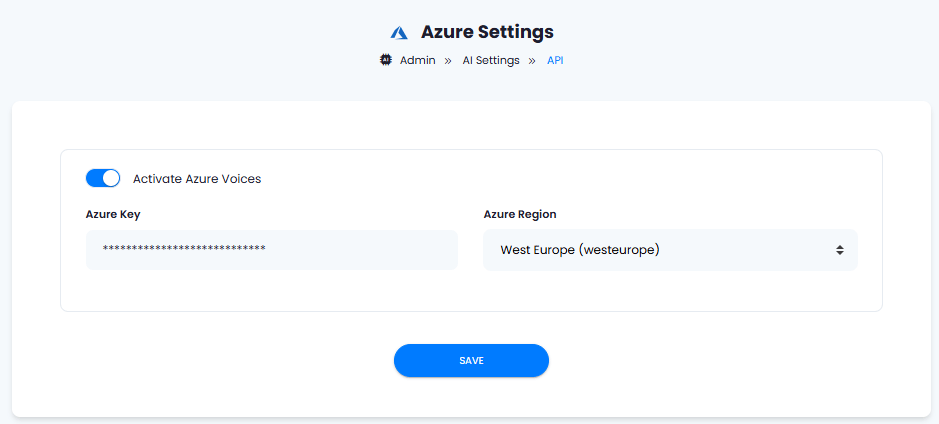 After you are done with configurations, click on **Save** button.
Congratulations! You have successfully completed the Azure setup process for **AI Voiceover** feature.
## Use Azure with AI Voiceover
You need to list which vendors you want to be available in the AI Voicever feature. For detailed instructions on AI Voiceover configuration please refer to the [AI Voiceover](/core/voiceover) tab.
After you are done with configurations, click on **Save** button.
Congratulations! You have successfully completed the Azure setup process for **AI Voiceover** feature.
## Use Azure with AI Voiceover
You need to list which vendors you want to be available in the AI Voicever feature. For detailed instructions on AI Voiceover configuration please refer to the [AI Voiceover](/core/voiceover) tab.