> ## Documentation Index
> Fetch the complete documentation index at: https://magicads.mintlify.site/llms.txt
> Use this file to discover all available pages before exploring further.
# Google Text to Speech Integration
> Enhance your Davinci AI platform with advanced text-to-speech capabilities of Google Cloud Platform. This guide walks you through setting up and leveraging powerful voice generation feature of GCP.
## Introduction
Davinci AI’s Google integration unlocks a world of AI-powered voice capabilities for your platform with hundreds of supported languages and dialects and several hundreds of Neural and Standard voices in various combinations.
## Connect GCP Account
To be able to use your GCP API for **AI Voiceover** feature, follow these steps to setup integration.
Go to the [Google Cloud Platform](https://cloud.google.com/) page, and get yourself registered in case if you don't have an account already.
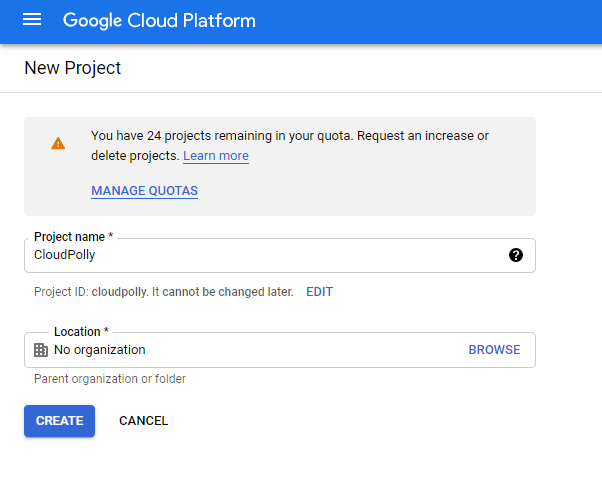
Once you are logged into your GCP account, click on the **New Project** button on the top left corner, and provide **project name** as you prefer.
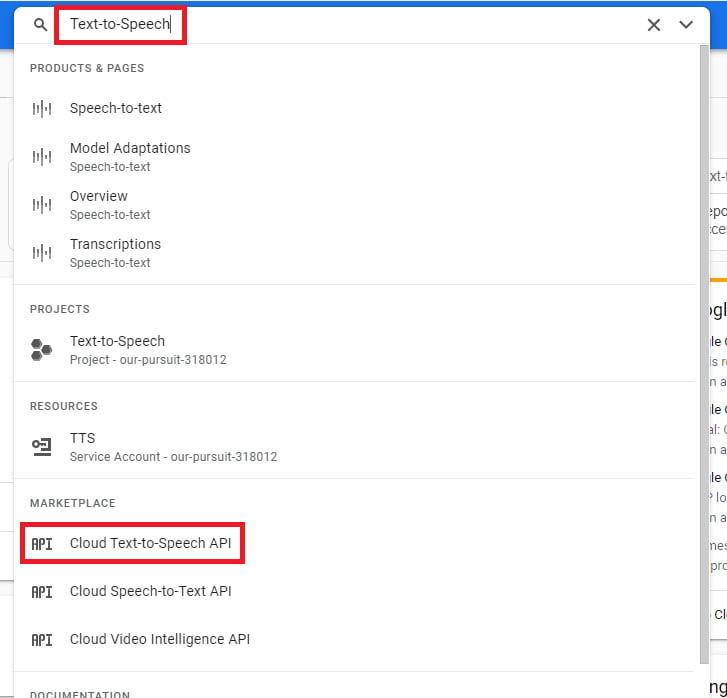
 Afterwards search for **Text to Speech** keyword, and select **Cloud Text to Speech API** from the list.
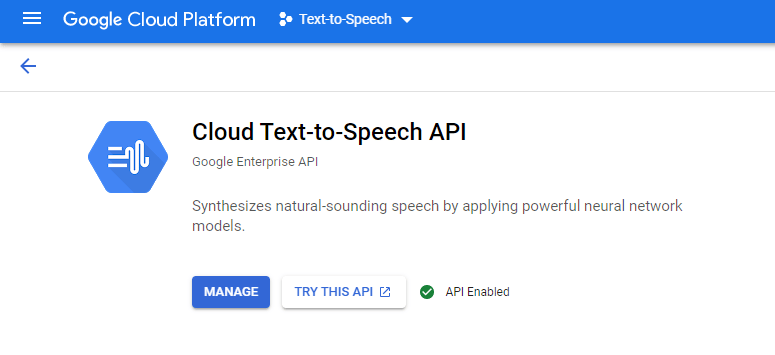
 Next, enable **Cloud Text to Speech API**.
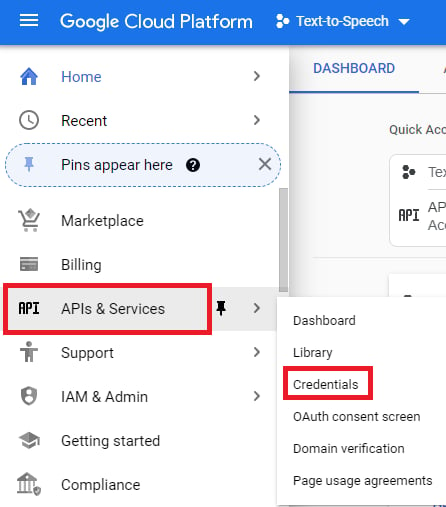
 Afterwards, on the left menu panel, go to **API & Services** -> **Credentials**.
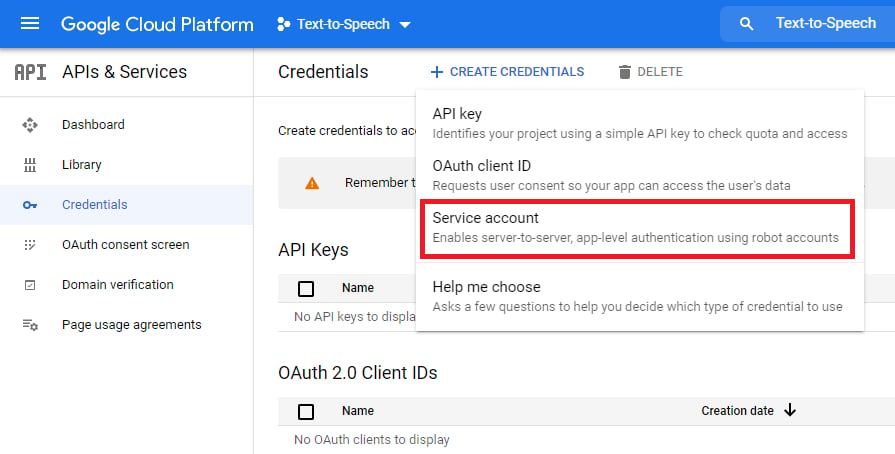
 Once you are on the **Credentials** page, click on **+ Create Credentials** and select **Service account** from the list.
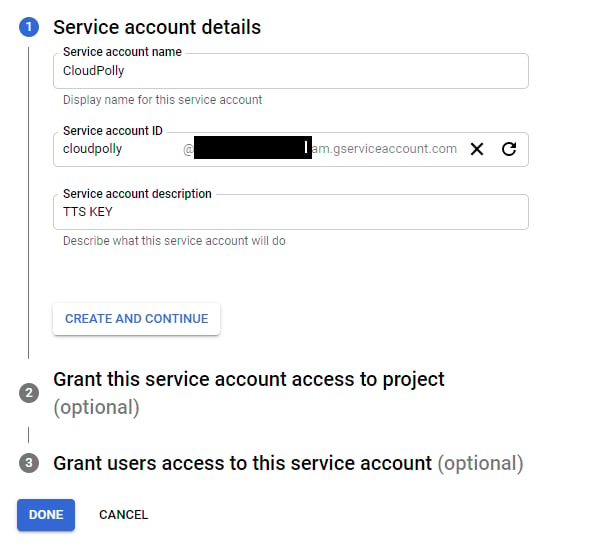
 Provide **Service account name** and **Service account description**.
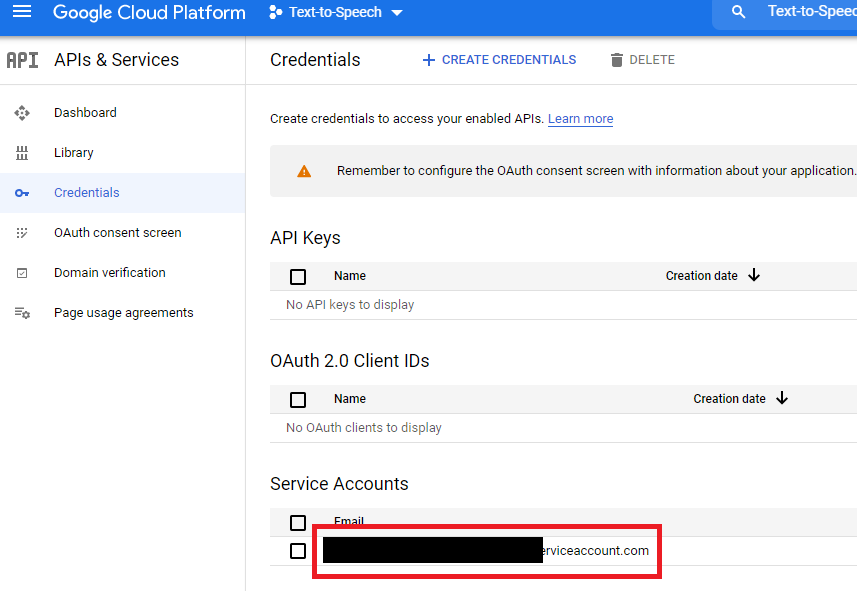
 Next, click on your newly created Service account name.
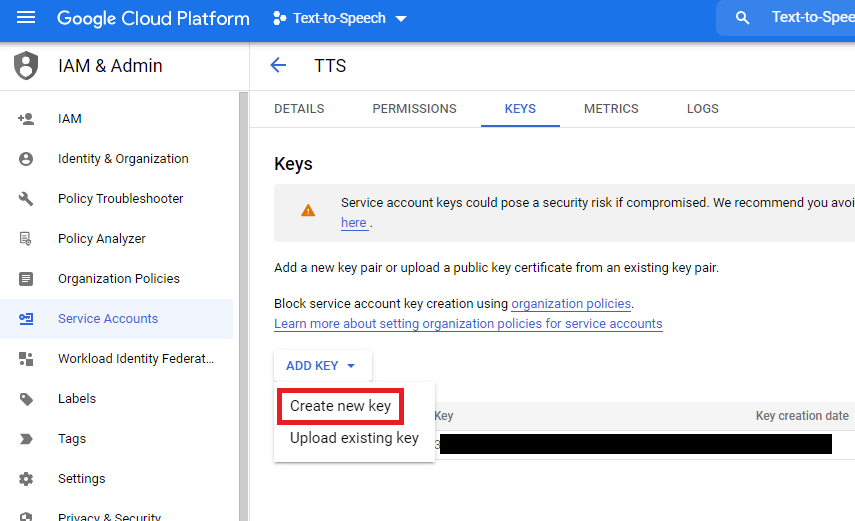
 Under **Keys** tab, select **Add Key** -> **Create new key**.
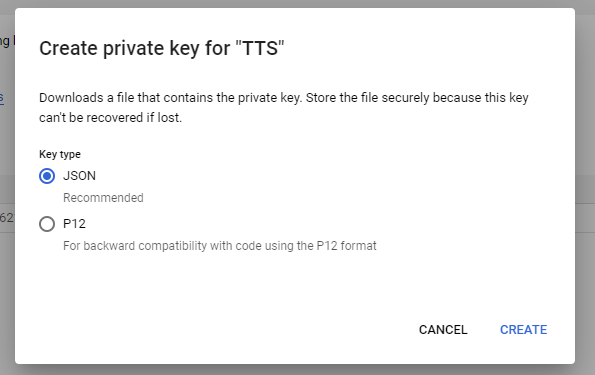
 Select **JSON** as key type. Click **Create** button, it will store in on your desktop.
Make sure you store this json file outside of your /public folder in Davinci AI, it must be stored in a secure place accessible only to you on your hosting server.
Select **JSON** as key type. Click **Create** button, it will store in on your desktop.
Make sure you store this json file outside of your /public folder in Davinci AI, it must be stored in a secure place accessible only to you on your hosting server.
 Now go back to Davinci AI, login as Admin, and under **Admin Panel**, navigate to **AI Settings** -> **AI API Keys** tab.
Click on **Google** tab there.
Now go back to Davinci AI, login as Admin, and under **Admin Panel**, navigate to **AI Settings** -> **AI API Keys** tab.
Click on **Google** tab there.
 Under **GCP configuration File Path** Include the **absolute path** for the json based on your hosting structure. JSON file must be stored outside of your /public folder in your domain. Show full path for the JSON file including JSON filename. Here is an example for cPanel:
```php theme={null}
/home/MY_USERNAME/MY_DOMAIN_PATH/json_file_name.json
```
Under **GCP configuration File Path** Include the **absolute path** for the json based on your hosting structure. JSON file must be stored outside of your /public folder in your domain. Show full path for the JSON file including JSON filename. Here is an example for cPanel:
```php theme={null}
/home/MY_USERNAME/MY_DOMAIN_PATH/json_file_name.json
```
Also make sure that you have turned on the **Activate GCP Voices** checkbox.
You don't have to use `GCP Storage Bucket Name` for AI Voiceover feature of for anything else, it is purely optional, but if you still want to use it as cloud storage option, refer to the Cloud Storage section for GCP Bucket instructions.
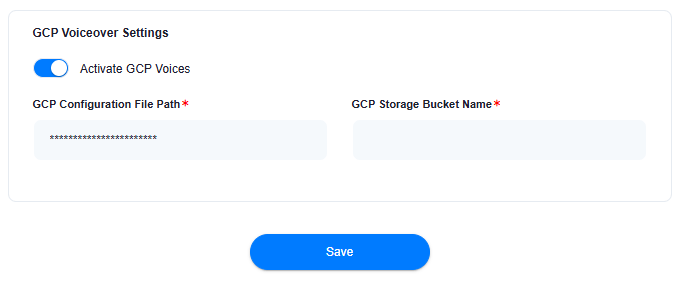 After you are done with configurations, click on **Save** button.
Congratulations! You have successfully completed the GCP setup process for **AI Voiceover** feature.
## Use GCP with AI Voiceover
You need to list which vendors you want to be available in the AI Voicever feature. For detailed instructions on AI Voiceover configuration please refer to the [AI Voiceover](/core/voiceover) tab.
After you are done with configurations, click on **Save** button.
Congratulations! You have successfully completed the GCP setup process for **AI Voiceover** feature.
## Use GCP with AI Voiceover
You need to list which vendors you want to be available in the AI Voicever feature. For detailed instructions on AI Voiceover configuration please refer to the [AI Voiceover](/core/voiceover) tab.