> ## Documentation Index
> Fetch the complete documentation index at: https://magicads.mintlify.site/llms.txt
> Use this file to discover all available pages before exploring further.
# Stripe
> Learn how to seamlessly integrate Stripe payments into your Davinci AI platform, enabling secure and convenient transactions for your users.
Stripe payment gateway is part of SaaS feature, hence requires to have Extended License
Stripe supports both `Prepaid` and `Subscription` plans in Davinci AI
## Introduction
Integrating Stripe with Davinci AI allows you to offer a widely recognized and trusted payment solution for your users. This guide will walk you through the process of setting up Stripe payments, from creating your Stripe account to configuring webhooks.
## Step 1: Set Up Your Stripe Account
If you haven’t already, sign up for a Stripe account:
* Visit the [Stripe](https://stripe.com/) website and click on **Sign Up** button
* Follow the prompts to create and verify your business account
* Complete any additional verification steps required by Stripe
## Step 2: Obtain Stripe API Credentials
To connect Davinci AI with PayPal, you’ll need to retrieve your API credentials:
Log in to your [Stripe Dashboard](https://dashboard.stripe.com/)
Once you are logged in, on the left menu panel click on **Developers** tab, next select **API keys** tab there. Copy your **Publishable Key** and **Secret Key**.
Keep your Secret Key confidential! Never share it publicly.
Make sure you are not in your sandbox environment, Stripe provides different API keys for Live vs Sandbox environments. Live API keys always start with `pl_live_` and `sk_live_`, sanbox keys start with `pk_test_` and `sk_test_`.
Next, click on the **Webhooks** tab, if you don't have new Stripe Workbench turned on yet, simply turn it on, you can select default settings there.
After you have enabled workbench, you are ready to proceed. Click on **Add Destination** button.
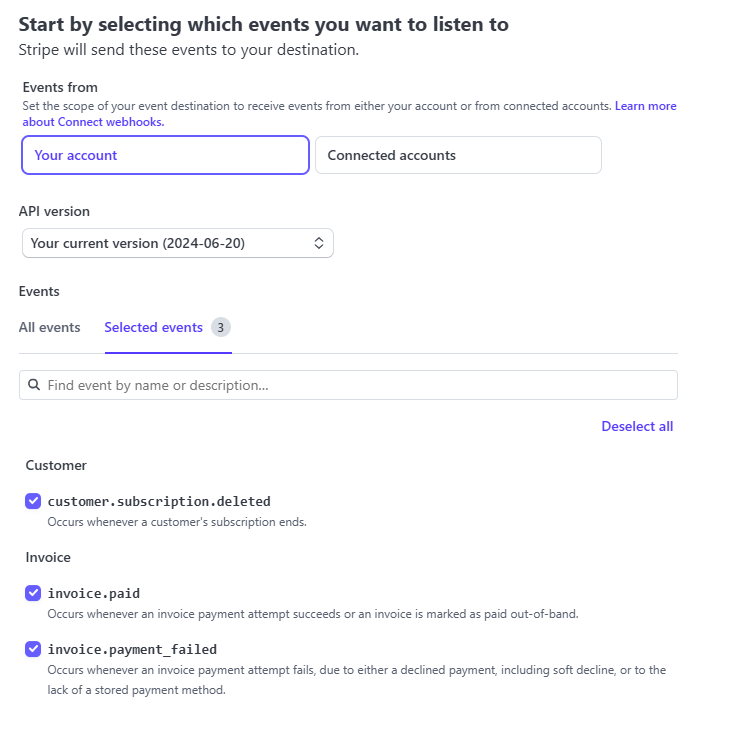
Next, make sure to have API version set **2024-06-20** and selected listed events below:
* invoice.paid
* invoice.payment\_failed
* customer.subscription\_deleted
After you are done with settings, click on **Continue** button.
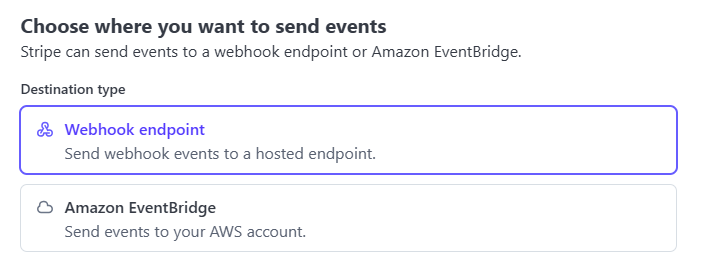
 On the next step for webhook setup, select **Webhook endpoint** as a destination type. Click **Continue** button afterwards.
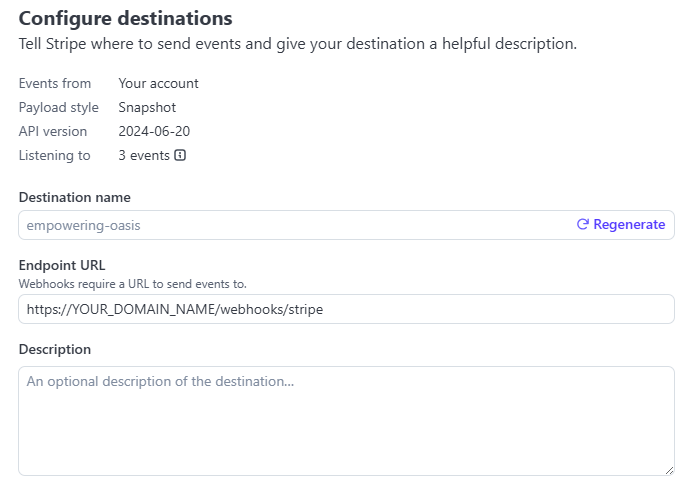
 Next, fill in your **Endpoint URL**, the URL will be following **https\://YOUR\_DOMAIN\_NAME/webhooks/stripe**. Afterwards click on **Create Destination** button.
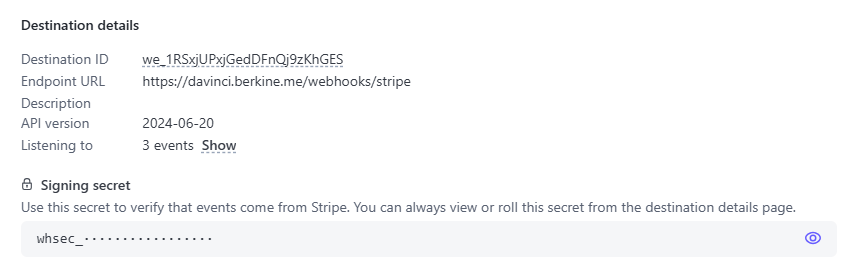
 At the final step you will be shown **Destination details** information, copy your **Webhook Signing secret** key.
 Now, go back to the **Admin Panel** -> **Finance Management** -> **Finance Settings** page and select **Stripe** from the list.
Include your API keys that you copied earlier into **Stripe Key** - (Publishable key), **Stripe Secret Key** - (Secret Key), **Stripe Webhook Secret**.
Now, go back to the **Admin Panel** -> **Finance Management** -> **Finance Settings** page and select **Stripe** from the list.
Include your API keys that you copied earlier into **Stripe Key** - (Publishable key), **Stripe Secret Key** - (Secret Key), **Stripe Webhook Secret**.
Make sure that your **Stipe Webhook URI** matched to what you have included in your stripe account.
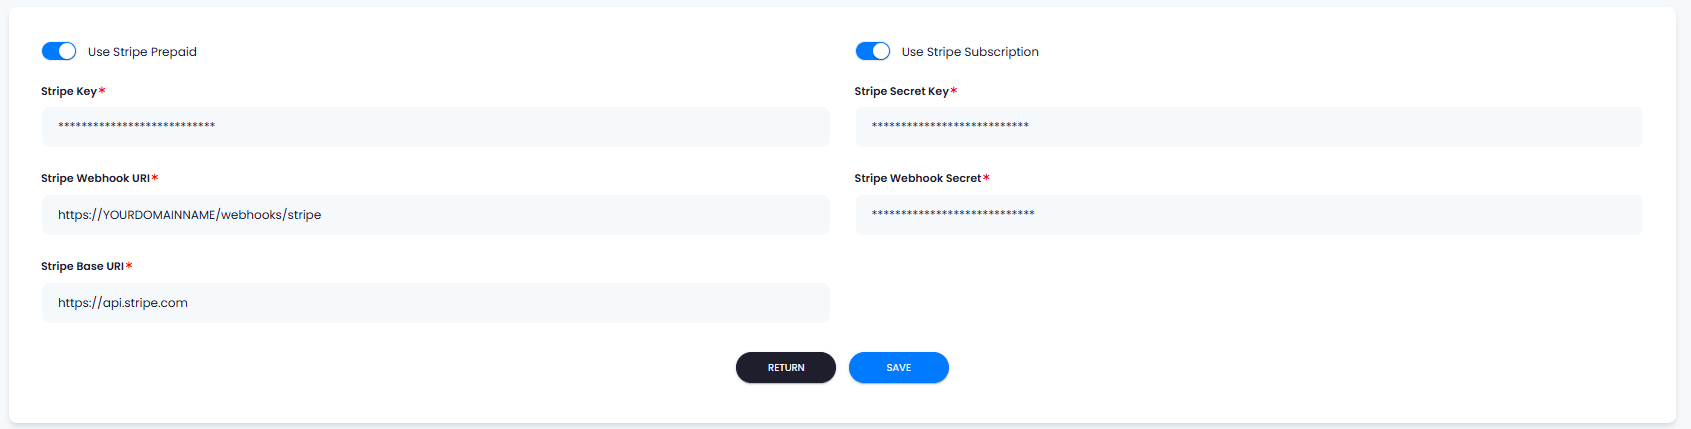 Depending on for which type of payment plans you want your users to be able to use Stripe, turn on **Use Stripe Prepaid** and **Use Stripe Subscription** checkboxes.
Once you are done with settings, click on **Save** button.
Please note that at this point all `Subscription plans` require you to create separate `product ids` for each created subscription plan. Refer to additional section below on that.
Congratulations! You have successfully completed setting up Stripe API keys for Davinci AI.
## Step 3: Setting up Subscription Plan
At the moment, subscription plans require you to include **Stripe Product ID** during plan creation, soon it will be removed.
To create proper product id for your subscription plan, follow the steps below.
Please note that `Prepaid Plans` do not require any addtional configuration.
Log in to your [Stripe Dashboard](https://dashboard.stripe.com/)
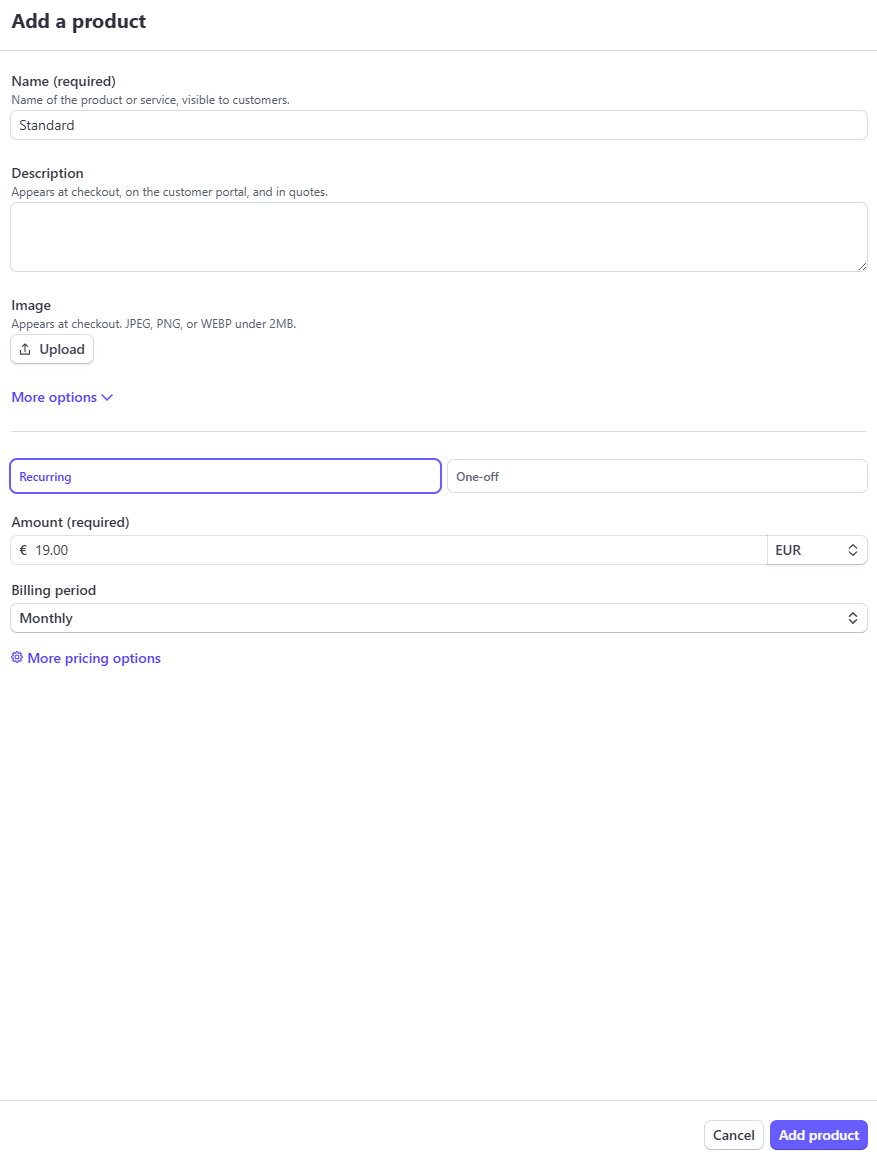
Once you are logged in, on the left menu click on **Product Catalog** tab and click on **Create Product** button.
Provide product **Name** and since it is a subscription plan, select **Recurring** and set target **Amount** that matches the one you want to put in your subscription plan, then select the **Billing period** to be matching with your subscription plan, like **Monthly** or **Yearly**.
After you are done with configuration, click on **Add product** button.
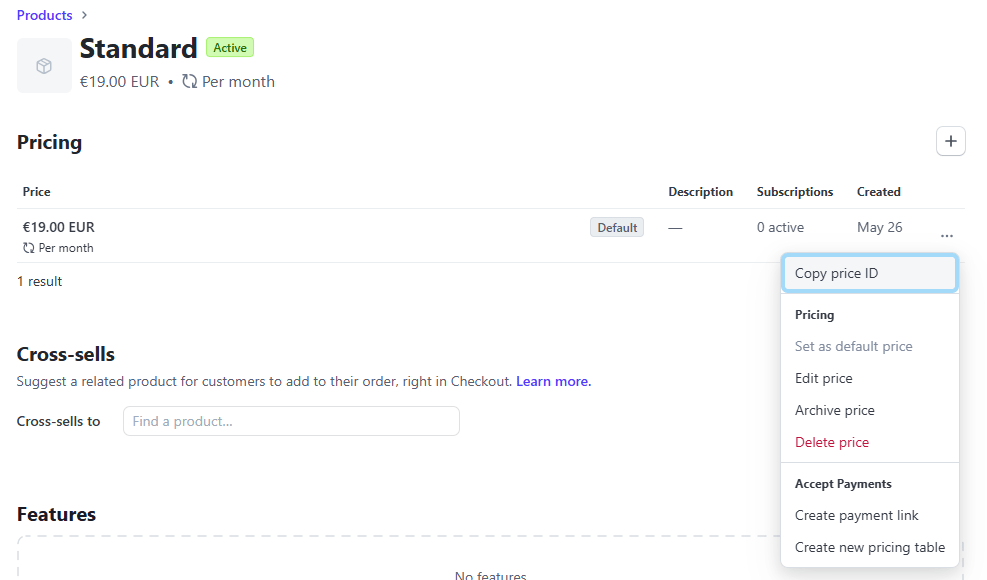
 After you have successfully created a product, it will be visible in the main **Product catalog** list. Find your newly created product in the list and click on it.
 Once you are on the product details page, under the **Pricing** section, click on the `...` and select **Copy Price ID**, now you have copied your price id.
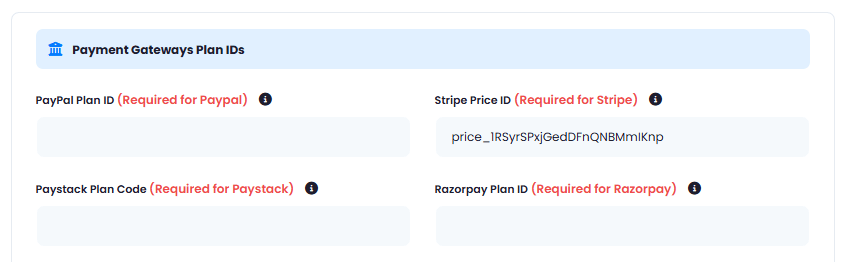
 Now go back to your subscription plan that you were creating or edit the existing one, and under **Payment Gateways Plan IDs**, include your stripe price id for **Stripe Price ID** input field. Configure rest of the subscription plan settings and click on **Save** button.
 Congratulations! You have successfully completed setting up Subscription plan that can be processed with Stripe Gateway.