> ## Documentation Index
> Fetch the complete documentation index at: https://magicads.mintlify.site/llms.txt
> Use this file to discover all available pages before exploring further.
# Prepaid Plans
> Create Prepaid Plans that allow your users to top up their credit balances whenever they need easily to leverage features of MagicAds
Prepaid plans are part of SaaS feature, hence requires you to first have access to SaaS Business extension.
## Prepaid Plan creation
To create prepaid plans follow the steps below, it explains each steps and fields to create your own prepaid plan as need for your end users.
Number of credits included in the prepaid plan and it's cost is fully up to you, below is just an example
After you have installed and activated **SaaS Business** extension, go to **Finance** section in the sidebar and click on **Pricing Plans** tab in the list.
Once you are on the **Prepaid Plans** page, click on the **Create New Prepaid Plan** button on the top right corner.
Next, you will see 2 sections: **General Settings** and **Included Credits**, below is the explanation of each fields, configure as needed.
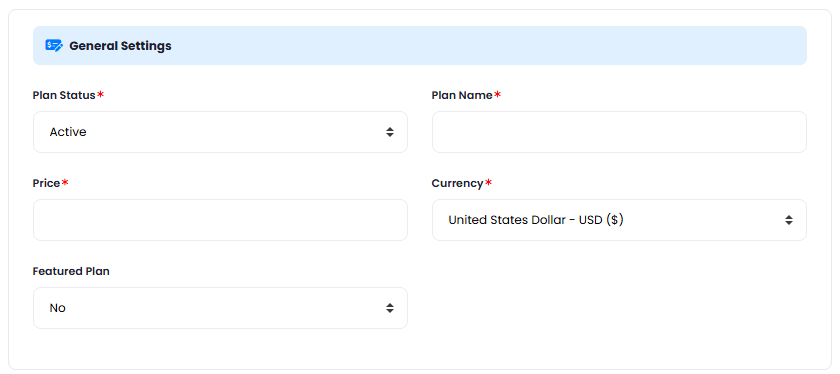
In the **General Settings** panel, you can configure following fields:
* **Plan Status** - you can either have your plan `Active` (will be visible for everyone) or `Closed` (not visible to anyone)
* **Plan Name** - provide a plan name that all the users will see
* **Price** - set the preferred price, you can set it based on allocated credits
* **Currency** - set your desired currency
* **Featured Plan** - you can set if you want this plant to be feature or not in the list, it will have highlighted colors vs other prepaid plans in the list
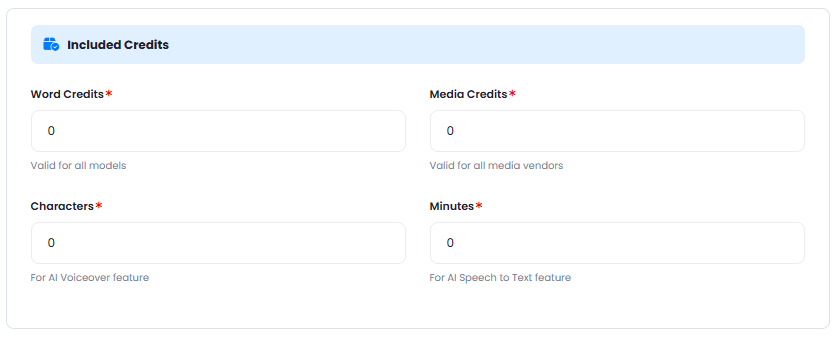
 In the **Included Credits** panel, you can configure following fields, this are the credits that user actually buys from you:
* **Word Credits** - these are essentially `tokens` that are valid for all **Text Generation** tasks, hence applicable to all AI features that generate text in Magic Ads
* **Media Credits** - these are credits applicable for `image`, `video`, `sound` generation tasks, cost for each of the image/video/sound vendors you can control directly on the configuration pages of those vendors at this point.
* **Characters** - these are credits for all **Text to Speech** generation tasks regardless of the TTS vendor.
* **Minutes** - these are credits for all **Speech to Text** generation tasks regardless of the STT vendor.
Note that you can fill in any combination of the credit types. You are not required to fill each and every field with credit values, you put `0` to all and just fill in `Word Credits` field for example, that way you will be selling only word credits to your users in this particular Preapaid Plan.
In the **Included Credits** panel, you can configure following fields, this are the credits that user actually buys from you:
* **Word Credits** - these are essentially `tokens` that are valid for all **Text Generation** tasks, hence applicable to all AI features that generate text in Magic Ads
* **Media Credits** - these are credits applicable for `image`, `video`, `sound` generation tasks, cost for each of the image/video/sound vendors you can control directly on the configuration pages of those vendors at this point.
* **Characters** - these are credits for all **Text to Speech** generation tasks regardless of the TTS vendor.
* **Minutes** - these are credits for all **Speech to Text** generation tasks regardless of the STT vendor.
Note that you can fill in any combination of the credit types. You are not required to fill each and every field with credit values, you put `0` to all and just fill in `Word Credits` field for example, that way you will be selling only word credits to your users in this particular Preapaid Plan.
 After you are done with filling in needed fields, click on the **Save** button.
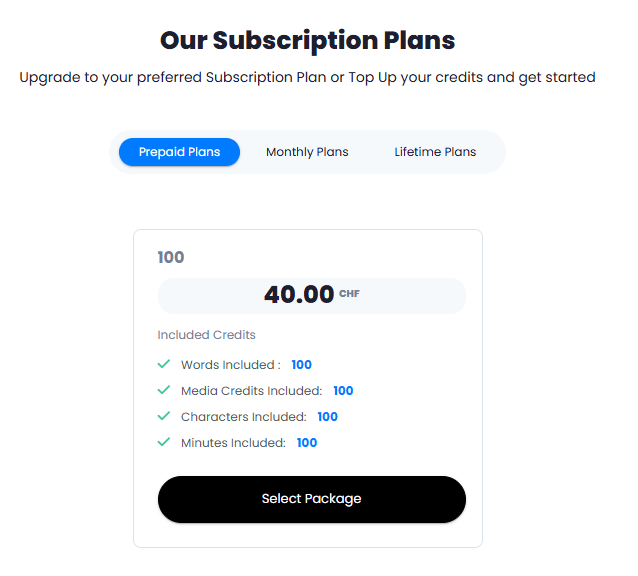
User will be able to see your newly created prepaid plan under **Subscription Plans** in the **User Panel**
After you are done with filling in needed fields, click on the **Save** button.
User will be able to see your newly created prepaid plan under **Subscription Plans** in the **User Panel**
 Congratulations! You now have completed creating your first Prepaid Plan.